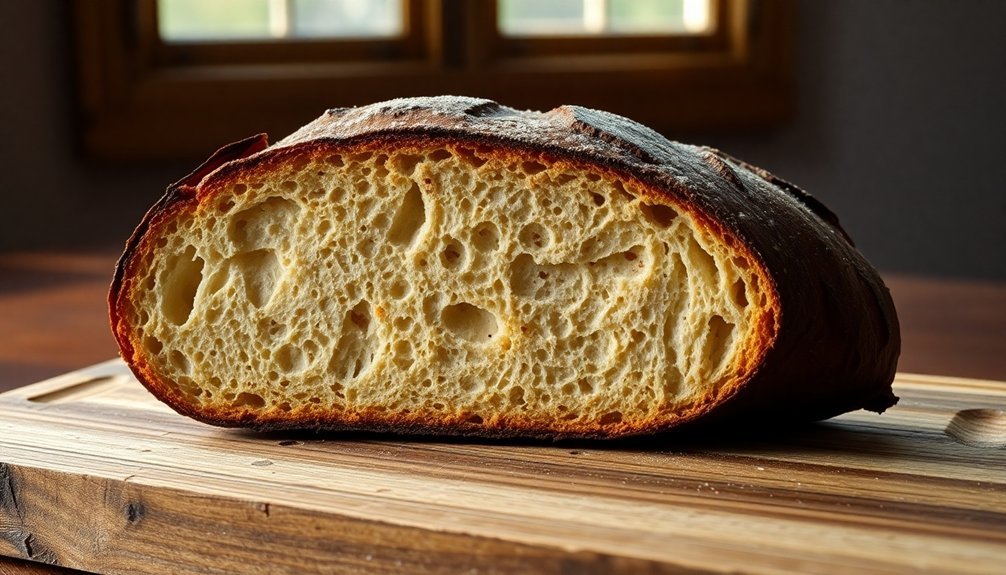
Solar-baked bread gets extra crispy because the concentrated sunlight and trapped moisture create perfect conditions for crust development. You'll find that solar ovens maintain steady temperatures between 300-350°F while effectively trapping steam, which helps form a gas-tight membrane on the bread's surface. This unique environment accelerates the Maillard reaction – the process that creates those beautiful brown crusts – while the consistent heat guarantees even caramelization. When you combine this with proper steam venting techniques and reflective surfaces that intensify heat distribution, you'll get that satisfying crunch every time. There's actually much more to the science of solar-baked perfection than meets the eye.
The Science Behind Solar Heat

You're not just getting any ordinary heat source – you're accessing a reliable, renewable energy system that's powerful enough to bake various types of bread, from milk loaf to French bread.
The precision of the heat distribution guarantees that each loaf receives the ideal temperature for perfect baking, leading to consistently high-quality results.
The innovative convection oven reaches 300 degrees Celsius, ensuring professional-grade baking capabilities for industrial applications.
Direct Sunlight and Crust Formation
When you're baking bread using solar power, concentrated sunlight acts much like a traditional oven, delivering intense heat that accelerates yeast activity and promotes rapid CO2 release for peak oven spring.
You'll notice the direct sunlight creates conditions perfect for the Maillard reaction, where surface proteins and sugars transform into complex flavor compounds.
The dry, high-heat environment from concentrated sunlight helps develop a well-caramelized, crispy crust while maintaining the ideal moisture balance for proper texture development. Without adequate steam venting during the final baking phase, the crust may become too soft and lack the desired crispiness.
Concentrated Heat Effects
During bread baking, direct sunlight or concentrated heat triggers a crucial chemical reaction that transforms CO₂ from its dissolved state into gas bubbles.
When you're using solar heat to bake bread, you'll notice that the surface temperature must reach 100°C before any crust can form. Until all the surface moisture evaporates, the temperature won't rise above this point, as the heat energy is being used to convert water into steam. This typically occurs at temperatures between 30 to 50°C, when CO₂ gas expansion is most active in the dough.
Once the surface moisture has completely evaporated, you'll see the crust begin to develop. The concentrated heat from the sun creates a hardened exterior that acts as an insulator, trapping moisture inside while limiting further dough expansion. This process makes solar-baked bread particularly crispy due to the intense, direct heat.
- Solar heat rapidly decreases CO₂ solubility, leading to more gas bubble formation
- Surface moisture must completely evaporate before crust formation can begin
- The temperature remains stable at 100°C until all surface water has evaporated
- The hardened crust concentrates more heat in itself, becoming thicker as baking continues
The direct sunlight creates a unique baking environment where heat concentration leads to excellent crust development and exceptional crispiness.
Sunlight Surface Caramelization
Sunlight's intense rays trigger two distinct chemical reactions that create the ideal golden-brown crust on solar-baked bread. When direct sunlight hits your dough's surface, it accelerates the Maillard reaction, where amino acids combine with reducing sugars to produce that characteristic browning.
Simultaneously, the heat breaks down sugar molecules through caramelization, adding complex flavors and deeper color to your crust.
You'll notice that proper steam management is essential during this process. Steam helps maintain surface moisture, preventing your crust from drying out too quickly and giving enzymes time to release sugars for optimal caramelization.
Without adequate steam, you'll end up with a dull, lifeless crust, but too much steam can prevent those desirable blisters from forming.
Watch out for temperature control, though. While sunlight's heat enhances these reactions, it can also speed up yeast activity and lead to overproofing.
If your dough overproofs, it'll deplete the sugars needed for both the Maillard reaction and caramelization, resulting in a pale, underwhelming crust. You can prevent this by reducing yeast amounts or controlling your dough's environment.
Perfect Solar Oven Setup
Before diving into solar baking, you'll need to construct your solar oven with precision and care. Start by creating a durable box structure using cardboard or wood, then line it thoroughly with aluminum foil to maximize heat reflection.
You'll want to insulate the walls with newspaper or sawdust to maintain consistent temperatures, and add a black surface at the bottom for ideal heat absorption.
For the most effective setup, position your solar oven where it'll receive direct sunlight, and guarantee the reflector flap is properly angled to direct sunlight into the box. You'll need to maintain an internal temperature of at least 178°F (70°C), so preheat for 30 minutes before baking.
Key elements for your solar oven's success:
- Install a cooking rack at least two inches above the reflective surface
- Cover the lid opening with plastic wrap to trap heat and moisture
- Position the reflector toward the sun's movement throughout baking
- Monitor and adjust the oven's position to maintain consistent heat
Remember to test your setup thoroughly before attempting to bake bread, making sure all components are secure and functioning properly.
Dough Preparation Secrets
With your solar oven set up properly, let's focus on preparing the perfect dough for solar baking. You'll need to develop gluten extensively through kneading, aiming for 600-800 turns for basic crusts or up to 2000 turns for ultra-thin results. The solar baking process particularly benefits from well-developed gluten, which creates that sought-after transparent film when stretched.
| Technique | Purpose |
|---|---|
| Extensive Kneading | Develops gluten structure |
| Surface Tension | Creates even rising pattern |
| Minimal Enrichments | Guarantees maximum crispiness |
When shaping your dough, focus on creating a smooth, even surface with proper tension. This step's vital because solar baking transforms that smooth top into an exceptionally crispy crust. You'll want to stick to simple ingredients – flour, water, yeast, and salt – avoiding enrichments like eggs or butter that could compromise the crust's crispiness.
For the best results, consider mixing strong bread flour with all-purpose flour to achieve an ideal crust thickness. While you might be tempted to dust with flour, remember this can lead to a tougher crust – instead, rely on proper shaping and tension for that perfect solar-baked finish.
Temperature Control Methods

Mastering temperature control in your solar oven requires understanding several critical ranges and adjustments. For bread baking, you'll want to maintain temperatures between 300°F and 400°F, which box-type solar ovens can achieve effectively.
You'll need to position your oven during peak sunlight hours (11:00 am to 3:00 pm) and adjust it every 30 minutes to track the sun's movement.
To maintain consistent temperatures for your bread, focus on these essential controls:
- Use dark-colored baking pans lined with black construction paper to maximize heat absorption
- Create airtight seals and insulate with crumpled newspapers or polystyrene to prevent heat loss
- Monitor internal temperature with a thermometer, keeping it above 180°F for food safety
- Adjust reflective surfaces made from aluminum foil to direct maximum sunlight into the oven
You'll need to compensate for environmental factors by extending baking times on cloudy days or adjusting the oven's angle.
Keep the oven in a wind-protected area and avoid opening it frequently, as this causes significant heat loss. Remember to make seasonal adjustments as daylight hours and sun intensity change throughout the year.
Steam Generation in Solar Ovens
You'll see natural steam patterns develop in your solar oven as heated water molecules rise and circulate through the baking chamber, creating a self-sustaining moisture cycle.
The trapped moisture in the enclosed space helps develop a crispy crust while maintaining softness inside your bread loaf.
Your oven's lid design plays an essential role in managing humidity levels, allowing just enough moisture to escape while retaining the steam needed for proper bread development.
Natural Steam Circulation Patterns
Throughout a solar oven, steam follows predictable circulation patterns that enhance the baking process. You'll find that as sunlight enters through the glazing and heats the black surfaces, moisture begins to evaporate, creating steam that rises naturally to the top of the cooking chamber.
This steam circulation mimics professional bread ovens, where consistent steam movement helps create that perfect crust you're looking for.
When you're baking bread in your solar oven, the steam's natural circulation patterns work to your advantage in several ways:
- Hot steam rises to the top of the chamber, then cools slightly and descends along the sides, creating a continuous convection loop
- Steam molecules collect on the glazing's inner surface before falling back onto your bread, maintaining constant moisture
- The circular steam pattern helps distribute heat evenly throughout the chamber, preventing cold spots
- Natural convection currents carry steam between your bread's surface and the oven walls, ensuring consistent crust development
You'll get the best results by positioning your bread in the center of the oven, where steam circulation is most uniform and effective.
Trapped Moisture Enhances Crust
Steam billowing inside your solar oven plays an essential role in developing the perfect bread crust. When you're using a solar oven, you'll find that its insulation system effectively traps both thermal energy and moisture, creating an excellent environment for crust formation. This trapped moisture prevents your bread from drying out too quickly, which would otherwise result in a subpar crust.
You'll notice that black liners or paper inside your solar oven serve a dual purpose. They don't just absorb heat – they help distribute it evenly while maintaining essential moisture levels throughout the baking process.
The reflective surfaces in your oven redirect solar energy efficiently, intensifying the heat while keeping the moisture sealed inside. This creates a professional baking environment right in your solar setup.
If you're using an advanced solar oven, you'll benefit from its closed-loop system. This clever design recirculates condensate, ensuring ideal moisture levels stay consistent throughout the entire baking process.
The combination of trapped moisture and steady heat creates the perfect conditions for developing that sought-after crispy crust while keeping the inside of your bread perfectly moist.
Lid Design For Humidity
A well-designed lid sits at the heart of successful solar bread baking, building on the principles of moisture retention. You'll want to verify your lid fits snugly, as this traps the steam needed for that perfect crust formation.
Metal office binder clips can help achieve a tighter seal, though you shouldn't over-tighten to avoid dangerous pressure buildup.
When steam starts to cloud your view, you've got several options for managing humidity while maintaining heat:
- Loosen the latches slightly to allow controlled steam release
- Quick-vent the lid for 2-3 seconds when moisture begins to accumulate
- Wipe away condensation with a cloth when visibility becomes too compromised
- Use strategic venting techniques based on your specific bread recipe
You'll need to strike a balance between steam retention and visibility. While some moisture is essential for crust development, too much can block sunlight and reduce your oven's efficiency.
If you notice complete fogging, quickly wipe the glass clean with a paper towel. Remember to maintain this moisture balance throughout the baking process, adjusting your lid's position as needed for best results.
Ideal Baking Times

When baking bread in a solar oven, you'll need to plan for notably longer cooking times compared to conventional methods. While a traditional oven bakes bread in about 45-50 minutes at 375°F, your solar-baked bread can take up to two hours, especially on partly cloudy days.
You'll find that your solar oven typically operates at lower temperatures, usually between 300°F and 350°F. These lower temperatures, combined with variations in sunlight intensity and cloud cover, mean you'll need to monitor your bread more carefully.
It's crucial to preheat your solar oven while you're preparing your ingredients to maximize efficiency.
To achieve the best results, you'll want to position your oven for ideal sun exposure throughout the baking process. You can't rely on fixed baking times like you'd with a conventional oven – instead, you'll need to check your bread frequently using traditional testing methods like the toothpick test or tapping the loaf's bottom.
Weather conditions will greatly impact your baking time, so you'll need to adjust accordingly. Remember that different bread types require different approaches – yeast breads may take longer due to the solar oven's moisture retention characteristics.
Crust Development Process
You'll find that crust development in solar-baked bread depends heavily on the concentration of heat through parabolic reflective surfaces, which create focused temperature zones for maximum browning.
Your steam retention system needs to maintain moisture for at least 15 minutes to achieve proper caramelization and blister formation, with the ideal setup including vacuum-insulated spaces to prevent heat loss.
The surface temperature must reach and sustain sufficient levels through a 60-watt heat flux to promote proper crust formation, while avoiding rapid moisture loss that could result in a dull, lifeless exterior.
Heat Concentration Patterns
Throughout the bread-baking process, solar ovens and conventional ovens create distinctly different heat concentration patterns. While your conventional oven maintains steady temperatures between 375°F to 550°F, solar ovens typically operate at lower temperatures of 200°F to 300°F but can produce more intense, direct heat through their reflective surfaces.
This concentrated solar energy leads to unique crust formation patterns you won't find in traditional baking. The way heat concentrates in solar ovens directly affects how your bread's crust develops. You'll notice the Maillard reaction occurs differently, often resulting in a darker, crisper crust due to the intense, direct heat and drier baking conditions.
The temperature variations from sun movement create distinctive patterns in crust development.
- Solar heat concentrates more intensely on exposed surfaces, creating rapid moisture reduction
- Dark surfaces in solar ovens enhance conduction heating, contributing to crust crispiness
- Temperature fluctuations lead to unique, rustic crust patterns
- Quick starch gelatinization occurs where concentrated solar heat hits the dough
While you'll need more time for solar baking, the unique heat concentration patterns often reward you with an exceptionally crispy, characterful crust that's difficult to replicate in conventional ovens.
Steam Retention Mechanisms
Steam control plays an essential role in solar bread baking, though it differs considerably from conventional methods. When you're baking bread in a solar oven, you'll need to pay special attention to steam retention since it's vital for proper crust development and overall bread quality.
To achieve ideal results, you'll want to use a covered baker or lid that can trap moisture around your loaf, simulating the environment of a traditional masonry oven. The wet steam will condense on your dough's surface, helping to fully gelatinize the starch and create that desirable shiny crust.
You'll find that this steamy environment prevents premature crust formation and allows for even heat penetration throughout your loaf.
Don't overdo the steam, though – moderation is key. Too much moisture can result in a tough, leathery crust. You'll want to maintain just enough steam during the initial baking stages to form a gas-tight membrane on the surface, which helps trap CO2 and contributes to proper oven spring.
Once the initial steam has condensed and the crust begins to form, you can allow it to dissipate for the remainder of the baking cycle.
Surface Temperature Dynamics
Surface temperature management in solar bread baking requires careful attention to achieve the perfect crust.
You'll find that solar ovens can reach temperatures between 450-550°F, ideal for creating that crusty exterior you're looking for. The convection heat from the solar oven's upper chamber works in tandem with the conduction heat from your baking surface, creating the perfect environment for oven spring and crust development.
You'll notice your bread's crust begins to harden as the surface temperature rises, but it's essential to maintain the right balance. If your solar oven gets too hot too quickly, the crust will harden before the dough has fully expanded, limiting your oven spring.
- Higher temperatures accelerate yeast activity, producing more carbon dioxide until the crust sets
- Scoring your dough becomes critical in controlling oven spring and creating deliberate expansion patterns
- Visual cues, particularly crust color, are your best indicators of doneness
- The flat "bake out zone" near the end of baking signals ideal crust development
Essential Equipment and Tools

Successful solar bread baking relies on a core set of essential tools, with the solar oven being the most critical component.
Whether you're using a basic cardboard pizza box conversion or a sophisticated Lytefire PRO model, you'll need direct sunlight to achieve suitable baking temperatures. Your oven may include additional features like mirrors or solar concentrators to enhance its performance, and it's wise to have a backup heating method for cloudy days.
You'll need aluminum foil to maximize your oven's effectiveness, as it reflects sunlight and helps maintain internal temperature. Cover the oven's surfaces with foil to enhance heat collection and retention.
Plastic wrap serves as your oven's window, creating a clear path for sunlight while trapping valuable heat inside. When used together with aluminum foil, it guarantees even heat distribution throughout the baking process.
A reliable thermometer is crucial for monitoring your oven's internal temperature and verifying your bread bakes properly.
You'll use it to verify that suitable baking temperatures are reached and maintained, while also checking the bread's core temperature to confirm it's fully baked.
Solar Versus Traditional Baking
While both methods can produce delicious results, solar baking differs markedly from traditional oven baking in several key aspects.
You'll notice that solar baking takes longer, typically 1-2 hours compared to conventional baking times, but it's less likely to burn your bread due to more consistent heat distribution. The temperature range of 325-350°F in solar ovens creates a unique baking environment that retains moisture better than traditional ovens.
When you're comparing crust formation, you'll find that solar-baked bread develops a differently textured crust that may not achieve the same dark color as conventional oven-baked bread. However, the moisture retention helps create a wonderfully soft interior.
- Solar ovens maintain steady temperatures, reducing the risk of over-browning or burning
- The rise might be slightly different due to lower temperatures affecting yeast activity
- You'll save energy and keep your house cooler by baking outdoors
- Crust development takes longer but results in more even cooking
The eco-friendly nature of solar baking makes it an attractive option, especially if you're looking to reduce your carbon footprint or bake in off-grid locations.
Troubleshooting Common Crust Issues

During solar bread baking, crust issues can present unique challenges that differ from traditional oven baking. You'll need to pay special attention to browning and texture problems that can arise from the unique solar environment.
If you're experiencing pale crusts, check that you haven't over-fermented your dough, as this reduces available sugars for caramelization. You'll also want to guarantee you're not using excess flour during shaping, which can form a paste and prevent proper browning. Adding diastatic malt can help if your flour lacks sufficient enzymes for browning.
To achieve proper crust texture, you'll need to maintain consistent temperature in your solar oven. If your crust is flimsy, you might need to adjust your setup to retain more steam. Consider using a covered pot to create a microenvironment that traps moisture.
Watch your proofing time carefully – overproofed dough will result in weak structure and poor crust formation. When scoring your dough, make deliberate cuts to control where the crust expands. If you're getting random bursts, your dough is likely underproofed.
Monitor your internal bread temperature, aiming for above 205°F to guarantee proper crust development.
Frequently Asked Questions
Can Solar-Baked Bread Be Stored Longer Than Conventionally Baked Bread?
You won't find a significant difference in storage time between solar and conventional bread. They'll both last about the same length when you store them properly in cool, dry conditions or freeze them.
Does Altitude Affect the Crispiness of Solar-Baked Bread Crust?
Yes, altitude will affect your solar-baked bread's crust crispiness. You'll notice increased crispiness at higher elevations due to lower air pressure and faster moisture evaporation, requiring careful monitoring of your baking time.
What Seasonal Variations Exist in Solar Bread Baking Results?
You'll get best bread results in summer with direct sunlight, faster baking, and crispier crusts. In winter, you'll need longer baking times and may see less browning due to reduced solar intensity.
Are Certain Bread Types More Suitable for Solar Baking?
You'll find whole wheat and multigrain breads work best for solar baking, as they retain moisture well and develop excellent crusts. Dense, hearty doughs hold up better than delicate ones in variable solar temperatures.
How Does Air Pollution Impact Solar Bread Baking Effectiveness?
When you're baking bread in a solar oven, air pollution can considerably reduce your success rate. You'll experience longer baking times, uneven browning, and poor rising as pollutants block the sunlight needed for proper baking.
In Summary
You'll find that solar-baked bread achieves its signature crispiness through concentrated direct sunlight and consistent heat distribution. By maintaining optimal temperature control and proper dough preparation, you're creating ideal conditions for perfect crust formation. Whether you're a novice or experienced baker, understanding these solar baking principles will help you achieve that extra-crispy crust that's often difficult to replicate in conventional ovens.


Leave a Reply