You'll get the best results polishing parabolic reflectors using three proven methods. First, start with traditional grinding using 80-100 grit tools in center-over-center strokes, then progress to finer grits up to 320. Second, apply polishing compound with a faceted pitch lap, working in consistent hour-long sessions while maintaining clean conditions. Third, finish with electroformed surface refinement or bright rhodium coating for superior reflectance. For ideal results, maintain a detailed progress log and regularly inspect your work with a magnifying tool. These foundational techniques open the door to advanced polishing strategies.
Traditional Grinding and Polishing

Transforming a raw piece of glass into a precise parabolic reflector begins with traditional grinding and polishing techniques.
You'll start with rough grinding using an 80-100 grit tool, applying firm pressure while performing center-over-center and W strokes. Don't forget to bevel the edges to prevent damage.
Next, you'll move to fine grinding with 220-320 grit, alternating the mirror and tool positions while monitoring the surface for uniform pits. With proper technique, you can achieve complete mirror creation in just 12-24 hours.
Keep a detailed grinding log to track your progress. Once you're satisfied with the surface, it's time for polishing.
You'll need a pitch lap cut into facets, polishing compound, and a water slurry. Work in hour-long sessions to let the pitch conform properly.
Maintain a clean workspace throughout the process.
Pre-Shaped Surface Refinement
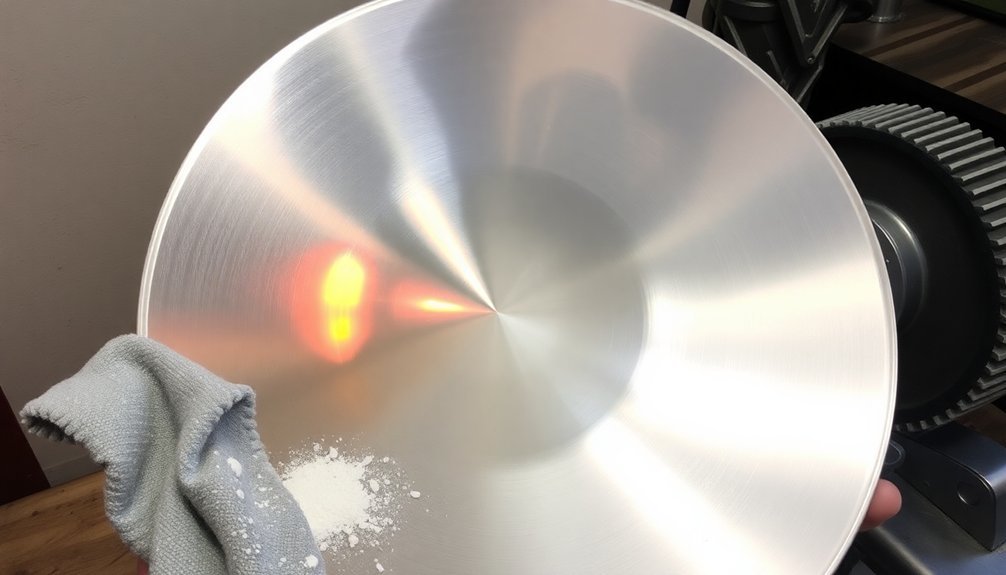
Once you've acquired a pre-shaped parabolic reflector through electroforming or machining, you'll need to refine its surface to achieve ideal performance.
Start by inspecting the surface quality using high-resolution indicators to identify any irregularities that need addressing.
For electroformed surfaces, you can enhance performance by applying electro-deposited bright rhodium coating.
If you're working with a machined surface, you'll want to reduce the scallop height to around 0.018 cm through final machining steps.
Complex geometric shapes can be achieved with exceptional precision through the electroforming process.
Apply gelcoating and fiberglassing to achieve a smoother finish.
Finally, you'll need to add an aluminum coating through vapor deposition, maintaining a thickness of 2000± 1000 A.
Test the RF reflectance to verify proper functionality.
Use close-range photogrammetry to confirm the surface accuracy and detect any deviations from the ideal paraboloid shape.
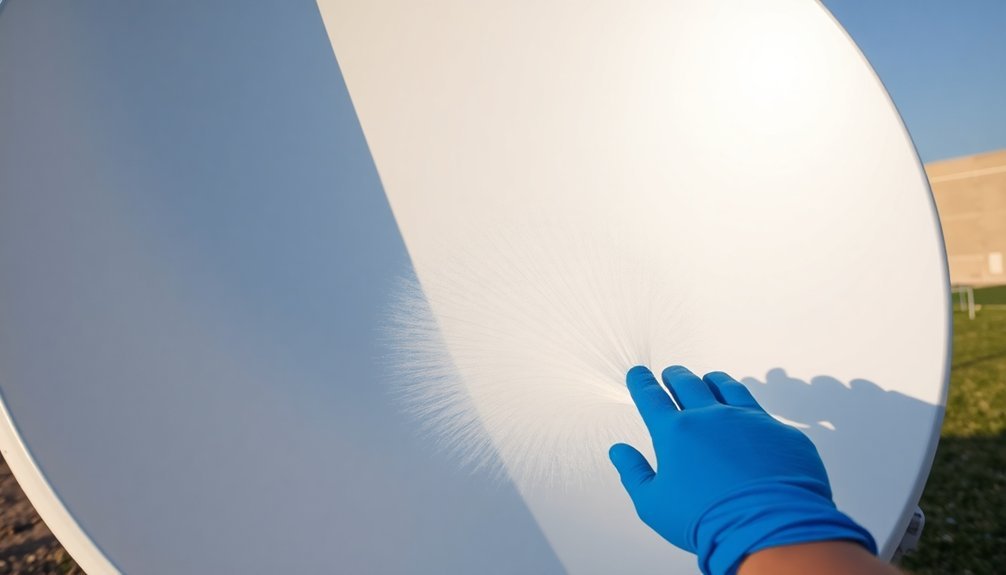
DIY Mirror Formation
Creating a parabolic reflector at home requires careful attention to material selection and surface preparation. You'll need glass, metal, or another reflective surface as your base material, along with various grits of sandpaper and polishing compounds. When working with glass surfaces, consider using frosted glass spray for creating custom patterns and effects.
Start your DIY project by following these essential steps:
- Clean your chosen surface thoroughly and assess for imperfections.
- Begin with coarse-grit sandpaper for initial shaping.
- Progress through finer grits, cleaning between each stage.
- Apply polishing compound using a pitch lap with cut facets.
Work in a clean, temperature-controlled environment to prevent contamination. Use consistent stroke patterns while polishing, and regularly inspect your progress with a magnifying tool.
Don't forget to wear protective gear throughout the process. Remember that achieving the perfect parabolic shape takes time and patience.
Frequently Asked Questions
How Long Does a Polished Parabolic Reflector Typically Maintain Its Mirror-Like Finish?
You'll find that high-quality parabolic reflectors maintain their mirror-like finish for 25-35 years under normal conditions. However, if you're near the sea or in urban areas, you'll need additional protective measures.
Can Household Mirrors Be Reshaped Into Effective Parabolic Reflectors?
You can't effectively reshape household mirrors into parabolic reflectors. They're not designed for this purpose and will likely break or lose reflectivity. Instead, you should use alternatives like satellite dishes or space blankets.
What Temperatures Can Polished Parabolic Reflectors Safely Withstand?
You'll find that polished parabolic reflectors can safely handle temperatures around 400-500°C, but the exact limit depends on your material choice – glass handles the highest temps, while aluminum and foil max out around 300°C.
Are There Specific Storage Conditions Required for Maintaining Parabolic Reflector Quality?
You'll need to store your parabolic reflector in a dry, clean area away from sunlight and chemicals. Keep it covered, maintain temperatures below 200°F, and use climate-controlled storage when possible.
Which Reflective Coatings Are Most Resistant to Environmental Damage?
You'll find IR-reflective coatings with metal oxide pigments are most environmentally resilient. They're resistant to thermal stress and weathering, while solvent-based coatings offer strong durability despite their environmental impact.
In Summary
Whether you're refining a pre-shaped reflector, grinding from scratch, or creating your own mirror surface, you'll find that polishing parabolic reflectors requires patience and attention to detail. You've now learned three proven methods to achieve that perfect shine and optical clarity. Choose the technique that best matches your skill level and available resources, and you'll be on your way to creating professional-quality reflective surfaces.


Leave a Reply