
Position your sun oven in direct sunlight between 10 a.m. and 2 p.m., avoiding shadows and wind. Set up on level ground and adjust reflectors to match the sun's angle. Use a digital thermometer to monitor temperatures, aiming for 200-300°F. Choose dark, thin aluminum cookware for ideal heat absorption and verify your door seal is tight before starting. Clean reflectors regularly and check shadow alignment for symmetrical distribution. Track the sun by repositioning every 30 minutes, and allow 25-30 minutes for proper preheating. On cloudy days, start earlier and expect longer heating times. These fundamentals will transform your solar cooking experience.
Choose Your Sunny Spot Wisely
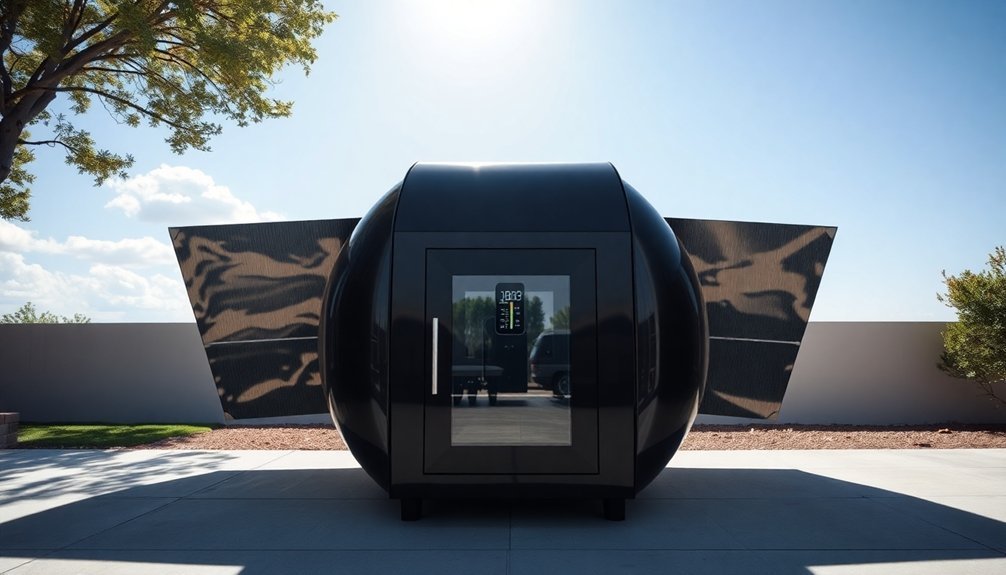
When setting up your sun oven, selecting the right location is critical for success. You'll need a spot that receives direct sunlight throughout the cooking period, away from any shadows cast by trees, buildings, or other obstacles.
Make certain the area you choose will remain unobstructed as the sun moves across the sky.
Pick a level surface to keep your oven stable and guarantee even heating. Since strong winds can disrupt your cooking by rattling or tipping the oven, select a relatively sheltered location. Avoid using your sun oven when winds exceed 35 MPH as this can be dangerous.
For extra stability on breezy days, secure the oven's alignment leg into the ground using wire stakes.
Keep the area around your oven clear of reflective surfaces that could cause uneven heating, and check for potential hazards like flammable materials before you begin cooking.
Timing Your Morning Setup
Starting your sun oven setup early guarantees you'll take full advantage of the day's solar energy.
You'll want to begin your preparations between 10 a.m. and 2 p.m. when the sun's rays are strongest and most direct.
For optimal heating performance, remember to track the sun throughout the day to maintain consistent temperature.
Early Bird Catches Sun
To make the most of your Sun Oven, proper timing and morning setup are essential for successful solar cooking. Start by preheating your oven for 25-30 minutes before cooking, and always remove the protective film from reflectors before first use.
You'll want to position your oven facing the sun with the glass door closed and latched, using the alignment leg and E-Z Sun-track indicators for proper orientation. Under optimal conditions, your solar oven can reach temperatures up to 200°F.
For ideal results:
- Plan your cooking between 10 a.m. and 2 p.m. when sunlight is strongest
- Adjust the oven's position every 30 minutes to track the sun
- Use dark cookware to maximize heat absorption
- Start earlier on cloudy days to guarantee food cooks completely
Remember to steam-clean your oven with soapy water for 90-120 minutes before its first use, and keep wire stakes handy for windy conditions.
Peak Morning Hours Matter
The morning hours between 10 a.m. and 2 p.m. offer prime conditions for solar cooking with your Sun Oven.
You'll want to set up in an area free from shadows cast by trees or buildings to maximize direct sunlight exposure.
Start by preheating your Sun Oven for 25-30 minutes before cooking. Unfold the reflectors, secure them with the thumbscrew, and align the oven using the bracket indicator.
On a clear day, you can reach temperatures around 300°F within 20 minutes. Using dark-colored pots will help absorb and retain heat more efficiently during cooking.
Remember to realign your Sun Oven every half hour to maintain ideal temperature. While intermittent clouds might slow cooking, they won't stop it completely.
Keep your oven mitts handy and use a thermometer to monitor the temperature. If you're using Corningware or Pyrex, start earlier to accommodate longer cooking times.
Perfect Angle Positioning
Proper angle positioning makes all the difference between a lukewarm meal and a perfectly cooked solar feast. You'll need to adjust your reflectors daily to match the sun's path, typically moving them hourly for maximum efficiency.
Use polished aluminum or mirrored surfaces to achieve ideal results, and match your reflection angle to the sunlight's angle of incidence.
- Calculate seasonal adjustments using your latitude – add 15° in winter and subtract 15° in summer
- Orient the oven's front directly toward the sun, using E-Z Sun-track indicators as guides
- Create stability on windy days with wire stakes or heavy stones
- Position your oven where the sun will be strongest (between 1-2 PM) if you can't monitor it
Remember to track the sun more frequently during winter months, adjusting every 20-30 minutes for consistent heating.
Checking Shadow Alignment
Beyond angle positioning, shadow alignment serves as your best visual guide for ideal sun oven placement. You'll want to check that shadows are evenly distributed on both sides of your oven and adjust until they're symmetrical. Use your finger to create a shadow at a right angle with the oven's edge for precise alignment verification.
| Shadow Check | Action Required |
|---|---|
| Uneven sides | Rotate oven until shadows match |
| Pot shadows | Reposition until cooking area is clear |
| Morning hours | Raise rear leg for proper tilt |
| Afternoon positioning | Lower rear leg gradually |
| Reflector shadows | Adjust until rays hit center evenly |
For consistent results, you'll need to monitor shadow changes throughout the day and make minor adjustments as the sun moves. Consider using a DIY sun finder tool to make alignment even easier.
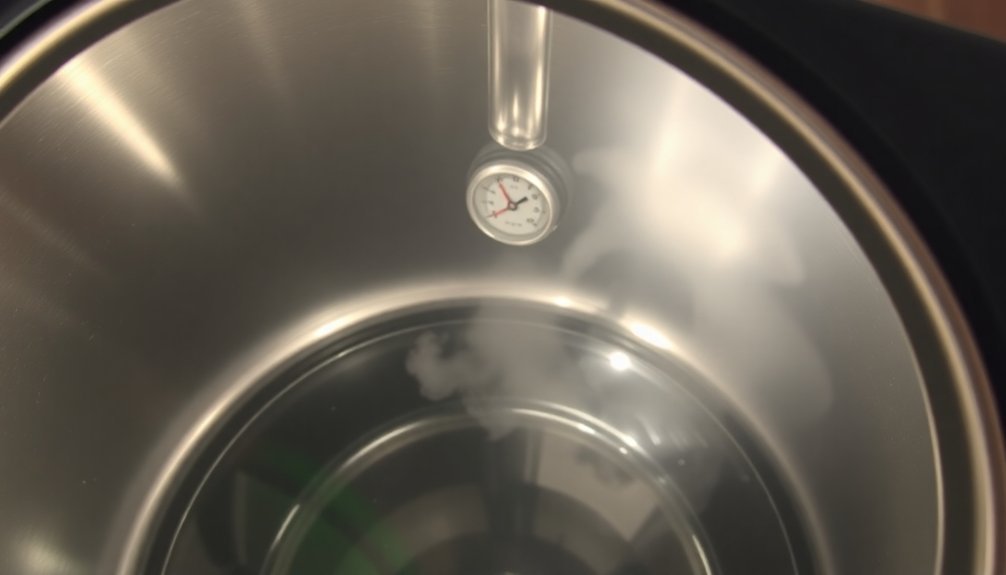
Temperature Monitoring Basics
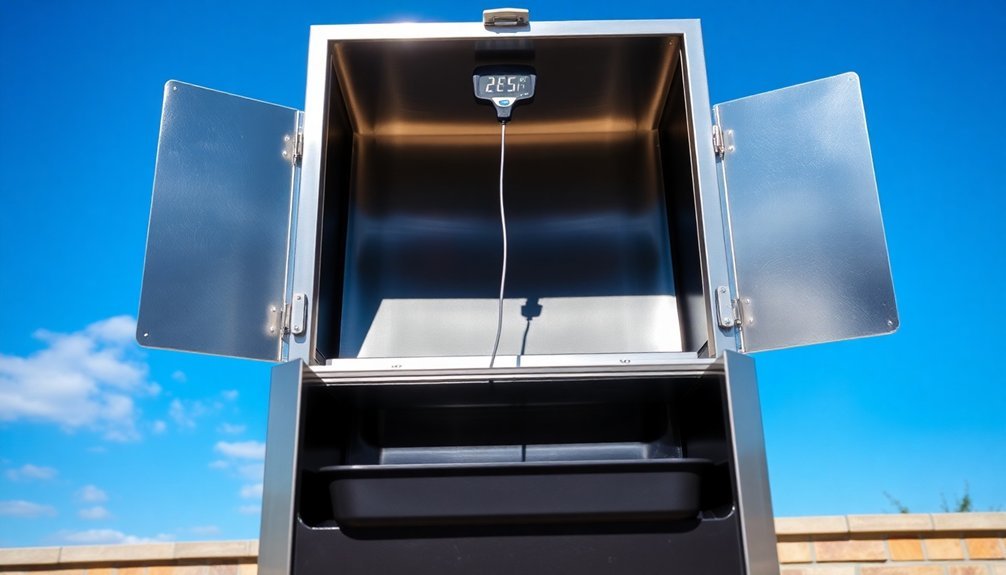
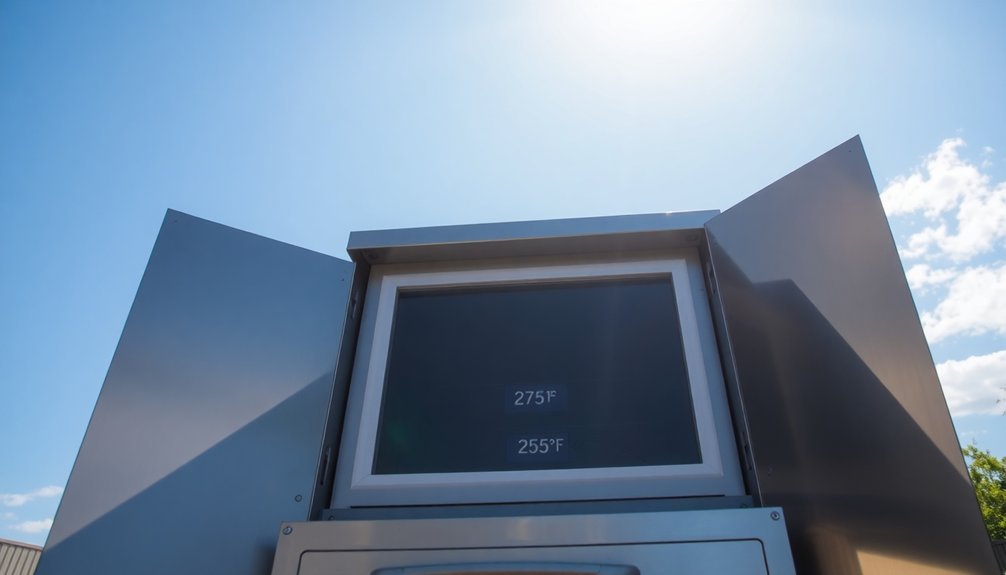
Successfully monitoring temperature in your sun oven requires a reliable digital probe thermometer and consistent attention to detail.
You'll need a thermometer that measures between -50°C to 300°C, and it's essential to calibrate it regularly for accuracy. Aim to maintain cooking temperatures between 200°F and 300°F, staying well above the danger zone of 50°F to 125°F where bacteria thrive.
- Place your sun oven in direct sunlight between 11 AM and 3 PM for ideal temperatures
- Preheat for 20 minutes before adding food on clear days
- Adjust the oven's position every 1-2 hours to track the sun
- Keep the oven door closed as much as possible to prevent heat loss
Remember that cooking times may double compared to conventional methods, so plan accordingly and use your thermometer to verify safe internal food temperatures.
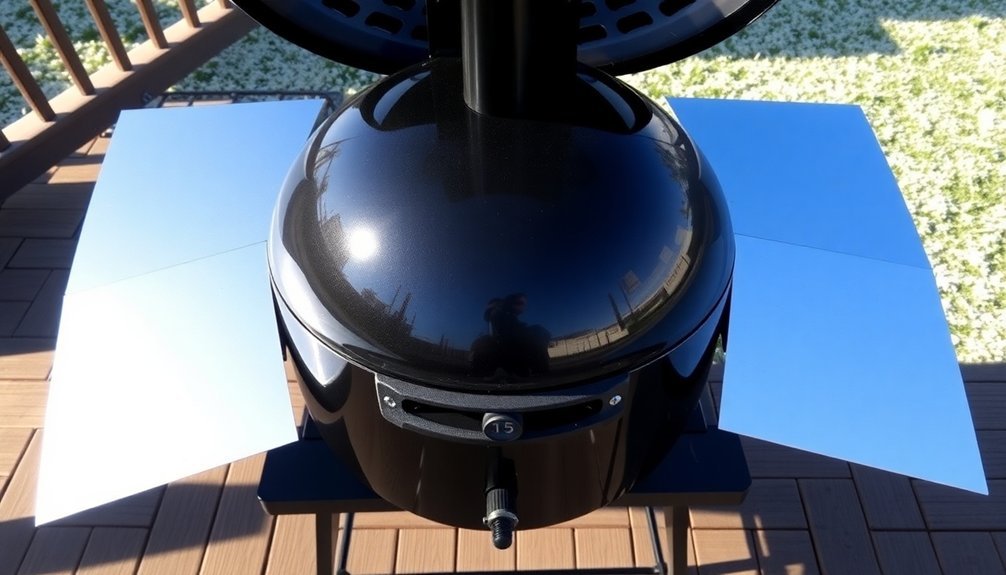
Reflector Panel Adjustments
Setting up your sun oven's reflector panels correctly can make the difference between a lukewarm meal and a well-cooked dish. Position your oven in direct sunlight and unfold the reflectors, making sure they're securely attached without casting shadows on the cooking area.
You'll want to adjust the top reflector to a steeper angle and the bottom reflector more shallowly, especially during morning or late afternoon hours. Use the E-Z Sun-track indicators to center the light dot over the bottom hole for proper alignment.
Watch that all reflected rays hit your target cooking surface. For ideal stability, secure the alignment leg with wire stakes on windy days.
Remember to reposition your oven throughout the day to follow the sun's path, keeping those reflectors working at peak efficiency.
Weather Impact on Preheating
While your sun oven's performance primarily depends on direct sunlight, understanding weather conditions is essential for effective preheating.
On clear days, you'll achieve ideal temperatures up to 400°F, but cloudy conditions will considerably reduce efficiency. You can still cook when there's partial cloud cover, though temperatures will drop to 200-250°F and cooking times will double.
- Look for a distinct shadow – if you can't see one, there isn't enough sunlight for effective cooking
- Expect peak performance during the 4 hours when the sun is directly overhead
- Plan for longer cooking sessions in summer months and southern latitudes
- Don't let cold weather discourage you – sun ovens can work even in sub-zero temperatures when properly aligned
Dark Cookware Selection
You'll find dark cookware is essential for your sun oven, as black and dark-colored pots excel at absorbing and retaining solar energy.
For peak results, choose black enamelware pots or darken your existing cookware by painting it with heat-safe black paint.
If you're working with shiny or light-colored pots, try wrapping them in a dark cloth or towel to improve their heat absorption capacity.
Choosing Heat-Absorbing Materials
Because the right cookware can make or break your solar cooking success, choosing dark-colored, heat-absorbing materials is crucial.
You'll want to prioritize aluminum cookware, which heats up quickly and evenly with its high thermal conductivity. Dark enamelware is another excellent choice, as its thin coating efficiently transfers heat while reducing cooking time.
- Opt for thin, dark aluminum pots to maximize heat absorption and transfer
- Choose enamel-coated steel cookware for reliable performance
- Avoid shiny stainless steel unless you cover it with a dark cloth
- Use plastic wrap to seal in heat and moisture
Skip cast iron for quick meals since it heats slowly, though it's fine for long-duration cooking.
If you're using glass lids, verify they're clean and clear to allow maximum sunlight penetration while trapping heat inside.
Black Pots Trap Sunlight
Since dark pots efficiently absorb and retain solar energy, they're essential for successful sun oven cooking.
Choose thin, dark metal cookware over ceramic or cast iron, as it heats up faster and maintains ideal temperatures. Make sure your pots have tight-fitting lids to lock in heat and moisture.
You'll want to place your dark pot inside a clear plastic bag or under an inverted glass bowl to create a heat trap.
Position it carefully in the center of your solar oven, using reflective surfaces to direct extra sunlight onto the pot. For stability on windy days, secure the setup with large stones.
Remember to monitor cooking times closely, as dark pots heat food more rapidly than lighter ones.
Always use pot holders when handling hot cookware to prevent burns.
Door Seal Verification
Maintaining a proper door seal is essential for your sun oven's performance. You'll want to verify the seal before each use by running your fingers along the gasket's perimeter, checking for any damage, gaps, or irregularities. A compromised seal will let precious heat escape and reduce your oven's efficiency.
Here's what you should check:
- Press firmly around the door's edges to confirm uniform contact between the gasket and frame
- Look for visible cracks, tears, or worn spots that might compromise the seal
- Test the door's alignment by closing it slowly and listening for any air gaps
- Clean the gasket regularly with a damp cloth to remove debris that could affect the seal
If you notice any issues, replace the gasket promptly to maintain ideal cooking temperatures and energy efficiency.
Sun Tracking Methods
Tracking the sun effectively can make or break your solar cooking success. Start by finding a sunny spot and using your oven's alignment indicator – you'll want to center the light through the front hole. Adjust the bracket to achieve the ideal angle for maximum sun exposure.
Throughout the day, you'll need to reposition your oven to follow the sun's path. During summer, when the sun's higher, you'll make fewer adjustments compared to winter months.
Keep your reflectors clean and properly angled to direct sunlight onto your cooking container. They're essential for boosting your oven's energy capture.
Watch your timing carefully. Begin cooking early to take advantage of morning rays, and expect peak heat by mid-afternoon.
You'll get better results by monitoring condensation and using your senses rather than relying solely on the thermometer.
Frequently Asked Questions
Can I Use My Sun Oven During Winter Months?
Yes, you can use your sun oven in winter months when there's bright sunlight. You'll need to adjust the angle to catch lower winter sun, and while cooking times are longer, it'll work even in freezing temperatures.
How Do I Prevent Moisture Buildup Inside the Oven While Preheating?
You'll need to loosen one latch while preheating, or place a small BBQ skewer between the glass door and gasket. This creates a small gap that lets steam escape while maintaining cooking temperature.
What's the Maximum Safe Temperature a Sun Oven Can Typically Reach?
Your standard sun oven can safely reach 360-400°F, but if you've modified yours, it could hit up to 448°F. You'll typically cook between 200-300°F, which is perfect for most recipes.
Should I Preheat With or Without Cooking Pots Inside?
For general cooking, you don't need pots during preheating. However, if you're baking, it's better to preheat with your pots inside to maintain consistent temperature. Either way works – choose based on your cooking needs.
Can I Stack Multiple Cooking Vessels During the Preheating Process?
Yes, you can stack multiple cooking vessels while preheating, but don't block sunlight from reaching lower items. It's best to place them side by side on the rack to guarantee even heating.
In Summary
You'll find solar cooking becomes second nature once you've mastered these preheating fundamentals. By positioning your sun oven correctly, choosing the right cookware, and monitoring temperatures consistently, you'll maximize your cooking efficiency. Remember to track the sun's movement and adjust accordingly throughout the day. With practice, you'll soon be confidently preparing meals using nothing but the sun's natural energy.


Leave a Reply