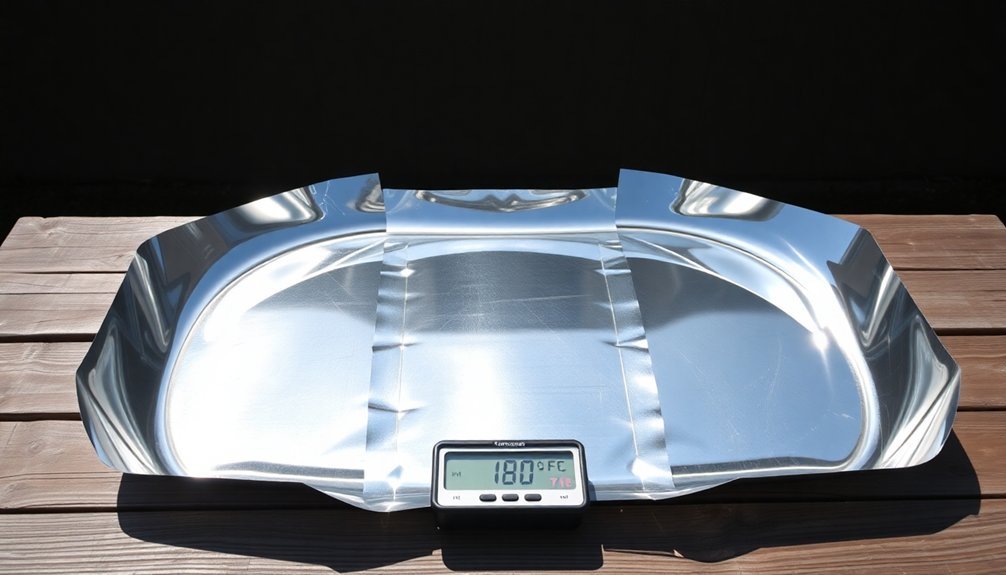
Transform your bakeware into efficient solar cookers with these proven hacks. Start by coating pans with military-grade aluminum tape for durability up to 302°F, or wrap them in affordable Mylar emergency blankets. You'll boost performance by applying a double layer of aluminum foil with shiny sides out, or treat surfaces with heat-resistant dark paint for maximum absorption. Add reflective vinyl with precise cuts, reinforce corners for stability, and install a radiant barrier beneath. Don't forget mirror film edges and quick-release coatings for easy food removal. These modifications will revolutionize your sun cooking experience, and there's even more to discover.
Aluminum Tape Coating Basics
When you're looking to enhance your bakeware's heat distribution, aluminum tape offers a robust solution with its impressive physical and thermal properties.
With a thickness of 3 to 4.8 mil and tensile strength up to 36 lbs/in, this durable material will securely adhere to your cooking surfaces.
You'll find the tape's temperature resistance particularly valuable, as it can withstand heat from -58°F to 302°F, making it perfect for solar cooking applications.
Its military-grade quality ensures optimal performance that meets rigorous MIL-T-23397B Type II standards.
The tape's strong acrylic adhesive bonds well to steel and other metals, providing up to 40 oz/in of adhesion strength.
Its malleable nature lets you easily conform it to irregular surfaces, while its moisture resistance guarantees it won't deteriorate during use.
For best results, apply the tape in clean, straight strips to create an effective reflective surface.
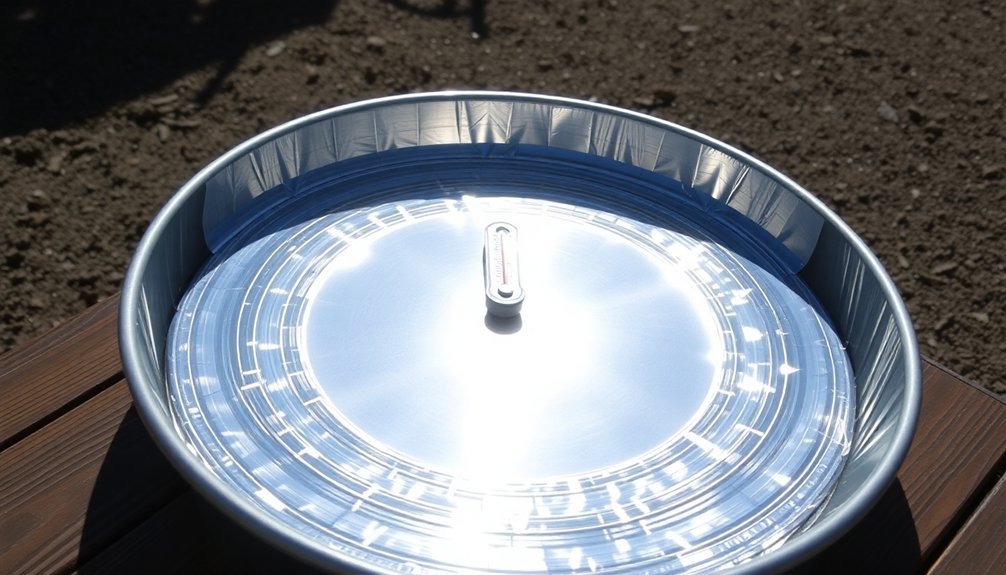
Mylar Blanket Pan Wrapping
Although solar cooking requires specialized materials, Mylar emergency blankets offer an affordable and effective way to enhance your bakeware's heat-gathering potential.
You'll need spray glue or thinned white glue to attach the Mylar to your pan's surface, then use a rubber roller or credit card to smooth out any bubbles or wrinkles.
For peak performance, trim the edges neatly and verify the Mylar's securely fastened to withstand outdoor conditions. Using a high heat paint on the exterior will make cleanup easier and improve durability.
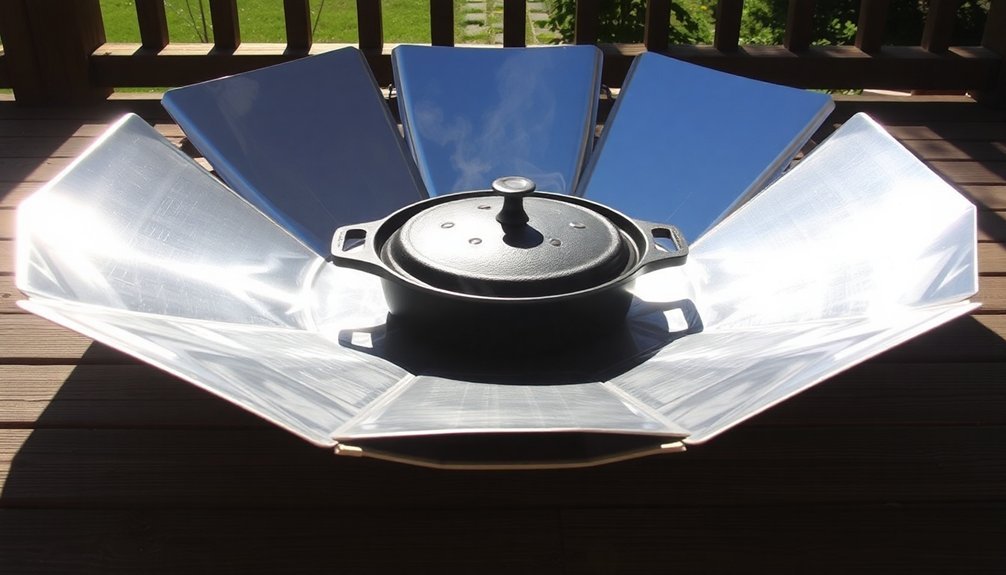
You'll want to pair your wrapped pan with a cake dome or similar cover to trap heat effectively.
While cooking times can be longer than conventional methods, you can prepare various foods from pot roast to cookies.
Remember to position your setup in direct sunlight, adjust the angle for maximum exposure, and always use oven mitts – these reflective surfaces can get extremely hot.
Dark Paint Surface Treatment
When selecting dark paint for your bakeware, you'll need food-safe, heat-resistant options like high-temperature engine enamel or specialty absorption coatings.
Before applying any paint, thoroughly clean and dry your baking surface, then test the paint's heat resistance on a small area first. For optimal solar absorption, look for coatings that offer near-zero reflectance similar to specialized black coatings used in high-resolution imaging.
You can verify the paint's durability by subjecting a test piece to your typical baking temperatures and checking for any peeling, bubbling, or fume release.
Safe Paint Selection Tips
Selecting the right paint for your reflective bakeware requires careful consideration of both safety and performance factors. You'll want to choose water-based formulas with low or zero VOCs to guarantee food safety and easy cleanup. For best results, use dark colors on cooking vessels and reflective surfaces for the oven walls. Using micro-bead technology in reflective paint applications can significantly enhance light capture and reflection properties.
| Paint Type | Best Use | Safety Features |
|---|---|---|
| Water-based Acrylic | Interior surfaces | Low VOC, non-toxic |
| High-heat BBQ | Cooking vessels | Heat resistant |
| Glass Microsphere | Reflective walls | OSHA compliant |
| Polyurethane | Exterior finish | Weatherproof |
| Zero VOC | Food contact areas | Food safe |
Always check the MSDS and guarantee proper ventilation during application. Look for paints that offer both heat resistance and durability, as they'll need to withstand repeated exposure to high temperatures and various weather conditions.
Surface Prep And Application
Proper surface preparation lays the groundwork for successful dark paint application on reflective bakeware.
You'll need to thoroughly clean the surface using a solvent-based method for heavy oils and grease. After cleaning, use a plastic abrasive pad to mechanically brush metal surfaces, removing zinc compounds.
For ideal paint adhesion and durability, follow these critical steps:
- Clean with petroleum-distillate solvent (Heptane), followed by an IPA wipe-down
- Apply appropriate surface treatment following ASTM B 449 standards
- Use high-temperature resistant dark paint in thin, even coats
- Allow each coat to dry completely before adding subsequent layers
Remember to test the final surface for imperfections under good lighting.
Regular maintenance with a vinegar-water solution will help preserve your bakeware's heat absorption properties and extend its lifespan.
Heat-Resistant Paint Testing
To guarantee your dark paint coating will withstand the rigors of baking, you'll need to conduct thorough heat-resistance testing.
Start by exposing your coated bakeware to gradually increasing temperatures, from 205°C to 425°C, to simulate actual baking conditions. Once cooled, bend test a small section to check for any cracking or adhesion loss.
You'll want to evaluate corrosion resistance by exposing your painted surface to high humidity and heat cycles.
Look for any signs of blistering, chalking, or rust formation. For the most reliable results, follow standardized ASTM D2485 testing protocols, which are specifically designed for heat-resistant coatings.
If possible, perform accelerated testing by subjecting your bakeware to multiple heating and cooling cycles. This will help ascertain your dark paint coating maintains its integrity during extended sun-baking sessions.
Reflective Vinyl Application Tips
When working with reflective vinyl, mastering proper application techniques guarantees professional-looking results and long-lasting durability. Start by mirroring your design and placing the vinyl with the glossy side down. You'll need a fresh 60° blade for precise cuts, especially on intricate patterns.
Before applying the vinyl, verify your workspace is well-lit and your tools are ready. For best results:
- Preheat your fabric for 2-3 seconds to remove moisture and wrinkles
- Position the vinyl carefully with the carrier sheet facing up
- Apply heat at 150-160°C for 8-12 seconds using medium pressure
- Let it cool before peeling the carrier sheet, then wait 24 hours before washing
Remember to test on scrap fabric first and avoid overstretching the vinyl, particularly in curved areas.
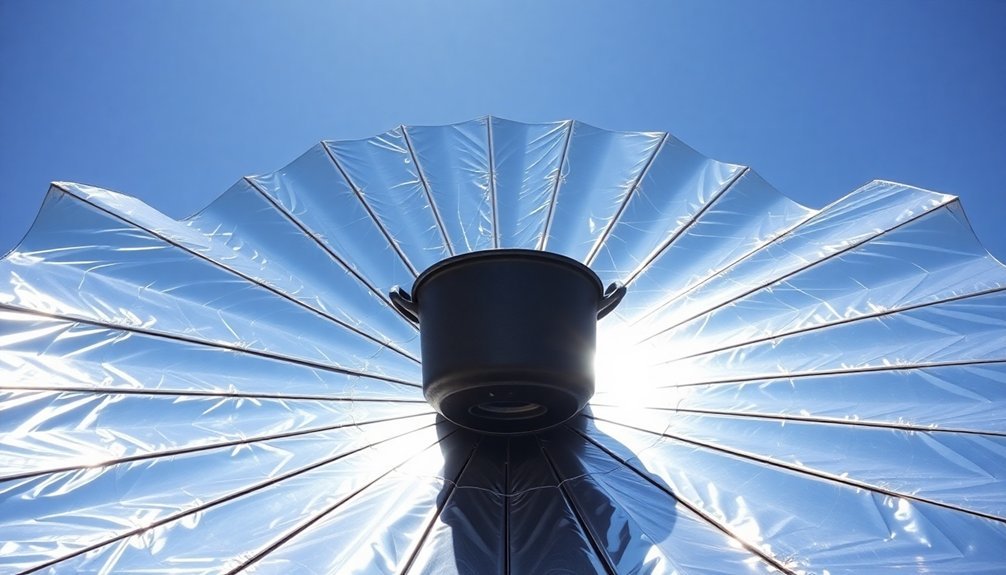
Double-Layer Foil Enhancement Method
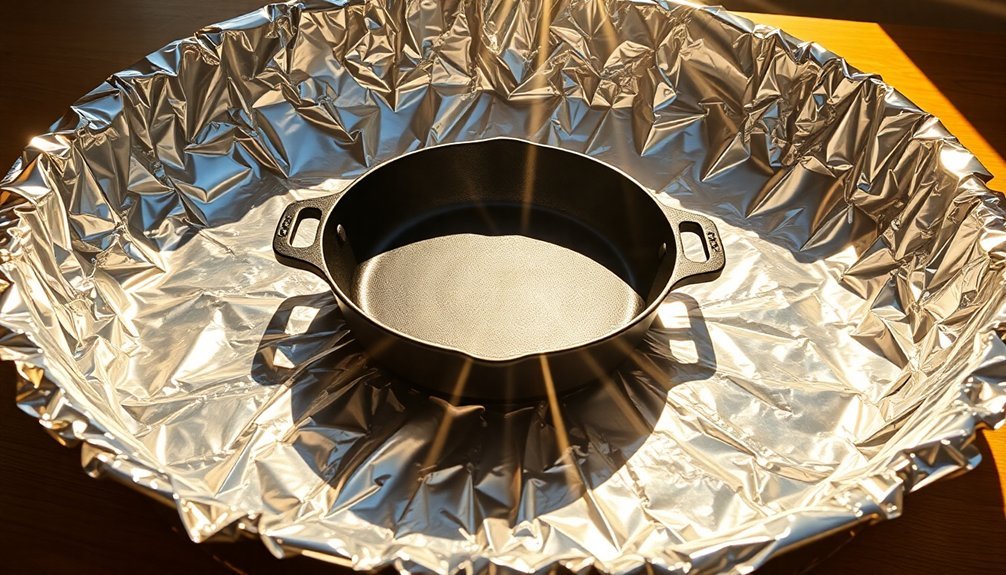
The double-layer foil enhancement method maximizes baking efficiency by creating a superior reflective surface.
You'll want to start by laying down your first layer of aluminum foil with the shiny side facing outward, ensuring it's completely smooth and wrinkle-free.
For the second layer, carefully apply another sheet of foil directly on top of the first, securing both layers with duct tape at the edges.
You'll notice this double-layer technique creates a more durable and reflective surface than single-layer applications.
To maintain ideal performance, keep the surface clean and replace both layers when they become dull or damaged.
If you're using this method for a solar oven, position your double-layered reflector at an angle where the shadow falls directly behind the box, maximizing sun exposure to your cooking area.
Heat Distribution Metal Strips
Mastering heat distribution in bakeware requires strategic placement of metal strips to confirm even cooking throughout your dishes.
You'll find aluminum strips offer superior heat conduction, though stainless steel provides excellent durability for long-term use. When solar cooking, these metal strips can help you achieve temperatures up to 90°C by efficiently transferring heat to your cooking pot.
- Choose aluminum strips with protective coating to prevent metal leaching
- Position strips evenly in pans larger than 9 inches for uniform baking
- Use matt black steel panels to maximize solar heat absorption
- Confirm proper spacing between strips for ideal heat flow
You'll notice faster cooking times and more consistent results, especially in deep pans or large cakes.
While strips might leave small marks, their benefits in heat distribution far outweigh these minor cosmetic issues.
Mirror Film Edge Techniques
You'll achieve professional-looking bakeware by focusing on proper mirror film edge application, starting with a precise cut that stops just short of the bakeware's rim to prevent future peeling.
For smooth corner coverage, use a squeegee in small, controlled strokes while keeping the film taut as you work around each curve.
When you're finishing the edges, maintain consistent pressure with your trimming tool to guarantee the corners lay perfectly flat without bubbles or lifts.
Preventing Film Edge Peeling
Successfully preventing edge peeling on mirror films requires meticulous attention to both preparation and application techniques.
You'll need to start with a spotless surface and verify you're working within the recommended temperature range. For best adhesion, apply a primer like Primer 94, especially on irregular surfaces.
- Use firm, consistent pressure with your squeegee to activate the adhesive properly
- Remove application tape at a 180° angle and immediately resqueegee all edges
- Apply edge sealer or sealing tape to protect vulnerable areas, particularly where panels meet
- Trim the film 1/4 inch from window edges to minimize lifting risks
Remember to avoid application fluid with perforated films, as trapped moisture can compromise adhesion.
Post-heating helps secure the film, particularly on curved or irregular surfaces where edge lifting is most common.
Smooth Corner Applications
When working with mirror film around corners, proper application technique makes the difference between professional results and amateur mistakes.
You'll want to start by ensuring the film's laminate side curls inward and applying plenty of solution to the glass surface.
Position the film's sticky side on the glass and use your squeegee with steady pressure from the center outward. For larger pieces, have someone help you hold the edges to prevent folding.
Work methodically to squeeze out all fluid and eliminate air bubbles.
To achieve perfect corners, maintain equal tension on all sides. If you're using Mylar film, a heat gun will help remove ripples.
Remember to apply heat evenly across the surface. For added security, tape the edges before stapling through the tape, not directly into the film.
Radiant Barrier Bottom Boost
Although radiant barriers are traditionally used in attics, they can greatly enhance your bakeware's performance by reflecting heat back toward the food.
While not as efficient as aluminum foil tape for direct solar cooking, you'll find radiant barriers work well as a supplemental heat reflector underneath your baking setup.
For the best results when using radiant barriers with your bakeware:
- Keep the reflective surface dust-free and positioned perpendicular to incoming solar rays
- Place the barrier below your bakeware, not in direct contact with it
- Install with the foil side facing up to maximize reflection and minimize dust accumulation
- Create a slight angle with your setup to capture more sunlight during peak hours
Remember that greater temperature differences between the food and the barrier will improve its effectiveness in redirecting heat.
Reflective Corner Reinforcement
Reinforcing the corners of your reflective bakeware setup greatly improves both durability and heat concentration. You'll want to use aluminum foil or reflective emergency blanket material to strengthen these vital points while maximizing solar reflection. When reinforcing corners, ascertain you're creating tight, precise folds that maintain structural integrity.
| Corner Type | Material | Technique |
|---|---|---|
| Top | Foil | Double fold |
| Bottom | Mirror | Tape seal |
| Left Side | Blanket | Heat seal |
| Right Side | Glass | Edge wrap |
Position your reinforced corners at ideal angles to capture maximum sunlight. You'll need to adjust these angles seasonally and during different times of day. For best results, combine corner reinforcement with black interior coating and proper insulation to create an efficient heat trap that'll considerably boost your solar cooking performance.
Quick-Release Coating Systems
Building on your corner reinforcement setup, you'll want to contemplate the right quick-release coating system for your bakeware. Platinum-catalyzed coatings offer fast curing and durability, while rhodium-based options provide excellent stability with minimal adhesive interaction – perfect for sun-baked goods.
For ideal results with your reflective bakeware, consider these coating options:
- Addition cure systems for low-temperature applications and minimal silicon migration
- UV-cure coatings when you're looking for energy efficiency and safer handling
- Platinum-catalyzed solutions for quick curing and stable release performance
- Rhodium-based formulations if you're working with acrylic materials or adhesive-heavy recipes
Remember to avoid tin-catalyzed coatings for food applications, as they can interact with your ingredients.
You'll get the best results applying these coatings at low weights while ensuring complete coverage of your baking surface.
Frequently Asked Questions
Can Reflective Bakeware Be Safely Cleaned in a Dishwasher?
You shouldn't put reflective bakeware in the dishwasher. While it's technically possible, harsh detergents and high water pressure can damage the reflective coating. It's best to hand wash with mild soap and water.
How Long Do DIY Reflective Coatings Typically Last Before Needing Replacement?
You'll typically need to replace DIY reflective coatings every 2-3 years, depending on weather exposure and maintenance. With proper care and high-quality materials, you can extend their lifespan up to 5 years.
Will Extreme Temperature Changes Cause Reflective Materials to Separate From Cookware?
Yes, you'll find that sudden temperature changes can cause reflective materials to separate from cookware. To prevent this, choose thermal shock-resistant materials and allow your cookware to heat and cool gradually.
Does Altitude Affect the Performance of Reflective Bakeware in Solar Cooking?
Yes, altitude affects your reflective bakeware's performance. You'll get better results at higher altitudes due to less atmospheric interference. Your bakeware's reflective surfaces can capture more direct solar radiation in thinner, clearer air.
Can Reflective Bakeware Treatments Affect Food Taste or Safety?
Yes, your reflective bakeware's coating can affect food taste and safety. If it's damaged or low-quality, it might leach chemicals or leave metallic flavors. You'll want to use food-grade coatings and check for wear regularly.
In Summary
You'll find these reflective bakeware modifications transform your sun cooking experience. Whether you've chosen aluminum tape, mylar wrapping, or mirror film techniques, proper application makes all the difference. Remember to test your enhanced cookware on a clear day, and don't hesitate to combine multiple methods for best results. With these hacks, you're well-equipped to harness solar energy and create delicious sun-cooked meals.


Leave a Reply