
You'll maximize your sun-powered cast iron baking with these proven hacks. Start by preheating your skillet in direct sunlight for 5-10 minutes, using reflective materials underneath to boost heat absorption. Create a double barrier by combining a preheated baking stone and tight-fitting lid for peak steam retention. Apply multiple thin layers of drying oils for a heat-absorbing black surface, and position reflective surfaces around your cookware to concentrate sunlight. Monitor temperature using water droplet tests or digital thermometers, and adjust your setup's angle based on the season. Keep a backup fuel source handy for cloudy days. These fundamental techniques just scratch the surface of solar cast iron mastery.
Preheating Your Cast Iron Outside
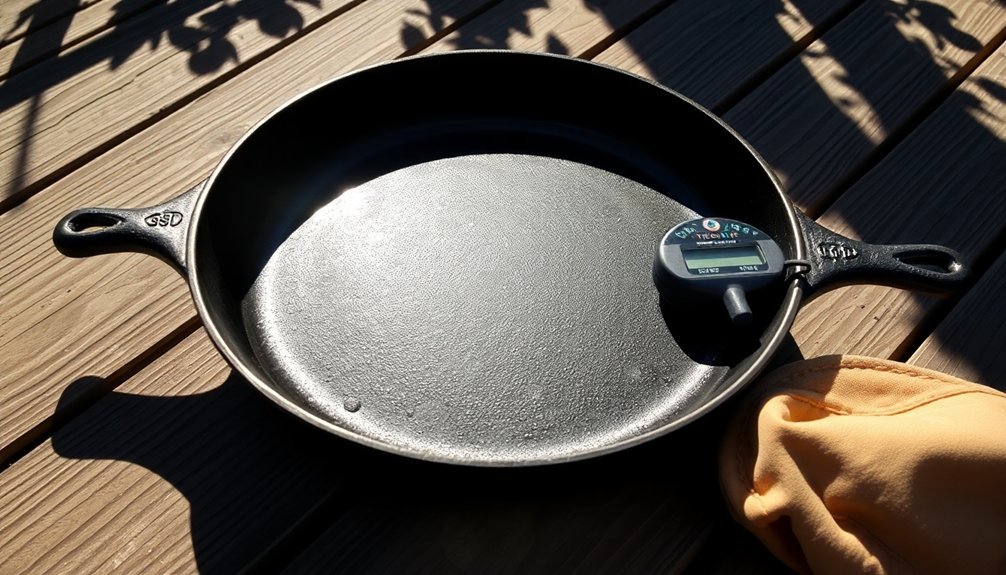
While many home cooks limit themselves to indoor cooking, preheating your cast iron outside offers unique advantages and sustainable options.
You can harness the sun's power to heat your skillet by placing it in direct sunlight on a stable surface. Using a reflective material beneath the pan can amplify the heat and speed up the process.
Monitor your pan's temperature as it heats to achieve that ideal medium-high range for cooking. Keep in mind that cast iron's critical temperature of 1450°F should never be exceeded, even in direct sunlight. If you're in a hurry or the sun isn't strong enough, supplement with a grill or wood fire.
Remember to rotate your pan for even heating distribution. Once preheated, you'll enjoy better food release and that perfect Maillard reaction for beautifully browned dishes.
Don't forget to maintain your pan's seasoning by adding a thin layer of oil after each use.
Black Surface Enhancement Methods
You'll get better heat absorption in your cast iron by applying a specialized high-temperature black paint, following the manufacturer's instructions for even coverage.
Surface preparation is crucial for optimal results, as oxide layers and residues can interfere with proper coating adhesion.
Regular seasoning of your cast iron creates an additional dark, protective layer that enhances heat distribution while preventing rust.
For best results, maintain your pan's black surface through consistent care and re-seasoning after each deep cleaning.
Dark Paint Application Tips
For achieving a rich, dark surface on cast iron cookware, several proven blackening methods can transform your pieces into beautifully seasoned masterpieces.
You'll want to start with a thorough cleaning using an alkaline detergent to remove any contaminants.
The black oxide method offers a professional finish – you'll dip your cookware in a hot chemical bath containing sodium hydroxide and nitrates. This treatment creates a thin oxide layer approximately 1-2 micrometres thick.
If you prefer a more traditional approach, try rust blueing by letting the surface oxidize, then boiling it to convert red rust to black.
For a natural finish, heat your cookware until the pores open, then apply a thin layer of flaxseed or linseed oil.
You can repeat this process multiple times for deeper coloring.
Remember to wipe off excess oil before baking to guarantee even polymerization and prevent sticky residue.
Seasoning For Heat Absorption
Creating a superior heat-absorbing surface on your cast iron cookware begins with proper seasoning techniques that enhance its black finish.
You'll want to focus on building multiple thin layers using drying oils like flaxseed, which polymerize into a hard, dark coating that maximizes heat absorption. The key is heating your pan above 375F to trigger the chemical transformation that bonds the oil to the iron. Regular applications help maintain a hydrophobic surface layer that repels moisture and prevents rust formation.
- Preheat your pan at 200F to open the iron's pores, then apply an ultra-thin oil layer.
- Bake the pan upside down at 400-500F for an hour to create a durable black surface.
- Repeat the process 6-8 times to develop a deep, heat-absorbing finish.
Double Lid Heat Trapping
You'll get superior heat distribution in your cast iron by positioning a preheated baking stone beneath your Dutch oven while using a properly sealed lid on top.
For rapid temperature rise, it's vital to preheat both the base and the stone thoroughly, though you shouldn't preheat the lid to prevent excessive top heat.
The double barrier created by the lid and stone combination helps regulate heat flow while trapping important steam for best bread baking results.
Heat Distribution Methods
The double lid method stands as one of the most effective heat-trapping techniques for cast iron baking.
You'll find that proper heat distribution transforms your cast iron vessel into a professional-grade baking environment. By placing a baking stone or steel on the lower rack and positioning your cast iron about 9 cm above the oven floor, you'll create an ideal setup for even heat distribution.
- Use a large cookie sheet or baking steel as a heat shield to prevent direct heat damage
- Position your cast iron vessel on a rack above the heat shield for consistent temperature
- Monitor the vessel's placement to maintain even heat distribution throughout baking
This setup mimics professional deck ovens, allowing you to achieve that perfect crackling crust and rich color while preventing the bottom of your loaf from burning.
Fast Temperature Rise Tips
Building on proper heat distribution techniques, double lid heat trapping offers a powerful way to accelerate temperature rise in cast iron baking.
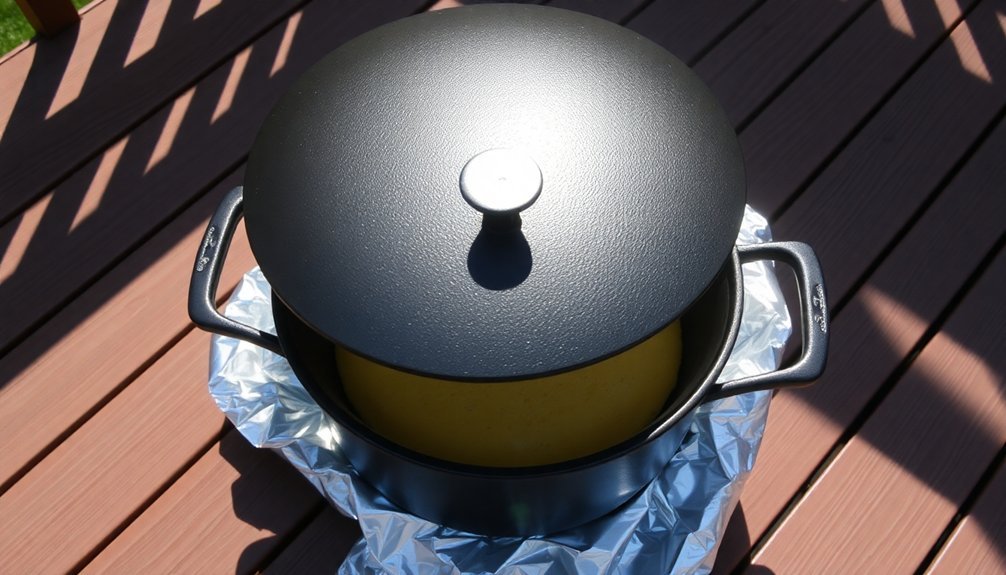
You'll want to use a tight-fitting lid to trap steam while incorporating a secondary foil cover for enhanced heat retention.
To maximize temperature rise, wrap aluminum foil tightly around the edges of your cast iron vessel's lid, creating a double-seal system.
This setup mimics professional deck ovens by maintaining a steam-saturated environment.
When using a solar setup, you can amplify this effect by adding a clear cover over your foil-wrapped lid, creating a greenhouse layer that captures both steam and solar energy.
The dual-lid approach works particularly well with black cast iron surfaces, which absorb and radiate heat efficiently while maintaining consistent internal temperatures.
Emergency Cloud Cover Solutions
When clouds roll in and disrupt your solar cooking plans, three reliable backup methods can keep your cast iron cuisine on track.
You'll want to switch to fuel-based alternatives like propane or alcohol stoves, which work effectively regardless of weather conditions. Keep these backup solutions ready and practice using them before emergencies arise.
- Multi-fuel stoves give you flexibility to use different fuel types when sunlight fails
- Denatured alcohol stoves provide a quiet, smokeless cooking option
- Pre-positioned fuel canisters guarantee you're ready when clouds appear
While using your backup methods, minimize attention by choosing low-smoke fuels and cooking in secluded areas.
Store your fuel supplies in a dry, accessible location and maintain a fire starter kit for challenging conditions.
You'll stay prepared by combining these backup solutions with your solar cooking setup.
Quick Temperature Monitoring Tricks
Choose between a digital infrared thermometer for instant surface readings or a manual probe for internal temperatures when you're working with cast iron in your solar oven.
You'll get the most accurate readings by targeting specific zones – the black surface of your cast iron for heat absorption rates and the center of your baking dish for core temperatures.
Your digital thermometer's quick response time lets you catch temperature fluctuations immediately, while manual probes excel at confirming when your bread or other baked goods have reached their target internal temperature.
Digital Vs Manual Thermometers
Getting accurate temperatures in cast iron baking requires the right tools for the job, and selecting between digital and manual thermometers can greatly impact your results.
Digital thermometers offer superior accuracy with quick 2-3 second readings, clear displays, and helpful alarms to alert you when target temperatures are reached. While manual thermometers can still get the job done, they're slower and require more attention to avoid reading errors.
- Digital models let you monitor temperatures through smartphone apps and log your baking data
- Manual thermometers need careful vertical placement and clip attachments to prevent false readings
- Digital options provide instant feedback for proofing chambers and dough temperature control
For consistent results in cast iron baking, you'll find digital thermometers offer more precision and convenience, though properly calibrated manual thermometers remain a reliable backup option.
Temperature Indicator Zones
Understanding temperature indicator zones in cast iron baking builds upon your thermometer expertise with simpler visual cues. You'll know your cast iron's reached ideal temperature by monitoring specific zones using an IR gun or watching the pan's behavior.
For solar oven setups, focus on the center of your cast iron, where temperatures are most stable. You can track three main zones: the outer edge (typically coolest), the middle ring (moderate heat), and the center sweet spot (highest heat).
When using an IR gun, adjust the emissivity settings to 0.01 increments for cast iron's non-reflective surface, and maintain a proper distance-to-spot ratio for accurate readings. Set your solar oven to maximize the center zone's heat absorption, which can boost temperatures by up to 10 degrees compared to standard setups.
Moisture Control While Baking
Maintaining proper moisture control while baking with cast iron makes the difference between perfectly crisp results and soggy disappointments.
You'll need to master moisture management in your solar oven setup by using a vessel with a black bottom and ensuring your clear cover creates a tight seal to trap heat while preventing excess moisture escape.
- Use aluminum foil or Reflectix to create a moisture-resistant heat barrier
- Preheat your oven to 125°F to eliminate unwanted moisture before baking
- Apply only the thinnest layer of oil to prevent rancidity in humid conditions
After baking, immediately dry your cast iron with a towel and apply a light coating of oil while it's still warm.
Let it cool completely before storing in a dry place. Regular inspection and proper seasoning will keep moisture-related issues at bay and extend your pan's life.
Seasonal Solar Angle Adjustments
Beyond mastering moisture control, proper solar angle adjustments can maximize your cast iron baking results throughout the year.
To optimize sun exposure, you'll need to adjust your solar cooker based on the seasons and your latitude. In summer, tilt your setup to latitude minus 15°; in winter, add 15° to your latitude for the best angle.
You'll get the most efficient baking between 10 AM and 2 PM when the sun's rays are most direct.
If you're using a box cooker, adjust the reflector panels between 30-60 degrees. For parabolic cookers, you'll need to make more frequent adjustments throughout the day.
Remember that northern latitudes face bigger challenges with sun angles, so you might need more pronounced tilts to capture adequate solar energy for your cast iron baking.
Cast Iron Positioning Tips
When positioning your cast iron cookware for baking, proper placement can make the difference between perfectly browned bread and a scorched bottom. Center your pan in the oven to guarantee even heat distribution, and pay attention to its distance from heating elements.
For best results, match your dough amount to the pot size, allowing enough headspace for the oven spring.
- Use a non-enameled cast iron skillet as a lid to create an effective seal
- Measure the interior height of your pot and lid combination before baking
- Check your baked goods a few minutes earlier than usual, as cast iron can speed up cooking times
Remember to loosen your bread from the pan's sides with a butter knife before cooling to prevent sticking and maintain that perfect crust you've worked so hard to achieve.
Steam Venting Techniques
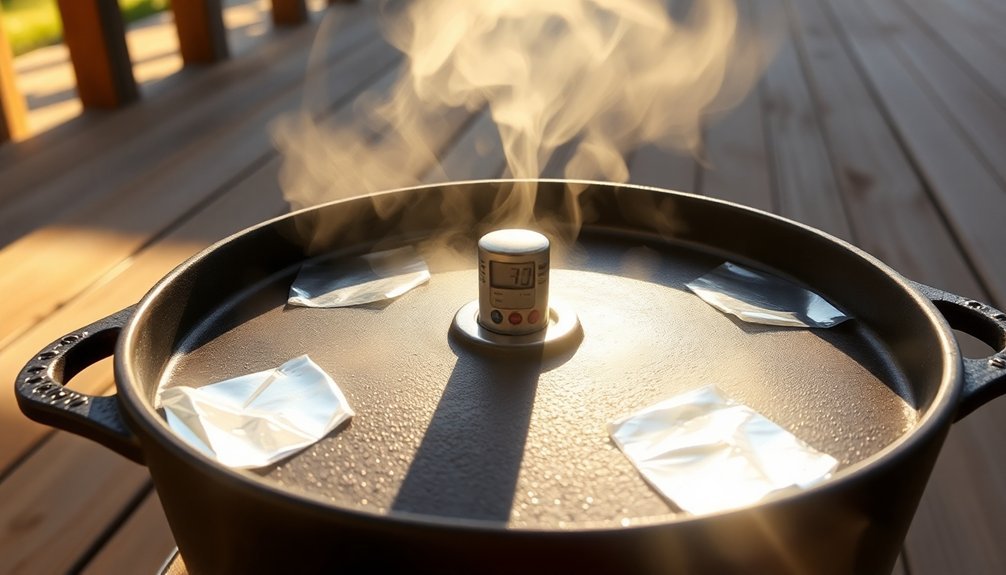
Proper steam venting can transform your cast iron baking from good to exceptional. You'll need to manage steam flow carefully while maintaining heat retention. Block vents strategically with damp towels near the control panel, but never completely seal a gas oven's vents when it's operating.
| Technique | Purpose |
|---|---|
| Bungee cord seal | Minimizes door steam escape |
| 5-8 minute heat pause | Prevents steam purging |
| Clear cover trap | Contains heat and moisture |
For best results, turn off your heat source for 5-8 minutes after loading your bread and introducing steam. This prevents combustion gases from pushing out valuable moisture. If you're using solar power, add a clear cover to trap steam effectively. Remember to stand aside when opening the oven door to avoid steam burns.
Heat Distribution Optimization
Since cast iron's exceptional thermal mass makes it ideal for heat retention, mastering heat distribution will greatly improve your baking results.
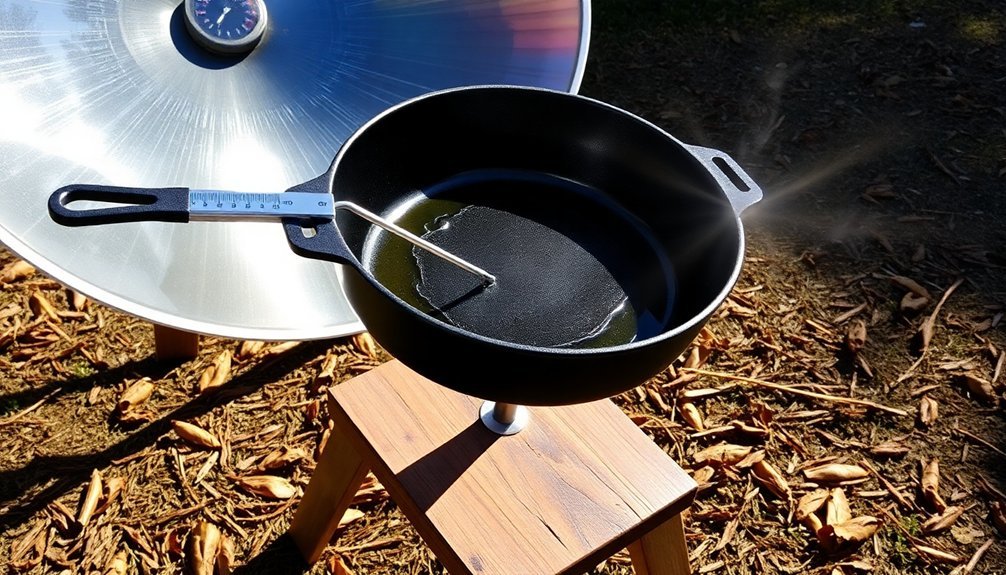
You'll want to position reflective surfaces around your cast iron vessel to concentrate sunlight and enhance heat gain. As the sun moves, adjust your reflectors' angles to maintain peak heat concentration. A tight-fitting clear cover creates a greenhouse effect, trapping heat while allowing sunlight to penetrate.
- Preheat your cast iron gradually for 5-10 minutes before adding ingredients to guarantee even heat distribution
- Use aluminum foil or Reflectix to create adjustable reflective panels that direct sunlight onto your black cast iron surface
- Test the temperature by sprinkling water droplets – they should sizzle immediately when the surface is properly heated
This setup can achieve temperatures around 170°F, perfect for solar baking success.
Frequently Asked Questions
Can I Use My Cast Iron Dutch Oven Lid Upside Down for Pizza?
You can definitely use your dutch oven lid upside down for pizza. It'll create a perfect flat cooking surface when placed on a lid rack. The cast iron material guarantees even heat distribution and a crispy crust.
Will Leaving Cast Iron in Sunlight Cause Warping or Damage?
No, you don't need to worry about sunlight damaging your cast iron. The pan's thermal properties can handle sun exposure without warping, though you should always dry it thoroughly afterward to prevent rust.
How Do I Prevent Condensation From Dripping Onto My Bread While Baking?
You'll prevent drips by preheating your cast iron thoroughly, using proper ventilation during baking, and removing the lid in the final minutes. Don't forget to maintain good air circulation in your oven.
What's the Best Time to Start Preheating for Afternoon Baking Sessions?
You'll want to start preheating your cast iron 3-5 minutes before baking. For afternoon sessions, time it so your bread goes in when temperatures are stable, typically 15-20 minutes after turning on your oven.
Should I Rotate My Cast Iron Skillet During Cooking or Keep It Stationary?
You should rotate your cast iron skillet regularly during cooking. It prevents hot spots, guarantees even heating, and helps your food cook uniformly. Turn it every few minutes while preheating and during the cooking process.
In Summary
You've now got the essential tools to harness the sun's power for your cast iron baking adventures. Remember to preheat thoroughly, position your cookware most effectively, and monitor temperatures closely. Don't let cloudy days discourage you – with these techniques, you'll still achieve great results. Keep experimenting with lid combinations and steam control, and you'll soon master the art of solar cast iron baking.


Leave a Reply