
When sun-cooking, you'll need to manage the temperature danger zone between 40°F and 140°F (4.4°C to 60°C) where bacteria can double every 20 minutes. Your solar cooker should quickly heat food through this risky range and maintain temperatures between 180-250°F (82-121°C) for safe cooking. You'll want to monitor internal food temperatures with a reliable thermometer, ensuring poultry reaches 165°F (74°C), ground meats hit 160°F (71°C), and whole cuts reach 145°F (63°C) with a 3-minute rest. Position your cooker during peak sun hours (11 AM – 3 PM) for ideal results. Understanding these basics will help you master the art of safe solar cooking.
What Is Food Temperature Risk

When you're cooking or storing food, understanding the temperature danger zone is essential for food safety. This critical zone spans between 40°F and 140°F (4.4°C to 60°C), where bacteria can multiply rapidly – doubling in number every 20 minutes.
You'll find that the riskiest foods include meat, seafood, dairy products, eggs, cooked rice, pasta, and prepared salads.
Even some plant-based items like cut melons and raw seed sprouts can harbor dangerous bacteria. If you leave these foods in the danger zone, pathogens like Salmonella and E. coli can flourish, potentially causing severe foodborne illnesses.
For vulnerable individuals, such as pregnant women or those with weakened immune systems, exposure to these pathogens can lead to serious complications, including hospitalization.
Safe Solar Cooking Temperatures
Although solar cookers can reach impressive temperatures up to 400°C (750°F), you'll typically cook your food at a more moderate 82-121°C (180-250°F).
These lower temperatures are ideal for preserving nutrients and maintaining moisture in your dishes. For best results, use dark, thin metal pots with tight-fitting lids to maximize heat absorption and retention. Heat retention improves significantly when using glass lids or high-temperature plastic bags to trap energy.
You'll achieve the best cooking performance by following these temperature guidelines:
- 82-91°C (180-195°F): Perfect range for thorough cooking without burning
- 165°C (325°F): Maximum temperature for conventional box cookers
- 290°C+ (550°F+): Achievable with high-performance parabolic cookers
Remember to check your solar cooker every 1-2 hours to adjust its position, but avoid frequent stirring or lid removal that can release trapped heat.
During partly cloudy days, expect temperatures between 93-121°C (200-250°F).
Time Guidelines For Sun Cooking
Since solar cooking relies on natural sunlight, you'll need to plan ahead for longer cooking times compared to conventional methods. Most dishes take 1.5 to 3 times longer than traditional ovens, with cooking durations typically ranging from 2 to 4 hours. The most effective period for solar cooking is during peak sun hours between 11:00 a.m. and 3:00 p.m.
| Food Type | Cooking Time | Best Practices |
|---|---|---|
| Quick Items | 30-60 mins | Perfect for eggs, omelets, coconut |
| Medium Dishes | 2-3 hours | Ideal for grains, fish, cut meats |
| Large Items | 4-7 hours | Suited for whole turkeys, briskets |
You'll achieve the finest results by using dark cookware and maintaining proper sun alignment. Remember to minimize added liquids and keep your oven well-sealed. Wind can greatly impact cooking times, so choose a sheltered location whenever possible. For best results, adjust your cooker's position every hour or two to track the sun's movement.
Monitoring Your Solar Oven
You'll need reliable temperature monitoring tools like thermocouples or digital sensors to track your solar oven's internal temperature and guarantee food safety.
Position your temperature sensors inside the cooking vessel at the focal point of your solar reflector for the most accurate readings.
For best heat capture, make sure to regularly adjust your solar cooker's position to track the sun's movement, using tools like light sensors or manual adjustments every 15-30 minutes. The monitoring system collects temperature and humidity data at 10-minute intervals via a micro-controller for comprehensive tracking.
Temperature Tracking Tools Needed
When monitoring a solar oven, reliable temperature tracking tools are essential for maintaining food safety and achieving consistent cooking results.
You'll need a combination of digital tools and physical instruments to track temperatures effectively and guarantee your food cooks safely.
For accurate temperature monitoring, you'll want these key tools:
- A high-quality digital thermometer with probe capabilities, measuring ranges from -50°C to 300°C for instant readings
- A temperature monitoring app that integrates weather data and provides real-time tracking, such as Solar Cooker Pro or GoSun
- A data logger or thermocouple system for continuous temperature recording and analysis
These tools work together to help you maintain proper cooking temperatures, receive timely alerts, and store historical data for future reference.
They're particularly valuable when adjusting cooking times based on weather conditions or sharing successful cooking profiles with other solar chefs.
Position For Maximum Heat
To maximize heat absorption in your solar oven, proper positioning and regular adjustments throughout the day are essential for maintaining consistent cooking temperatures.
Place your cooker between 11:00 AM and 3:00 PM when the sun's intensity peaks, and adjust it every 20-30 minutes to track the sun's movement.
Set your cooker on a dry, level surface and orient the shorter front panel eastward for noon meals or westward for evening cooking.
You'll need to adjust your reflector angles based on your latitude – use steeper angles in winter (latitude + 15°) and shallower angles in summer (latitude – 15°).
Keep reflectors clean and properly aligned to capture maximum sunlight.
If it's windy, stabilize your cooker with stones or bricks, and create an air gap under your pot using a wire rack for better heat retention.
Proper Food Storage Methods

Proper food storage practices play an essential role in preserving sun-dried foods for long-term use.
You'll need to verify your produce is completely dried before storage to prevent spoilage and maintain quality over time.
Follow these critical steps for ideal storage:
- Move partially dried fruits and vegetables to a shaded area with good ventilation, allowing them to dry until they reach a leathery consistency.
- Pasteurize vine-dried items like beans and peas by either freezing them for 48 hours or heating them in a 150°F oven for 30 minutes.
- Store your finished products in airtight containers to protect them from moisture and maintain their dried state.
Don't rush the final drying process – proper completion in the shade helps prevent over-drying while verifying food safety and longevity.
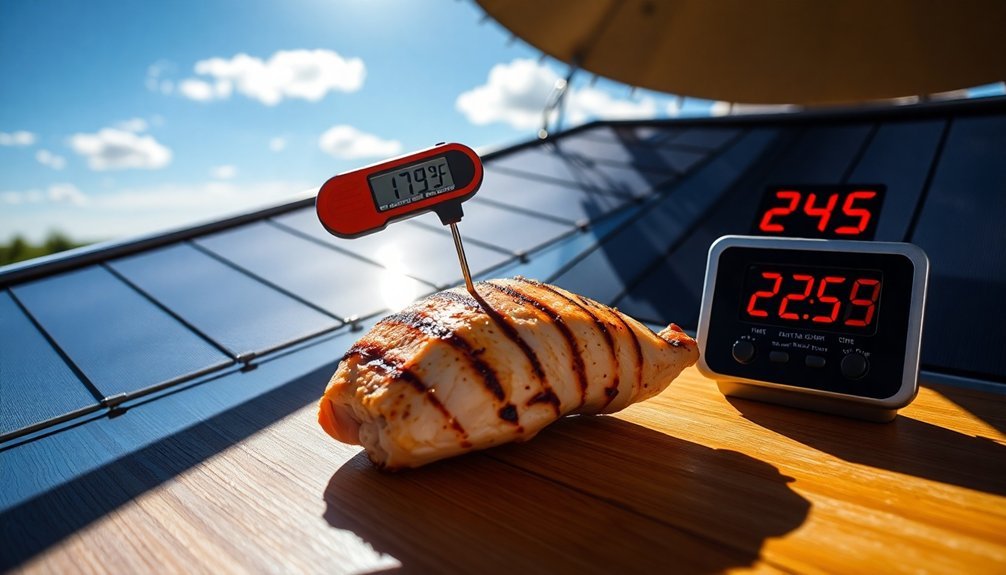
Checking Internal Food Temperature
You'll need to carefully insert a clean thermometer into the thickest part of your food, avoiding bones and fat, to get an accurate internal temperature reading.
Make sure you're waiting at least 60 seconds for the reading to stabilize, and if you're using a digital thermometer, look for the display to stop changing before recording the temperature.
For extra safety, it's smart to check multiple spots in larger portions of food, especially when sun-cooking, since heating may not be as uniform as with conventional cooking methods.
Proper Thermometer Use Tips
Three essential steps make checking internal food temperatures both safe and accurate. When using your thermometer in sun-cooked foods, always insert it into the thickest part while avoiding bones and fat. For thin items like chicken breasts, insert the probe sideways to get an accurate reading.
- Clean and sanitize your thermometer probe after each use to prevent cross-contamination between different foods.
- Test your thermometer's accuracy regularly using ice water (32°F) or boiling water (212°F), adjusting for altitude.
- Wait for your digital display to stabilize before recording the temperature reading.
Remember to check temperatures about 5-10 minutes before your estimated cooking time ends. For large items like roasts, test multiple spots to verify even cooking throughout.
If you're using a wireless probe thermometer, you can monitor temperatures without repeatedly opening your solar cooker.
Reaching Safe Target Temperatures
When cooking with solar energy, reaching and verifying safe internal food temperatures remains essential for preventing foodborne illness.
You'll need to guarantee poultry reaches 165°F (74°C), while ground meats must hit 160°F (71°C). Whole cuts of beef, pork, lamb, and veal require 145°F (63°C) with a three-minute rest period.
Insert your thermometer into the thickest part of the food, avoiding bones and fat. For chicken or turkey, check the deepest section of the breast or thigh. When cooking ground meat patties, probe the center of the thickest portion.
Don't rush the reading – let your thermometer stabilize for accurate results. Remember that stuffed foods require temperature checks in both the meat and stuffing to guarantee complete safety.
Cross-Contamination Prevention

Preventing cross-contamination requires a systematic approach to food handling and storage.
You'll need to establish clear boundaries between raw and ready-to-eat foods while maintaining strict personal hygiene practices.
Remember to use separate utensils, cutting boards, and containers for different food types.
When sun-cooking, follow these essential steps to avoid cross-contamination:
- Store raw meats in sealed containers at the bottom of your refrigerator, keeping cooked foods on higher shelves.
- Use different colored cutting boards and utensils for raw and cooked foods, washing and sanitizing them between uses.
- Change gloves and wash hands thoroughly when switching between handling raw and ready-to-eat foods.
Always label and date your stored foods, and keep your work surfaces sanitized with a proper bleach solution to maintain a safe cooking environment.
Weather Impact On Cooking
You'll find that cloud cover greatly affects sun-cooking temperatures, with even light cloud coverage reducing cooking efficiency by up to 50%.
The sun's position throughout the day impacts your cooking times directly, making mid-day hours between 10 AM and 2 PM ideal for maintaining safe cooking temperatures.
Weather patterns and seasonal changes will affect your sun-cooking schedule, requiring longer cooking times during winter months and on overcast days.
Cloud Cover Effects
Cloud cover poses a considerable challenge for sun-cooking by disrupting the amount of solar energy that reaches your cooking equipment.
When clouds contain more aerosols from pollution or natural sources, they become brighter and more reflective, greatly reducing the sunlight available for cooking.
You'll notice varying effects on your sun-cooking depending on cloud conditions:
- Light-colored clouds with high sulfate content can reflect up to 25% of sunlight back to space, severely limiting cooking temperatures.
- Dark, soot-laden clouds absorb sunlight directly, preventing it from reaching your solar cooker.
- Ship tracks or industrial pollution can create persistent bright cloud streaks that block solar energy for extended periods.
During cloudy conditions, you'll need to adjust your cooking times or consider alternative cooking methods to maintain food safety.
Sun Position Matters
The sun's position plays an essential role in determining your sun-cooking success, as both seasonal variations and daily angles affect the amount of solar energy reaching your cookware.
You'll get superior cooking results by positioning your solar cooker within 15° west and 25° east of true north. During winter, you'll notice more solar radiation on north-facing surfaces due to the sun's lower position, while east and west exposures receive intense sunlight during summer mornings and afternoons.
For best results, use tools like SunOnTrack or Shadowmap to analyze sun patterns at your cooking location. These apps help you predict shadow impacts and superior cooking times.
Remember that local topography and neighboring structures can affect solar access, so choose your cooking spot wisely. In hot climates, you might need extra protection from intense direct sunlight.
Seasonal Temperature Variations
Beyond sun positioning, weather conditions greatly affect your solar cooking outcomes.
You'll need to adapt your cooking strategy based on different seasonal challenges to maintain safe cooking temperatures.
- During windy conditions, shield your solar cooker with windbreaks like foil barriers or strategically placed rocks to prevent heat loss and maintain consistent temperatures.
- In cold or snowy weather, you'll need extra time for preheating, and it's vital to create a barrier between your cooker and the cold ground.
- When it's rainy, make sure you've got proper shelter while maintaining adequate ventilation to prevent dangerous smoke buildup.
For all weather conditions, monitor your cooking temperatures carefully and consider using thermal blankets or specialized equipment to retain heat when nature isn't cooperating.
Signs Of Food Spoilage

Recognizing signs of food spoilage involves monitoring four key indicators: visual, smell, touch, and other physical changes.
When you're sun-cooking, watch for visual red flags like fuzzy mold growth, unusual discoloration, or slimy films on food surfaces. Trust your nose – if you detect funky odors, ammonia-like smells, or rancid aromas, it's time to discard the food.
Your sense of touch can reveal texture problems, such as excessive softness, sliminess, or abnormal dryness in meats and produce.
Don't ignore other warning signs like bubbling or foaming in containers, bulging packaging, or unexpected pH changes. In frozen foods, look out for frost buildup or ice crystals. For dairy products, watch for clotting or separation that wasn't present before.
If you spot any of these indicators, it's safer to dispose of the food.
Adjusting Solar Cooking Position
Successful sun-cooking depends heavily on proper positioning of your solar cooker to maximize sunlight exposure throughout the day.
You'll want to find an open, shade-free spot away from trees, buildings, and waste areas, while ensuring protection from strong winds and dust.
For best performance, follow these key positioning steps:
- Place your cooker during peak sun hours (9-10 am to 1-2 pm) with its shadow directly behind it.
- Adjust the cooker's position hourly to track the sun's movement, especially if you're cooking all day.
- Stabilize the unit with bricks or stones on the outside if it's windy, but never inside the cooker.
If you're in an intertropical zone, you'll need to adjust your reflectors' angles based on seasonal changes and latitude for maximum solar concentration.
Reheating Solar Cooked Foods

When reheating food in a solar cooker, you'll need to follow strict temperature guidelines to guarantee safety and prevent bacterial growth.
Make sure your solar oven reaches at least 145°F before adding any food, though it's safer to preheat to 200°F to account for heat loss when you open the cooker.
You'll want to reheat your food to an internal temperature of 165°F within 30-60 minutes.
Don't attempt to reheat food that's been sitting at room temperature for over 3-4 hours.
Always use a calibrated food thermometer to verify internal temperatures, and keep the reheated food above 145°F until serving.
If you can't reheat the food promptly, cool it quickly to below 50°F and store it properly to prevent contamination.
Frequently Asked Questions
Can I Use My Solar Oven to Sterilize Medical Equipment?
Yes, you can sterilize medical equipment in your solar oven when it reaches 121°C (250°F) and maintains that temperature. Just make certain your oven's design allows sufficient heat retention for proper sterilization.
How Does Altitude Affect Solar Cooking Temperatures and Times?
At higher altitudes, you'll find water boils at lower temperatures due to reduced air pressure. This means your solar cooking may take longer, though your cooker can still reach high temperatures with proper insulation and design.
What Materials Should I Avoid Using in My Solar Cooker?
You'll want to avoid using plastic wrap, unprotected metal reflectors, aluminum foil as a cover, and low-quality plastics. These materials can melt, cause burns, reflect heat away, or release harmful chemicals when heated.
Does Food Cooked in a Solar Oven Retain More Nutrients?
Yes, your food will retain more nutrients in a solar oven. You'll preserve vitamins and minerals better than with high-temperature cooking methods because solar cooking uses gentle, moderate heat that doesn't destroy nutritional content.
Can Solar Ovens Be Used to Pasteurize Water Effectively?
Yes, you can effectively pasteurize water using a solar oven. You'll need to heat water to 149°F (65°C) for 6 minutes to kill harmful pathogens. The process works best on sunny days with proper equipment.
In Summary
You've learned the vital aspects of safe solar cooking, from managing the temperature danger zone to proper monitoring techniques. By following these temperature guidelines, adjusting your cooker's position, and watching weather conditions, you'll guarantee food safety while harnessing the sun's power. Remember to store your solar-cooked foods properly and check for spoilage signs. With these practices, you'll enjoy safe, sustainable sun-cooked meals.


Leave a Reply