Your solar cooker's poor heating performance likely stems from incorrect sun tracking and reflector alignment. You'll need to adjust your cooker every 1-2 hours to maintain ideal sunlight exposure, keeping reflector angles between 45-90 degrees. The best cooking window is between 10 a.m. and 2 p.m. when sunlight is strongest. Check that your transparent lid fits snugly and isn't reflecting light away from the food. Weather conditions like dust and wind can reduce efficiency by up to 30%. Understanding these factors and making proper adjustments will transform your solar cooking results.
Correct Sun Tracking Methods
Since solar cookers depend entirely on sunlight to generate heat, proper sun tracking is essential for successful cooking.
You'll need to adjust your cooker's position every 1-2 hours to maintain ideal sun exposure, ensuring the UV rays directly hit your cooking vessel.
For convenience, you can use automated solutions like the Solar Tracker by Sunshine Innovations, which eliminates manual adjustments by automatically following the sun's movement.
If you're tech-savvy, you might consider building a DIY tracking platform using solar panels and motors.
When tracking manually, position your cooker to maximize direct sunlight throughout the cooking period. Using dark-colored cookware will help absorb and retain heat more effectively during the cooking process.
On cloudy days, start cooking earlier and plan for longer cooking times.
Solar Panel Reflector Alignment
You'll need to track the sun's movement throughout the day to maintain proper alignment between your reflector panels and cooking surface.
Your reflector angle should stay between 0-10 degrees above the horizon for winter conditions, while ensuring the collector plane remains almost perpendicular to the reflector's surface.
Remember to adjust your reflector setup seasonally by adding 15 degrees to your latitude in winter and subtracting 15 degrees in summer for ideal solar energy capture. Using polished aluminum reflectors will provide optimal performance due to their high reflectivity and excellent thermal conductivity.
Tracking Sun's Daily Path
The Sun's daily path plays a critical role in maximizing your solar stove's efficiency through proper reflector alignment.
You'll need to track the Sun's movement throughout the day to guarantee ideal heating performance.
You can use either active or passive tracking methods. Active tracking employs sensors like LDRs and electric motors to automatically adjust your stove's reflectors, while passive systems use compressed gas or liquid expansion to follow the Sun without electricity.
Since the Sun rises in the east and follows a predictable arc across the sky each day, positioning your reflectors correctly is crucial for maintaining consistent heat.
If you're using a dual-axis system, you'll get more precise tracking as it adjusts both horizontally and vertically, though it's more complex and expensive than single-axis options.
Remember that your geographical location and seasonal changes affect the Sun's path, so you'll need to account for these variations when positioning your stove's reflectors.
Optimal Reflector Panel Angles
Setting your solar stove's reflector panels at ideal angles can make the difference between a lukewarm meal and properly cooked food.
You'll want to keep your reflector angles between 45 and 90 degrees for best performance, with 60 degrees being a reliable starting point. Anything less than 45 degrees will reflect sunlight back toward the sun, while angles beyond 90 degrees can shade your oven window.
Consider these critical factors when positioning your reflectors:
- Your latitude affects the best angle – higher latitudes require steeper angles
- Seasonal changes demand adjustments, with winter requiring lower tilt angles (0-10 degrees above horizon)
- The reflector's size and shape must match your oven window to avoid wasting reflected light
Remember to adjust your panels throughout the year as the sun's path changes to maintain cooking efficiency.
Optimal Cooking Times
Understanding ideal cooking times is essential for successful solar cooking, as meals typically take longer than conventional methods.
You'll need less than an hour for quick items like eggs and melted cheese, while cookies and quick breads require 1 to 1.5 hours. More substantial foods like fish, casseroles, and cut meat need 2 to 2.5 hours, while whole chickens and pot roasts take 3 to 3.5 hours.
Your cooking times will vary based on sun exposure and temperature conditions. For best results, cook between 10 a.m. and 2 p.m. when sunlight is strongest.
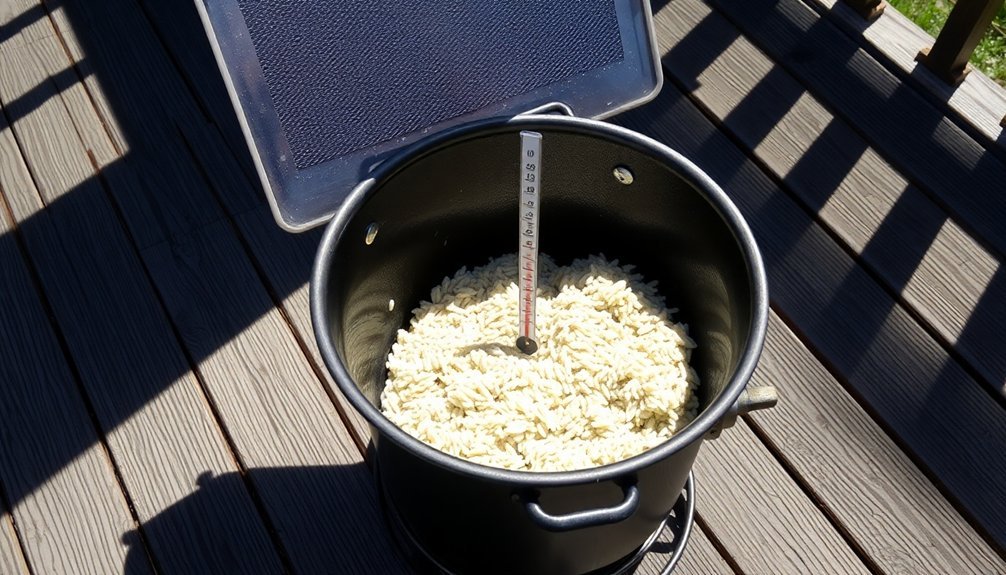
You'll need to adjust your timing if cooking outside peak hours or in less-than-ideal conditions. Use a food thermometer to verify proper doneness, especially for meat dishes.
Weather Impact Assessment
While outside temperatures have minimal impact on solar cooking, direct sunlight remains the most critical factor for your cooker's performance.
Even in freezing weather, your well-insulated solar cooker can reach 350°F on bright, sunny days. However, clouds and overcast conditions will greatly reduce your cooking reliability.
Environmental challenges can affect your cooker's efficiency in several ways:
- Dust storms can decrease heat output by 30% due to scratched reflective surfaces
- Variable sunlight intensity during dawn or dusk will slow cooking progress
- Seasonal changes impact available cooking hours, especially outside summer months
You'll need to adapt your cooking schedule to weather conditions.
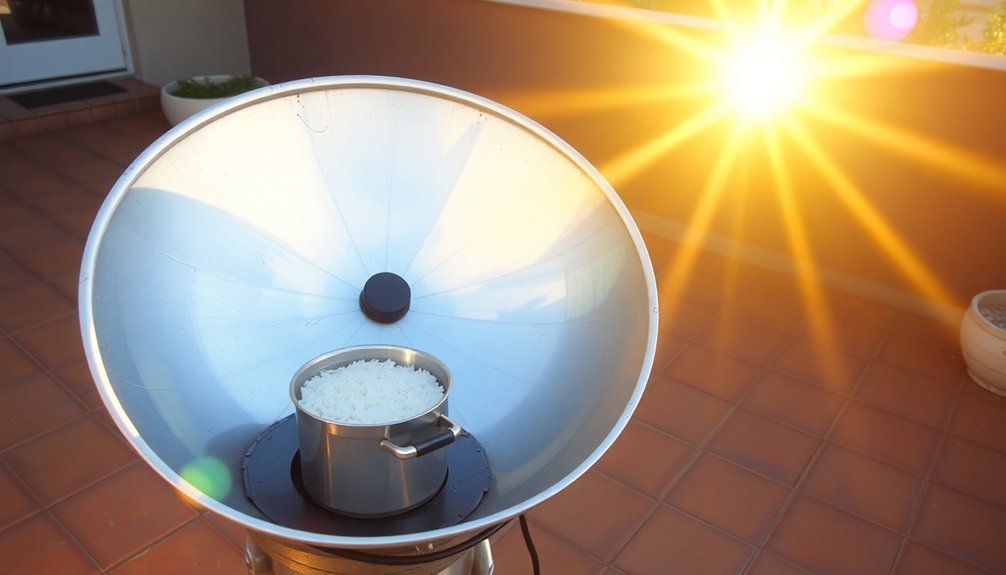
If you're using a parabolic cooker, remember to reorient it every 20-30 minutes and wear protective sunglasses.
Consider using a fireless cooker to keep food warm when sunlight becomes unreliable.
Positioning Your Solar Cooker
Beyond weather conditions, proper positioning of your solar cooker makes the difference between a successful meal and undercooked food.
You'll need to place your cooker on a level, dry surface between 11 AM and 3 PM when sunlight is strongest. Make sure there's no shade from trees or buildings blocking your setup.
To maintain peak heating, you'll want to adjust your cooker every 20-30 minutes to track the sun's movement. Point the shorter front panel east for noon meals or west for evening cooking.
Keep the reflectors angled correctly and clean them regularly for maximum efficiency. If you're cooking in winter, start earlier around 10 AM and consider laying the cooker on its back for high latitudes.
Use stones or bricks to stabilize against wind when needed.
Heat Retention Techniques
Your stove's performance depends heavily on proper insulation placement around your cooking vessel, requiring at least 6 inches of material like hay, sawdust, or cotton waste on all sides.
To maximize heat retention, wrap the bottom, sides, and top with reflective materials such as aluminum foil, and guarantee all seams are tightly sealed.
Using a clear lid or oven bag creates an essential greenhouse effect while trapping valuable heat inside your cooking vessel, allowing food to maintain cooking temperatures for hours.
Insulation Material Placement Tips
To maximize your solar oven's efficiency, proper insulation placement plays a crucial role in maintaining consistent cooking temperatures. Start by lining the entire interior of your box, including the bottom, sides, and lid, with appropriate insulating materials.
You'll want to seal all seams with tape to prevent heat from escaping through gaps.
For peak performance, consider these critical placement strategies:
- Layer the bottom of your oven with thick insulation to prevent heat loss through the base
- Position insulation around interior walls, ensuring it doesn't interfere with your heat-absorbing black surfaces
- Cover the inside of the lid with reflective material or insulation to bounce heat back toward your food
Remember to integrate your insulation with other components like reflective panels and clear glazing, allowing sunlight in while keeping valuable heat trapped inside.
Heat-Trapping Lid Techniques
Since effective heat retention is essential for solar cooking success, mastering proper lid techniques can dramatically improve your stove's performance.
Choose transparent covers like glass lids or high-temperature plastic bags that allow sunlight to enter while trapping valuable heat inside. Don't use aluminum foil as a cover since it reflects sunlight away from your food.
Make sure you're creating a proper seal to maintain pressure and steam accumulation, which raises the boiling point and speeds up cooking.
You'll need to adjust your lid's position throughout the day to track the sun's movement. If your pot isn't black, apply non-toxic dark paint to enhance heat absorption.
During windy conditions, opt for glass lids over plastic wrap, as they're more stable and provide better heat retention.
Frequently Asked Questions
Can I Use My Solar Stove Indoors Near a Sunny Window?
You can cook with a solar stove near a window, but it won't be as effective as outdoor use. Modern windows block UV rays, and you'll need a large, south-facing window for best results.
What Materials Can I Safely Use for Cooking in a Solar Stove?
You'll get the best results using dark-colored cookware like black metal pots, dark glass dishes, or cast iron. Always use heat-safe containers and avoid plastics that can melt. Black canning jars work great too.
How Do I Prevent Food From Sticking to Solar Cookware?
You'll prevent sticking by drying ingredients thoroughly, preheating your cookware, using room-temperature food, and avoiding overcrowding. Add oil to hot pans and maintain proper spacing between food items while cooking.
Will Food Taste Different When Cooked in a Solar Stove?
Your food will taste similar to oven-cooked meals, but without charred flavors from traditional grilling. You'll notice it's more tender and juicy since solar cooking retains moisture and natural flavors better than conventional methods.
Can I Use My Regular Pots and Pans in a Solar Stove?
You can use your regular pots and pans, but they should be dark-colored and thin-walled for better heat absorption. Light or reflective cookware won't work as efficiently in your solar stove.
In Summary
Your solar cooker's performance depends heavily on how well you've mastered these key elements. Track the sun's movement, align your reflectors properly, and time your cooking during peak sunlight hours. Don't forget to position your cooker ideally and use proper heat retention methods. With practice and attention to these details, you'll transform your solar stove from a frustrating gadget into an efficient cooking tool.


Leave a Reply