To find the best tilt for maximum solar cooking, you'll want to adjust your cooker's angle based on your latitude and season. In winter, add 15-20° to your latitude for steeper angles, while summer requires shallower angles between 20.8° to 27.6° for horizontal cookers. Position your cooker directly at the sun during peak hours (11 AM to 3 PM) and make regular adjustments to maintain alignment. Track shadows to optimize exposure, and consider local weather conditions – increase tilt in cold weather and decrease it in high humidity. Understanding these key factors will reveal the full potential of your solar cooking experience.
Understanding Solar Angles
When setting up a solar cooker, understanding the sun's angles is vital for maximizing its efficiency.
You'll need to take into account both the sun's elevation and its movement throughout the day to position your reflectors correctly. A ±15° angular tolerance is typically required for unattended cooking.
You can use a protractor to measure and adjust your reflector angles precisely. For best performance, your solar cooker should face the sun directly, similar to how solar panels face south in the U.S. Non-parabolic reflectors may perform better than parabolic ones for durability.
If you're dealing with low sun angles, try using multiple reflectors with different tilt angles. The geometric design, including the glass cover's tilt angle, plays an important role – for example, a 15° tilt works best at 40.66° N latitude.
Remember that local weather conditions and seasons will affect your best setup.
Seasonal Adjustments For Best Results
You'll need to adjust your solar cooker's tilt angle considerably during winter months, typically positioning it steeper to catch the sun's lower path across the sky.
In summer, you should position your cooker at a shallower angle while monitoring heat flow carefully to prevent overheating and potential damage to food. Frequent tracking becomes necessary to maintain optimal cooking conditions as the sun moves across the sky.
These seasonal adjustments aren't just helpful – they're essential for maintaining consistent cooking temperatures and achieving the best results throughout the year.
Winter Cooking Tilt Angles
Mastering winter solar cooking requires strategic tilt angle adjustments to compensate for the season's lower sun position.
You'll need to add 15-20 degrees to your latitude to find the ideal tilt. For instance, if you're at 37 degrees latitude, aim for a 45-57 degree tilt.
Your choice of cooker matters greatly. Box and parabolic cookers work best in winter due to their adjustability, though parabolic models need frequent repositioning. Using multiple types of cookers can help optimize your cooking across different seasons.
If you're using a panel or funnel cooker, be careful with steep tilts to prevent spills.
Location plays an essential role too. If you're near the 30th parallel or lower, you'll enjoy better cooking conditions.
Higher elevations also help, as they provide more intense UV rays, boosting your cooker's efficiency regardless of the season.
Summer Heat Flow Control
Summer solar cooking demands a different approach than winter techniques.
You'll need to adjust your cooker's tilt angle to higher positions, ranging from 20.8° to 27.6° for horizontal cookers and 41.5° to 50.6° for inclined models. These steeper angles help compensate for the sun's lower zenith angle and maximize radiation capture.
For ideal heat flow control in summer, follow these key adjustments:
- Tilt your cooker more steeply than in winter to align with direct sunlight.
- Check and readjust the angle throughout the day, especially with parabolic designs.
- Use compensated inclines on box cookers for better performance.
You'll notice considerably improved cooking efficiency when you properly align your cooker's surface with the sun's rays.
Remember to handle tilted cookers carefully to prevent spills while maintaining ideal heat flow.
Tracking The Sun's Movement
You'll get the most consistent cooking results by tracking the sun's movement, which affects both your heat patterns and light distribution throughout the day.
Without proper tracking, shadows from the cooker's walls can reduce efficiency and create uneven heating zones in your cooking chamber.
Understanding these patterns lets you optimize your cooker's position every 20-30 minutes, ensuring maximum solar exposure and even heat distribution across your cooking surface.
Time-Based Heat Patterns
To maximize your solar cooking success, understanding the sun's daily movement patterns is essential. The most effective cooking window falls between 11:00 am and 3:00 pm when the sun's overhead position provides ideal UV rays and heat intensity.
You'll get the best results by starting early to preheat your cooker and adjusting its position throughout the day.
The sun's movement affects your cooking temperatures in predictable patterns:
- Peak hours (11 am – 3 pm) are ideal for high-temperature cooking like baking bread.
- Early morning (10 am) works best for preheating and preparation.
- Late afternoon (until 4 pm) can be used for maintaining warmth and slow-cooking.
You'll need more frequent adjustments during winter months, while summer allows for longer periods between repositioning your cooker.
Light Distribution Benefits
Building on the sun's daily patterns, proper light distribution can greatly boost your solar cooking efficiency.
Just as LED lights provide targeted illumination in modern kitchens, you'll want to position your solar cooker to capture and distribute sunlight effectively across your cooking surface.
You'll achieve ideal results by ensuring even light distribution throughout your cooking area, similar to how under-cabinet lighting eliminates shadows on kitchen countertops.
Position your cooker's reflective surfaces to minimize dark spots and maximize heat concentration. Direct sunlight should hit your cooking vessel uniformly, reducing cold spots that can lead to uneven cooking.
Shadow Impact Analysis
When tracking the sun's movement throughout the day, understanding shadow patterns becomes essential for optimal solar cooking results.
You'll need to analyze shadow impacts at different times to maximize your cooker's exposure to sunlight. By calculating the sun's azimuth and altitude angles, you can determine ideal positioning and avoid shadowed areas.
To effectively track shadows for your solar cooker, follow these key steps:
- Monitor shadow lengths during peak cooking hours (2 hours after sunrise until 2 hours before sunset).
- Calculate sun angles using multipliers for different times of day (e.g., 2.49 for early morning positions).
- Compare shadow impacts between different cooker locations to find the spot with minimal shading.
Using visualization tools or simple observation methods, you'll be able to identify the best tilt angles that minimize shadow interference and maximize direct sunlight exposure.
Maximizing Solar Heat Collection
Successful solar cooking depends heavily on maximizing the amount of solar heat your cooker can collect and retain. To optimize your setup, you'll need to adjust your cooker's tilt angle based on seasonal changes and your latitude.
In winter, use a steeper tilt since the sun sits lower in the sky, while in summer, a shallower angle works better.
Add reflective surfaces like aluminum foil or mirrors to direct more sunlight toward your cooking area. Position these materials strategically to capture sunlight throughout the day.
Don't forget to use dark-colored cookware, which absorbs sunlight more efficiently, and guarantee proper insulation using materials like newspaper or cotton balls.
Pre-heat your cooker for 15-20 minutes, and always use lidded containers inside oven bags to maintain consistent temperatures for effective cooking.
Equipment Setup and Positioning
Proper equipment setup and positioning form the foundation of effective solar cooking.
You'll need to carefully unfold your solar oven, ensuring the ventilation flaps are positioned correctly at the bottom. Once assembled, you'll want to aim it directly at the sun, using your own shadow as a guide when standing behind the unit.
For ideal stability and performance, install your support rods with precision:
- Connect the two halves of each rod before installation
- Position the tops slightly offset from upper corners
- Slide the bottom ends into the lower corners, maintaining parallel alignment
To track the sun's movement throughout the day, you can mount your oven on a Lazy Susan or implement a more sophisticated tracking system using solar panels and servo motors.
Remember to adjust the oven's position periodically for consistent cooking temperature.
Weather Impact on Tilt
The sun's angle and local weather conditions greatly influence the ideal tilt for your outdoor cooking equipment.
You'll need to adjust your cooking surface's tilt based on temperature, humidity, and weather patterns to maintain best heat distribution.
In high humidity, you should decrease the tilt angle slightly since moisture evaporates more slowly, keeping surface heat high.
During cold weather or at higher altitudes, increase the tilt to compensate for slower cooking times and lower atmospheric pressure.
When it's windy, you'll want to position your equipment at a lower angle to maintain stable temperatures and protect against heat loss.
Consider using protective barriers or adjustable legs to modify your tilt as weather conditions change.
This flexibility helps you maintain consistent cooking temperatures regardless of environmental challenges.
Testing Your Optimal Angle
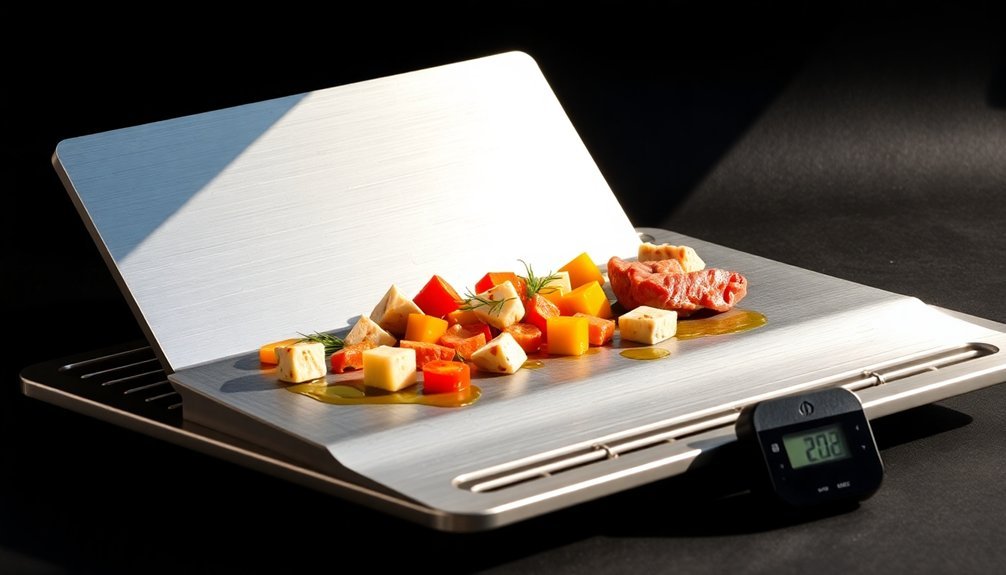
Now that you understand weather's influence on cooking angles, determining your ideal tilt requires systematic testing. Using an accurate thermometer is essential for this process, so first verify your thermometer's accuracy using the ice water method.
To find your best cooking angle:
- Test three different tilt positions (15°, 30°, and 45°) while monitoring internal temperatures with a calibrated digital probe thermometer.
- Record cooking times and temperature consistency at each angle.
- Compare results to identify which angle produces the most even cooking.
Don't forget to account for your thermometer's potential inaccuracy when measuring temperatures. If your thermometer reads 5° lower in the ice water test, adjust your target temperatures up by 5° during your angle testing.
This systematic approach will help you determine the most effective tilt for your cooking setup.
Frequently Asked Questions
Can I Use My Tilt Skillet Outdoors for Solar Cooking?
While you can technically use a tilt skillet outdoors, it's not designed for solar cooking. You'll get better results using a proper solar cooker with reflective surfaces and appropriate tilt adjustments.
How Does Altitude Affect the Optimal Tilt Angle?
You'll need to increase your tilt angle at higher altitudes since the sun's position changes. Add about 5 degrees to your base angle for every 1,000 feet of elevation to maintain ideal solar exposure.
What Emergency Backup Systems Work Best With Tilted Solar Cookers?
You'll get the best backup with a layered system: combine your tilted solar cooker with a rocket stove and insulated containers. This guarantees continuous cooking even when sun conditions aren't ideal.
Do Different Cooking Surfaces Require Different Tilt Calculations?
You'll need to adjust your tilt calculations based on your cooking surface. Flat griddles require less tilt than curved surfaces, while wok-style pans need steeper angles for proper food movement and control.
Are There Smartphone Apps for Calculating Precise Cooking Angles?
Yes, you'll find several smartphone apps that measure angles precisely. You can download angle-measuring apps like "Bubble Level" or "Angle Meter PRO Plus" from your app store to calculate exact surface tilts.
In Summary
By adjusting your solar cooker's tilt throughout the year, you'll maximize its cooking efficiency. Remember to check your location's specific sun angles and adjust seasonally – higher in winter, lower in summer. Keep testing and tracking your results to find what works best. Don't forget that weather conditions will affect your ideal angle, so stay flexible and make small adjustments as needed for the best cooking performance.


Leave a Reply