
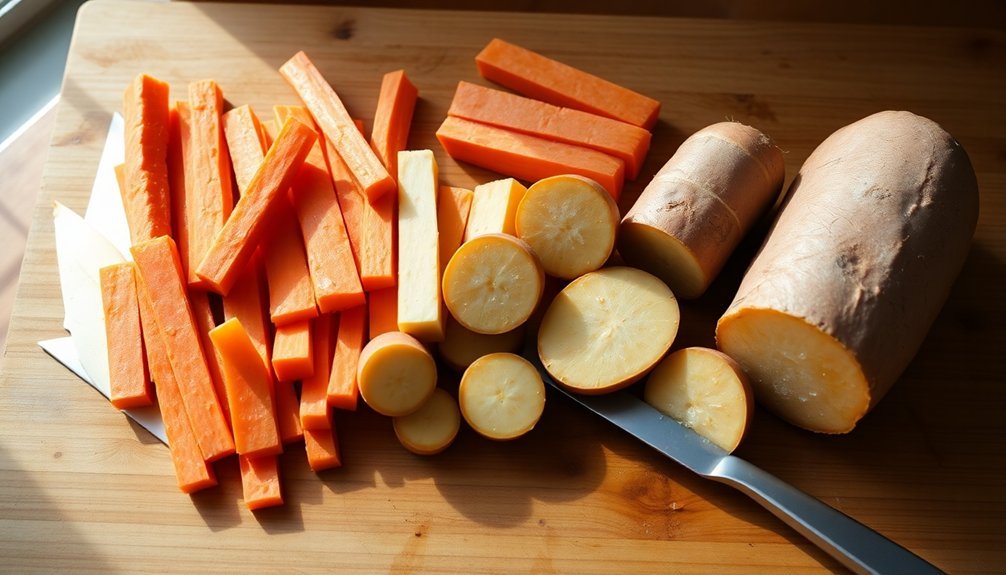
To maximize your sun-powered cooking success, cut root vegetables into uniform 1½ to 2-inch pieces for large batches or ¾-inch pieces for smaller portions. You'll want to maintain consistent sizes to guarantee even cooking and proper heat absorption. For dense roots like rutabagas, opt for smaller cuts, while tender vegetables like carrots work well in matchstick-sized julienne strips. Spread your vegetables in a single layer on the cooking surface, allowing proper airflow between pieces. Consider seasonal adjustments – smaller cuts work better in lower sun intensity. These fundamental cutting techniques lay the groundwork for mastering solar cooking methods.
Essential Root Vegetable Cuts
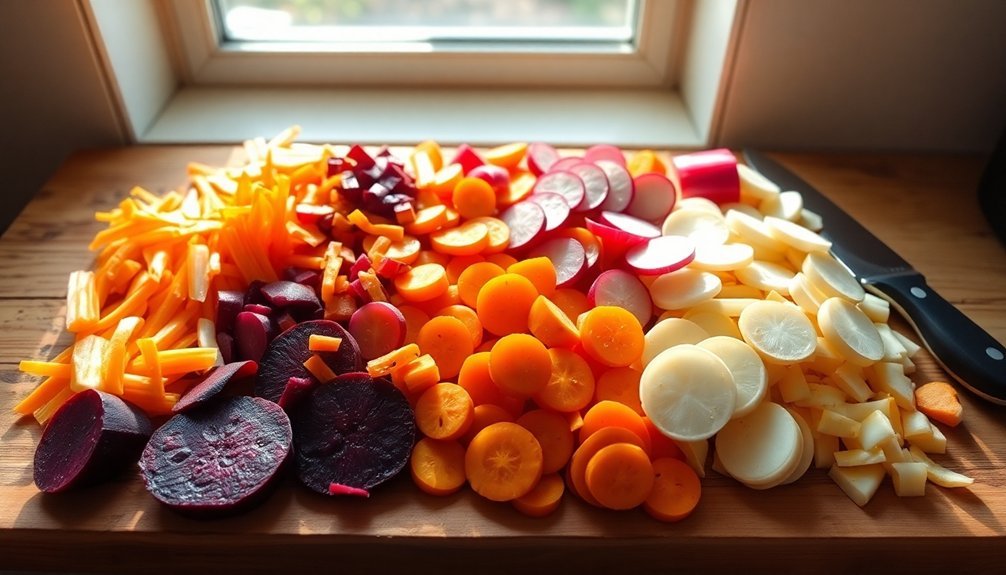
Four essential cutting techniques form the foundation of root vegetable preparation: julienne, brunoise, paysanne, and oblique cuts.
When you're working with root vegetables, you'll want to master these methods to enhance both presentation and cooking efficiency. The aromatic foundation in classic recipes often starts with properly cut root vegetables.
The julienne cut creates matchstick-sized strips (1/16 x 1/16 x 2 inches), perfect for quick-cooking dishes and colorful garnishes.
For soups and stews, you'll find the brunoise cut invaluable, producing tiny 1/8-inch cubes that cook evenly and release maximum flavor.
The paysanne cut yields quarter-sized, thin slices that work beautifully for roasting and sautéing.
When you're aiming for elegance, try the oblique cut – a 45-degree angle slice that adds visual interest to your dishes and creates appealing height in presentations.
Maximizing Solar Heat Distribution
While proper cutting techniques set the stage for cooking, understanding heat distribution maximizes your root vegetables' solar cooking potential.
You'll get the best results by focusing on the temperature at root level, where it matters most. Research shows that maintaining root zone temperatures can enhance growth and quality by up to 1.2°C compared to untreated areas. By implementing solar-powered heating systems with looped tubing or PVC piping, you can maintain consistent temperatures that'll enhance both flavor and texture.
- Use EPDM rubber tubing or PVC pipes in a looping pattern to distribute solar-heated water evenly beneath your cooking surface.
- Install aluminum sheet fins to boost heat transfer, raising temperatures by up to 18°C.
- Consider bench-top heating systems that use half the energy of traditional methods.
- Combine water-curtain and floor-heating systems for peak energy efficiency while improving vegetable quality.
These methods guarantee your root vegetables cook thoroughly while taking advantage of sustainable solar energy.
Slice Thickness Guidelines
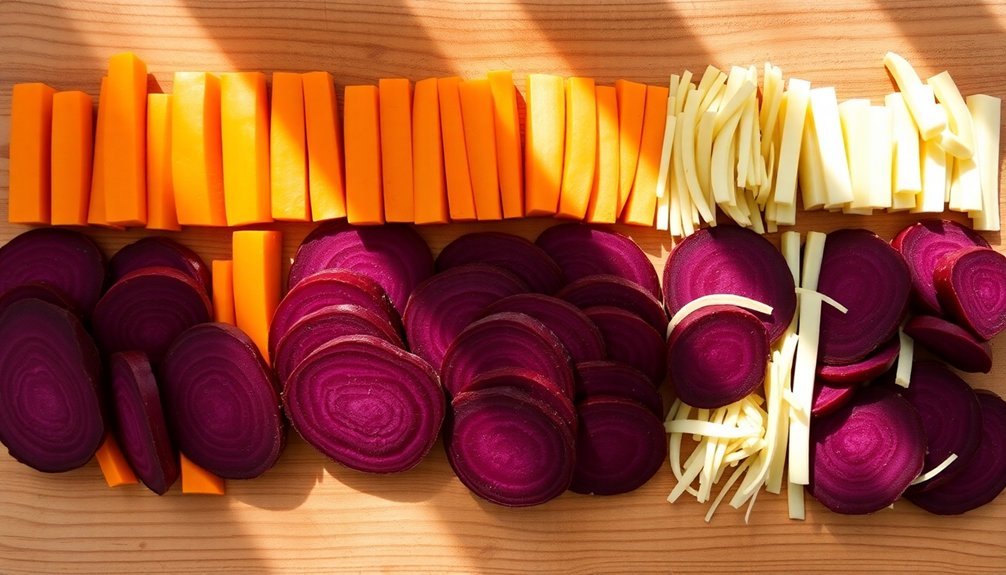
Since proper slice thickness directly impacts cooking results, mastering the right cuts for your root vegetables is vital. You'll want to adapt your slicing technique based on your cooking method and desired outcome.
| Method | Thickness | Best For |
|---|---|---|
| Raw | 1/8" or less | Salads, veggie trays |
| Roasting | 1/4" or 1" chunks | Beets, carrots, turnips |
| Julienne | 1/8" x 2-3" long | Stir-fries, garnishes |
| Gratin | 1/4" | Layered dishes |
| Sautéing | 1/8" to 1/2" | Quick-cooking dishes |
For sun-powered cooking, uniform thickness is essential to guarantee even heat distribution. When preparing vegetables for solar cooking, you'll get the best results by maintaining consistent cuts throughout your preparation. Using a well-sharpened knife will help achieve the precision needed for these specific measurements. Remember that thicker cuts require longer cooking times, while thinner slices cook more quickly.
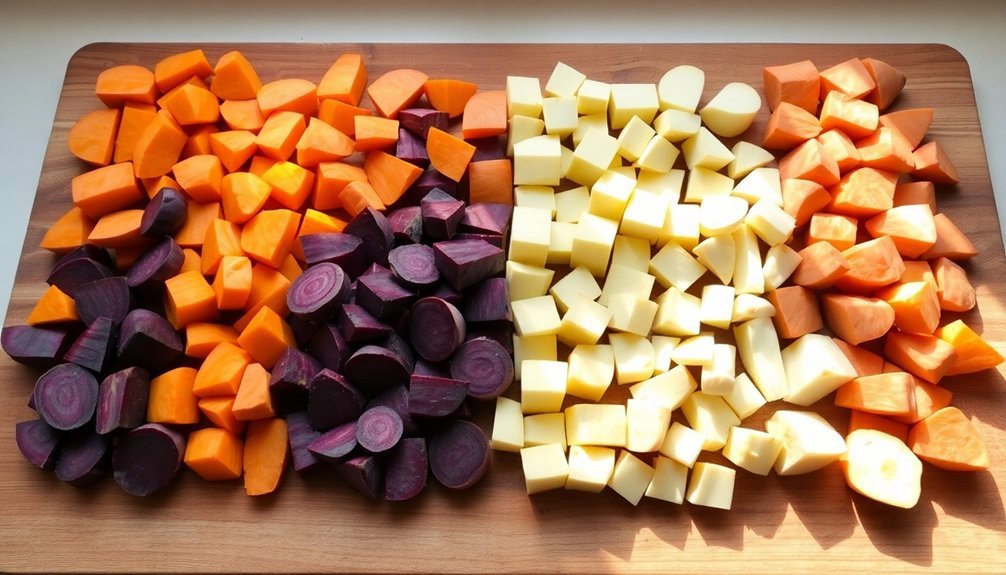
Dicing For Even Results
You'll want to guarantee uniform dicing of root vegetables by creating consistent-sized cubes that cook evenly in your solar-powered dishes.
Keep your work area clear and grip your sharp chef's knife firmly, maintaining a safe distance between the blade and your fingers while dicing.
A sturdy cutting board and sharp knife are essential tools for achieving perfect cubes, allowing you to slice through dense root vegetables with precision and control.
Uniform Size Matters Most
Every successful root vegetable dish starts with uniform dicing. When you're cutting your vegetables into 1½ – 2 inch pieces, you're setting yourself up for consistently delicious results.
You'll achieve even cooking times and perfect browning across all your root vegetables, which means better flavor distribution in every bite.
- Even browning and texture development across all pieces
- Consistent cooking times, preventing some pieces from being under or overcooked
- Better seasoning distribution on uniformly sized surfaces
- Proper air circulation between pieces during roasting
Remember to adjust your cuts based on the vegetable type – carrots and parsnips might need slightly smaller pieces than potatoes or turnips.
If you're using pre-cut vegetables, you'll need to modify your cooking times accordingly. Just make sure you've thoroughly cleaned each vegetable before you start cutting.
Quick Prep Safety Tips
Before diving into root vegetable prep, establishing proper safety measures will protect both you and your ingredients. Start by washing your hands thoroughly with soap and warm water, and guarantee your workspace and tools are clean.
You'll want to rinse your root vegetables under cold running water, using a clean vegetable brush to scrub away dirt from carrots and beets. Don't soak them, as this can lead to moisture issues. Instead, let the water run over them while you work.
Remove any damaged parts and trim the tops, leaving an inch of stem on beets to preserve their color. If you're peeling carrots, give them another quick rinse afterward.
Keep your prepped vegetables separate to prevent cross-contamination, and always use clean utensils for cutting and handling.
Tools For Perfect Cubes
Achieving perfectly diced root vegetables starts with selecting the right tools for the job.
You'll want to equip your kitchen with both manual and specialized tools to guarantee consistent results. A sharp chef's knife and sturdy cutting board form your foundation, while tools like mandolines and vegetable choppers can help you achieve uniform cuts more quickly.
- Manual tools: Chef's knife, cutting board, and peeler for basic prep work
- Specialized equipment: Mandolines and dice cutters for precision and consistency
- Electric options: Food processors for larger batches and time savings
- Helpful extras: Julienne peelers and French fry cutters for creating uniform strips
For best results, you'll want to chill your vegetables before cutting and keep them dry to prevent slipping.
Remember to group similar-sized vegetables together to maintain even cooking times in your sun-powered dishes.
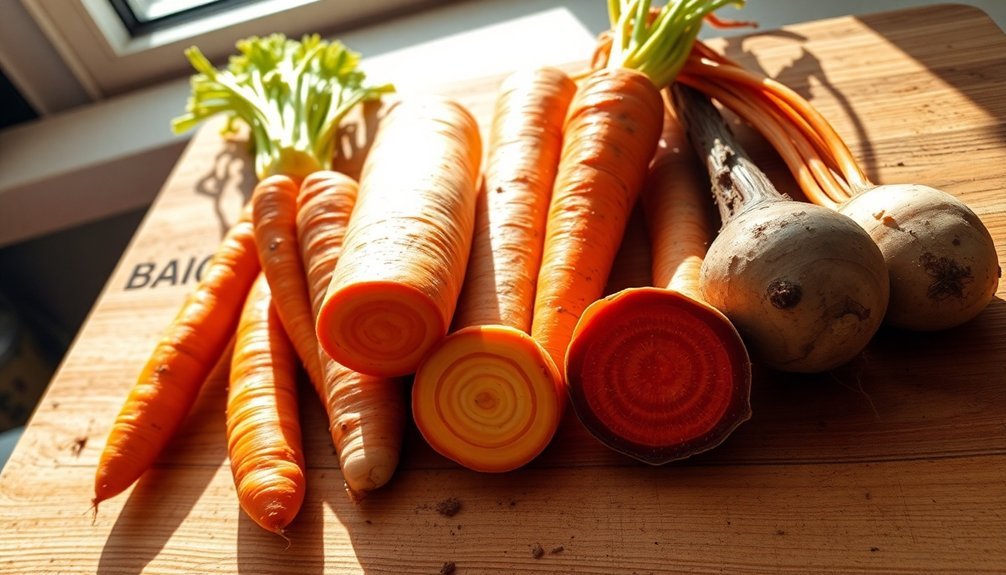
Root Size Comparison Chart
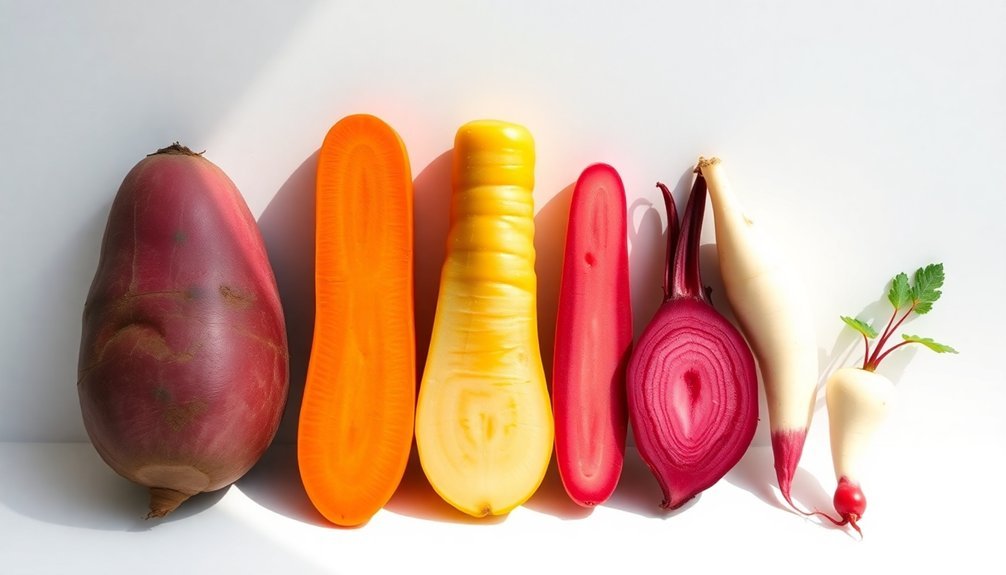
Your root vegetable selection ranges from the largest turnips and beets at golf-ball size down to petite radishes at dime size, making it easy to plan your cooking portions.
You'll want to select vegetables at their peak sizes – carrots at 4-6 inches, radishes at 1.5-3 inches, and beets at ultra (acorn) to baby size – for ideal flavor and texture in your recipes.
When storing these vegetables, you can maximize space by grouping similar-sized roots together, keeping in mind that larger specimens like mature beets and turnips need more room than smaller options like baby radishes.
Largest To Smallest Roots
Understanding root vegetables' sizes helps you plan garden spacing and harvest times effectively.
You'll find that rutabagas, potatoes, and sweet potatoes dominate the large category, often needing more space and longer growing periods.
Medium-sized roots like turnips and carrots offer versatility in your garden layout, while smaller varieties give you quick-harvest options.
- Largest roots (rutabagas, potatoes) take 60+ days to mature and need significant spacing
- Medium roots (turnips, carrots) mature in 30-40 days with moderate spacing needs
- Small roots (baby turnips, petite beets) can be harvested in about 30 days
- Micro varieties (tiny radishes, ultra-petite beets) are perfect for tight spaces and quick results
You'll get better yields by matching root sizes to your available garden space and desired harvest timeline.
Ideal Cooking Size Guide
Mastering root vegetable preparation starts with a clear size guide for consistently delicious results. You'll want to cut your roots into uniform 1½-inch chunks to guarantee even cooking and perfect caramelization.
| Vegetable Type | Ideal Cut Size |
|---|---|
| Dense Roots (potatoes, turnips) | 1½-inch cubes |
| Medium Roots (carrots, parsnips) | 1½-inch chunks |
| Tender Roots (mushrooms, onions) | 1½-inch pieces |
When you're working with mixed vegetables, maintaining consistent sizing becomes even more essential. This uniformity guarantees all pieces finish cooking simultaneously at 425°F (450°F for sweet potatoes). You'll know you've got it right when the outsides are golden brown and the insides are tender after 30-45 minutes of roasting. Remember to rotate your vegetables every 15 minutes for that perfect, even browning.
Storage Space Requirements
After perfecting your cutting technique, proper storage becomes the next key to success with root vegetables.
You'll need to take into account both depth and space requirements when planning your storage solution. Root vegetables typically need about 18 inches of depth, whether you're storing them in a root cellar, basement, or outdoor trench.
- Potatoes and sweet potatoes require the most space due to their larger size and need for dark conditions.
- Carrots can be packed more densely in boxes with damp sand, maximizing vertical storage.
- Beets and celeriac work well on racks or in containers with proper spacing to maintain airflow.
- Small root vegetables like radishes need less space but still require proper humidity control.
Remember to keep your storage area between 32-45°F and maintain high humidity levels while allowing for adequate ventilation.
Solar Cook Times By Cut
When preparing root vegetables for solar cooking, the size and shape of your cuts directly impact cooking duration.
You'll find that smaller, uniform pieces cook more quickly and evenly than larger chunks. For best results, cut your root vegetables into 1-inch cubes or thin slices.
During peak hours (10 a.m. to 2 p.m.), these smaller cuts can cook in about 2-3 hours, while whole or larger pieces may need up to 6 hours. You'll want to use a black pot with a clear lid to maximize heat absorption and retention.
Remember to adjust your solar oven's position every hour to maintain consistent temperature. If you're cooking carrots alongside other root vegetables, verify they're cut to similar sizes to achieve even cooking throughout.
Optimal Shapes For Absorption
To maximize solar cooking efficiency, the shape and arrangement of your ingredients play an essential role in heat absorption. Cut your root vegetables into uniform, smaller pieces to guarantee even cooking and ideal heat distribution.
You'll want to arrange them in a single layer within your solar cooker, preventing any overlap that could create cold spots or uneven results.
- Dice vegetables into similar-sized pieces to promote consistent cooking times
- Position your cooker with an east/west orientation for steady heat exposure
- Use a shallow cooking container to minimize heat loss and maintain temperature
- Arrange ingredients in one layer to prevent shadowing and maximize sun exposure
Your solar cooker should be longer in the east/west dimension, with reflective materials positioned to direct sunlight onto your carefully prepared vegetables.
Keep the interior dark to enhance heat absorption while using a transparent lid to trap warmth.
Preparation Tools And Equipment
Essential preparation tools make solar cooking with root vegetables both efficient and enjoyable.
You'll need a root vegetable cutting machine that offers versatile options for strips, slices, and cubes, with adjustable thickness from 2-10mm. Its stainless steel construction guarantees lasting durability and food safety.
For harvesting, you'll want a digging fork to lift root vegetables and aerate soil. The Cobra hand-held tool proves invaluable for soil preparation and mixing compost.
When it comes to precision cuts, bonsai scissors offer excellent control for delicate trimming, while the Felco No. 6 pruner handles thicker stalks with ease.
These tools' specialized functions complement each other, creating a complete toolkit that'll help you prepare root vegetables perfectly for solar cooking.
Moisture Control Through Cutting
The thickness of your root vegetable slices directly impacts how quickly they'll lose moisture during preparation.
You'll want to keep cuts uniform and appropriately sized for your cooking method, as inconsistent slicing can lead to uneven moisture distribution.
When cutting root vegetables into larger pieces, they'll retain more moisture than thin slices, which can dry out rapidly during extended prep time.
Slice Size Affects Dryness
Mastering slice size is essential for controlling moisture in root vegetables. When you're preparing roots for sun-powered cooking, remember that larger cuts retain more moisture due to their smaller surface-to-volume ratio.
You'll want to balance cooking speed with moisture retention by choosing the right size for your needs.
- Uniform pieces guarantee even cooking and consistent moisture across all cuts
- Larger cuts preserve more moisture but take longer to cook through
- Small cuts cook faster but risk drying out due to increased surface exposure
- Keeping the skin on potatoes and small stems on beets and carrots helps lock in moisture
Cut your vegetables just before cooking to minimize moisture loss through exposed surfaces.
For best results in sun cooking, choose larger, uniform pieces when you want to maintain moisture levels throughout the cooking process.
Water Loss During Prep
Beyond slice size, proper cutting techniques during prep work can greatly impact moisture retention in root vegetables. When you're preparing root crops, you'll want to remove leafy portions carefully, leaving only small petiole stubs.
If you cut too deeply, you'll expose vulnerable tissue that leads to excess moisture loss. To protect your vegetables from pathogens, let cut surfaces dry naturally. You don't need to worry as much with rutabagas and allium crops like onions and garlic, but for most root vegetables, avoid deep cuts that create entry points for harmful organisms.
During prep, it's best to handle your vegetables when they're dry and avoid washing them before storage. Keep different vegetables separated to prevent moisture transfer and maintain their natural protective barriers.
Storage After Solar Cooking
When storing root vegetables after solar cooking, proper temperature and humidity control become essential for maintaining their quality and extending shelf life.
Keep your cooked vegetables in airtight containers at temperatures between 35-40°F to prevent spoilage. You'll want to monitor moisture levels carefully, as excess humidity can lead to mold growth while too little can cause your vegetables to dry out.
- Store cooked root vegetables in covered containers with small ventilation holes to maintain proper moisture balance
- Place containers in a dark location to prevent quality deterioration
- Check stored vegetables regularly for signs of spoilage and remove any affected pieces
- Use clean, dry storage containers and avoid stacking them to prevent crushing
Remember to label your containers with cooking dates and consume the vegetables within 3-4 days for best results.
Seasonal Cutting Adjustments
To maximize the efficiency of solar cooking throughout the year, adapting your cutting techniques based on seasonal changes can greatly impact cooking times and results.
During fall and winter, when sun intensity is lower, you'll want to cut root vegetables like carrots, beets, and turnips into smaller, uniform pieces to guarantee faster cooking. This is especially important when daylight hours are limited.
In spring and summer, when you've got stronger sunlight and longer days, you can opt for slightly larger cuts. However, you'll still need to maintain consistency in size for even cooking.
Remember to adjust your cuts based on the specific vegetable – dense roots like rutabagas need smaller cuts than tender spring radishes.
For year-round solar cooking success, match your cutting technique to both the season and the vegetable's texture.
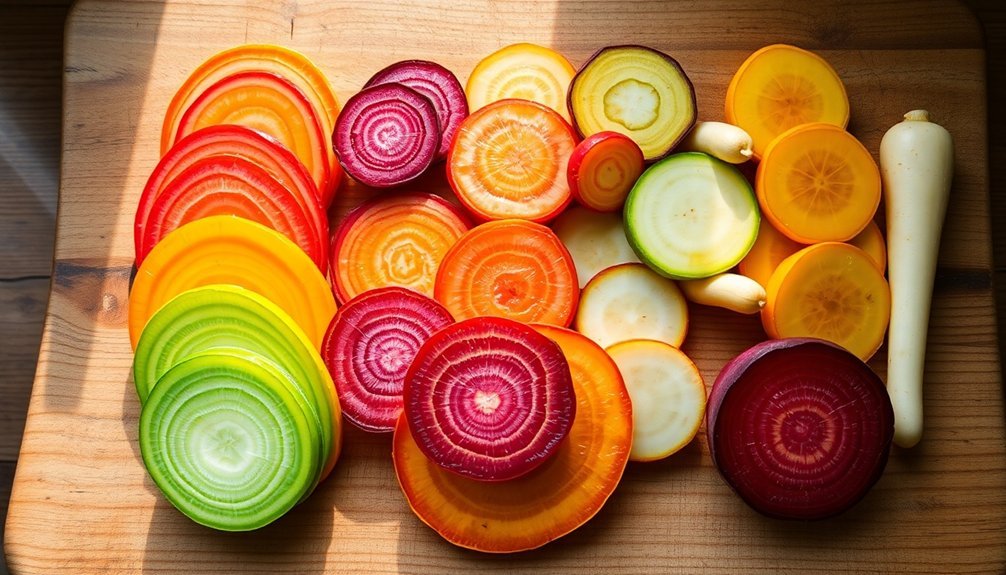
Root Texture Considerations
Masterful solar cooking begins with understanding the diverse textures of root vegetables.
You'll want to select firm, unblemished roots that feel heavy for their size, as these characteristics indicate peak freshness and peak cooking potential.
When you're preparing roots for solar cooking, consider how different cutting methods will affect their final texture.
- Thin slices or julienne cuts work best for quick-cooking roots like carrots and parsnips
- Larger, uniform chunks are ideal for dense roots that need longer cooking times
- Grating or shredding creates delicate textures perfect for solar-baked gratins
- Dicing into equal-sized pieces guarantees even cooking throughout
Remember that roasting in your solar cooker will naturally enhance the vegetables' sweetness, while steaming or boiling works better for achieving a smoother, mashed consistency.
Batch Sizing Methods
Three key principles guide effective batch sizing for solar-cooked root vegetables: portion planning, equipment capacity, and cooking duration. You'll need to adjust your portions based on whether you're cooking for a small group (5 cups) or large gathering (25 cups).
| Batch Size | Small Group | Large Group |
|---|---|---|
| Portions | 1 cup/person | 2 cups/person |
| Vegetable Cuts | ¾-inch chunks | 1½-2 inch pieces |
| Oil Amount | 1-2 tbsp | 4-6 tbsp |
| Cook Time | 30-45 min | 45-60 min |
| Pan Setup | Single sheet | Multiple sheets |
For ideal results, you'll want to maintain consistent piece sizes within each batch. Small batches work best with ¾-inch chunks, while larger batches benefit from bigger cuts to manage cooking time efficiently. Remember to space your vegetables evenly and turn them periodically for uniform roasting.
Frequently Asked Questions
Can Root Vegetables Be Cut and Prepared the Day Before Solar Cooking?
Yes, you can cut and prep your vegetables the day before. Just store them in airtight containers in the fridge, and remember to keep potatoes submerged in water to prevent browning overnight.
How Do Different Colored Root Vegetables Affect Solar Cooking Absorption Rates?
You'll find that darker root vegetables absorb heat faster in solar cooking, while lighter ones take longer to cook. Using dark pots can help balance absorption rates regardless of the vegetable's natural color.
Do Pesticides Affect How Root Vegetables Should Be Cut for Solar Cooking?
You don't need to change your cutting method due to pesticides, as they're reduced by cooking, not cutting. Just focus on uniform, consistently-sized pieces for even solar cooking and ideal heat distribution.
Should Root Vegetables Be Cut Differently When Combining With Non-Root Vegetables?
You'll want to cut root vegetables slightly larger than non-root vegetables since they take longer to cook. Match the cuts when they have similar cooking times for even doneness and appealing presentation.
Can Frozen Root Vegetables Be Used for Solar Cooking Methods?
Yes, you can use frozen root vegetables in solar cooking. They'll take slightly longer to cook due to moisture content, but they're convenient and nutritious. Just adjust your cooking time and recipe liquid accordingly.
In Summary
You'll find these root vegetable cutting techniques essential for your solar cooking success. By following the thickness guidelines and paying attention to seasonal adjustments, you're ensuring even heat distribution in your sun-powered meals. Remember to take into account texture changes during storage and adjust your batch sizes accordingly. Whether you're dicing carrots or slicing parsnips, you've now got the knowledge to maximize your solar cooking results.


Leave a Reply