
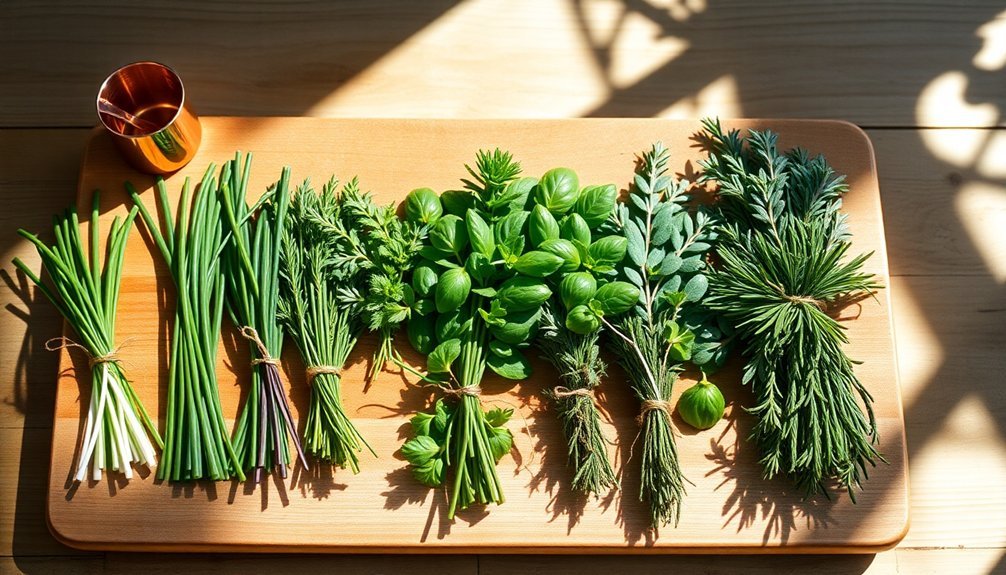
To right-size your herbs for outdoor cooking, start by chopping fresh herbs with sharp tools to prevent bruising. Roll leafy herbs like basil and use a chiffonade cut, while finely chopping woody herbs like rosemary and thyme. You'll want to bundle 5-7 stems of similar length together, removing any wilted leaves before prep. For solar cooking, create small bundles that allow proper heat circulation and maintain temperatures between 50-60°C. When portioning, remember that dried herbs are more concentrated – use one-third the amount compared to fresh herbs. The right herb sizing techniques can transform your outdoor meal preparation from good to exceptional.
Chopping Fresh Herbs To Size
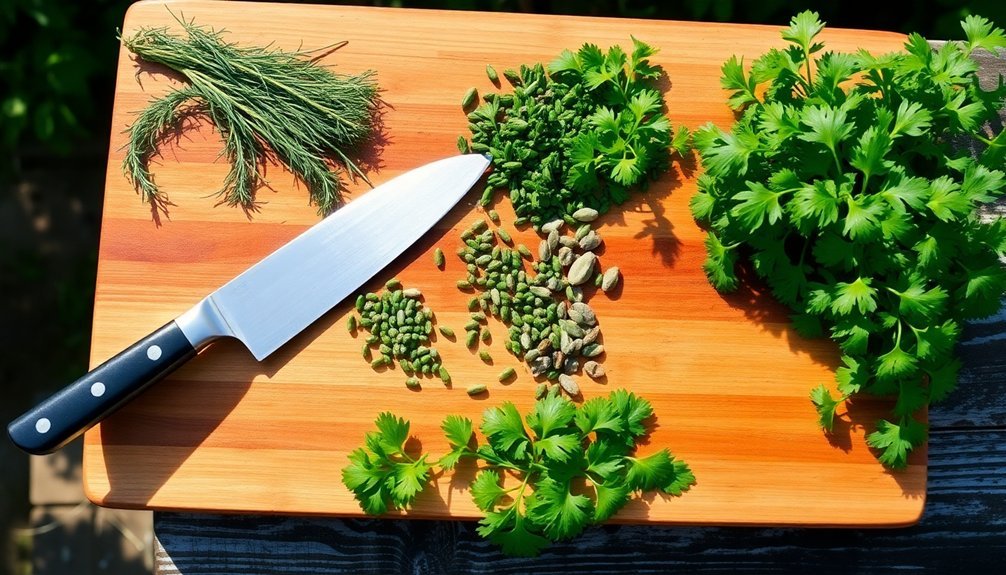
Mastering herb preparation starts with understanding the right cutting techniques for different varieties.
For leafy herbs like basil and sage, you'll want to roll the leaves into a tight bunch and slice them crosswise into thin ribbons using the chiffonade technique.
When working with parsley and cilantro, remove leaves from stems with a fork, then bundle and slice in a rocking motion. These herbs are best when used immediately after cutting for maximum freshness.
For smaller-leaved herbs like thyme and rosemary, strip leaves from stems by pulling against the growth direction. You can leave them whole or chop finely depending on your dish.
When handling delicate herbs like chives and dill, cut them in small bunches using sharp kitchen shears or a knife with a rocking motion.
Remember to keep your knife sharp to prevent bruising, and always dry herbs thoroughly before chopping.
Preparing Herbs For Solar Cooking
When preparing herbs for solar cooking, you'll want to bundle them in small groups that allow proper heat circulation while maximizing your drying space.
Your drying times will vary based on the sun's intensity and the thickness of your herb bundles, typically taking 4-5 hours in ideal conditions.
Position your herbs in single layers on solar oven trays, maintaining a temperature between 50-60°C to preserve essential oils while ensuring thorough dehydration. A cake rack setup provides ideal airflow distribution through your herbs during the drying process.
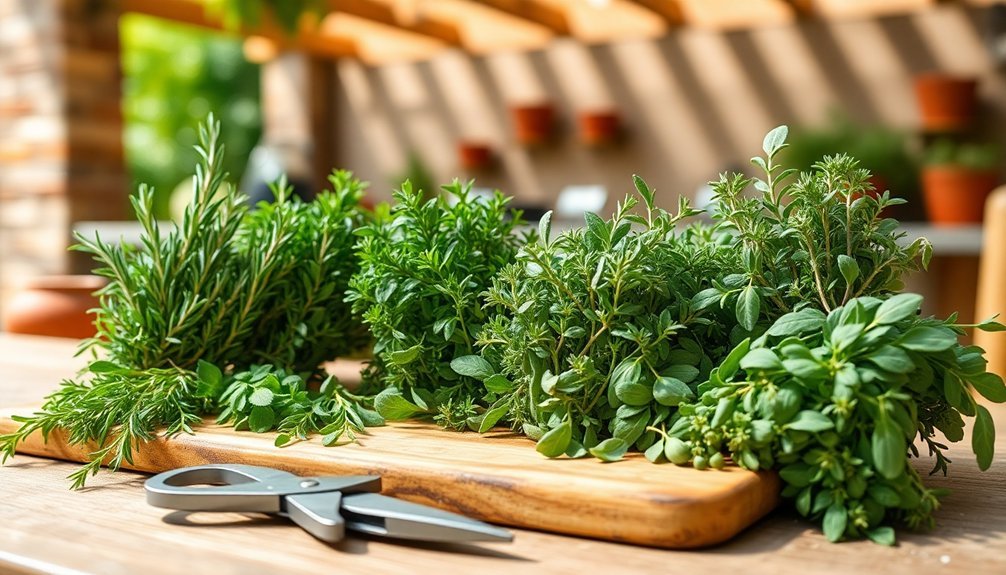
Bundling Herbs For Heat
The art of bundling herbs for solar cooking begins with selecting the right varieties that pack intense flavors and aromas. You'll want herbs with high oil content, like sage, lavender, and rosemary, which release their flavors gradually during the cooking process. Fresh herb bundles provide a natural and chemical-free way to enhance your outdoor cooking experience.
For the best results when bundling your herbs for solar cooking:
- Cut stems to equal lengths using sharp scissors, harvesting in the morning after the dew has dried.
- Remove any wilted leaves and arrange the herbs to maximize leaf coverage within the bundle.
- Secure the stems with twine at the base, wrapping upward at a steep angle to capture leaves.
- Create a tight double knot at the bottom and trim excess foliage.
Once bundled, hang your herbs in a warm, dry space before using them in your solar-cooked dishes or storing them in airtight containers.
Drying Times In Sun
Successful solar drying of herbs requires careful attention to timing and environmental conditions.
You'll find that different herbs have distinct drying periods based on their moisture content and leaf structure. Your tender herbs like thyme will dry quickly, often in 2-8 hours, while basil and oregano typically need 2-4 days. Sage's thick leaves demand even more time.
For the best results, don't place herbs in direct sunlight – it'll fade their color and diminish flavor. Instead, choose a well-ventilated, shaded area with good air circulation.
Watch your herbs closely during the drying process. If you're dealing with delicate herbs like tarragon or lemon balm, they'll dry faster but need extra attention to prevent mold.
When properly dried, you can store your herbs in airtight containers for up to a year, using just one-third the amount in recipes compared to fresh herbs.
Herb Quantity Guidelines
When you're planning your herb garden, you'll want to allocate about 1-2 square feet of growing space for each herb plant to guarantee proper development.
For dried herb storage, a standard 4-ounce spice container can hold approximately 3/4 to 1 cup of dried herb leaves, while small 2-ounce jars work well for daily use.
You'll maximize your storage efficiency by keeping larger backup quantities in amber or blue glass containers, transferring smaller amounts to accessible jars for regular cooking needs.
Herbs Per Container Ratios
Proper spacing ratios are essential for growing multiple herbs in a single container. You'll need to match plants with similar water needs while giving each herb enough room to thrive. A 20-inch container can comfortably house 3-4 herbs, while a 10-inch pot works best for a single plant.
- Allow an 8-inch diameter space for each herb you're planting in a shared container.
- Combine moisture-loving herbs like basil, chives, and parsley in one pot.
- Group drought-resistant herbs like rosemary, sage, and thyme together.
- Keep aggressive spreaders like mint and lemon balm in separate containers.
When arranging multiple herbs, position taller varieties at the back, medium-height plants in the middle, and trailing herbs along the container's edge. This arrangement guarantees proper growth and makes harvesting easier.
Growing Space Per Plant
Beyond container ratios, specific growing space requirements for individual herbs guarantee ideal growth and health. You'll need to allocate space based on your herbs' mature sizes to prevent overcrowding and disease.
| Herb Type | Required Space |
|---|---|
| Large (Rosemary, Sage, Mint) | 3-4 feet |
| Medium (Basil, Tarragon) | 2 feet |
| Small (Cilantro, Chives) | 1 foot |
| Micro (Most Sprouts) | 6 inches |
When planning your herb garden, consider that larger herbs like rosemary and sage need 3-4 feet of space, while medium-sized herbs like basil require about 2 feet. Smaller varieties such as cilantro and chives can thrive with just 1 foot of space. Remember that proper spacing guarantees adequate airflow, reduces fungal disease risk, and prevents competition for nutrients between plants.
Solar Heat And Herb Intensity
Although herbs thrive in full sunlight, excessive solar heat can greatly impact their growth and potency. When temperatures soar above 105°F, your herbs will stop photosynthesizing to conserve water. You'll need to manage the sunlight exposure carefully to prevent heat stress and maintain ideal growth.
- Place taller plants or structures strategically to create shade during peak heat hours, while still allowing 4-6 hours of direct sunlight.
- Install solar panels or shade cloth 4 meters above your herb garden to reduce heat intensity and create beneficial microclimates.
- Water consistently to support evapotranspiration, which naturally cools your herbs and surrounding area.
- Consider combining your herbs with larger vegetation that reflects more sunlight, as this can reduce ground temperature and protect your plants from excessive heat damage.
Best Containers For Outdoor Prep
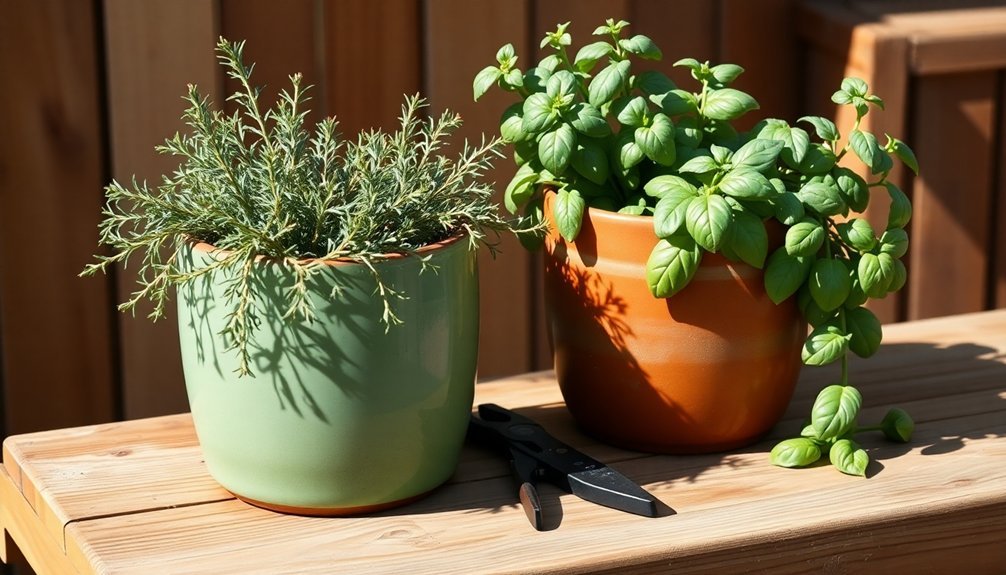
While managing sunlight exposure helps your herbs thrive, selecting the right container plays an equally important role in their success.
For moisture-loving herbs, choose plastic containers that retain water longer. If you're growing oregano, thyme, or rosemary, opt for terra cotta pots that allow better air circulation and quick soil drying.
Size matters too – start with 10-inch containers for young plants, but provide 2-4 inches more width for mature herbs. Deep-rooted herbs like parsley need taller pots, while shallow containers work well for chives and thyme.
You'll want food-grade materials and proper drainage holes to guarantee healthy growth. If you're placing containers outdoors, consider metal pots carefully as they can overheat in direct sun.
For constant moisture needs, self-watering containers are your best bet.
Proper Tools For Herb Processing
When processing fresh herbs, having the right tools makes all the difference in preserving their flavors and extending their usefulness. A well-designed herb tool with food-grade stainless steel construction and ergonomic features will help you efficiently trim and strip herbs like rosemary, cilantro, and kale.
- Look for a tool with ambidextrous thumb and finger rise, featuring a serrated grip for better control.
- Choose lightweight, pocket-sized options that include safety features like a latch and clearance magnet.
- Ascertain your tool has dual functionality for both trimming and stripping to maximize its usefulness.
- Maintain your tool's performance by applying protective oil after use and storing it indoors.
Remember to keep your herb processing tool clean and dry to prevent rust and maintain its sharp edge for consistent results.
Timing Your Herb Additions
Since herbs can make or break a dish, understanding the right timing for their addition is essential to achieving ideal flavor.
For hot dishes, you'll want to add delicate herbs like basil and cilantro during the final 1-2 minutes, while hardier herbs like rosemary can go in during the last 20 minutes of cooking.
When preparing cold dishes, you've got options. You can add herbs hours before serving to let flavors meld, or sprinkle them just before serving for maximum freshness.
For marinades, combine chopped herbs with oil, garlic, and citrus at least an hour before grilling. You'll get great results using rosemary as skewers or placing herb bundles directly on the grill for a smoky flavor.
Remember to adjust quantities when substituting dried herbs, as they're more concentrated than fresh ones.
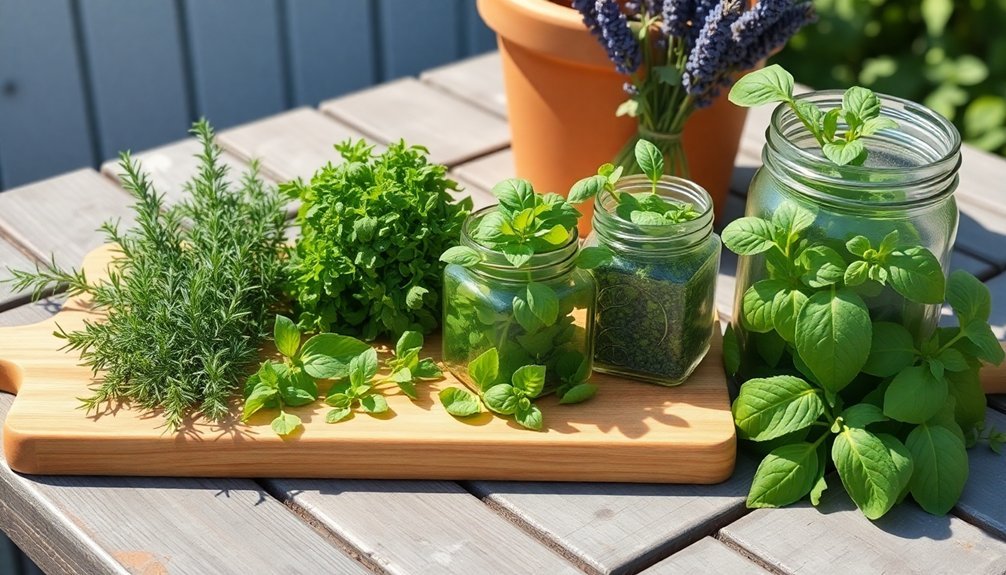
Storage During Food Preparation
The best timing for adding herbs won't matter if you don't store them properly during meal preparation. When you're cooking outdoors, proper herb storage becomes even more critical to maintain freshness and prevent contamination.
- Keep fresh herbs in a Mason jar with an inch of water, covered loosely with a plastic bag if you'll be cooking for several hours.
- Place your herb storage container in a shaded area of your prep station, away from direct sunlight and heat sources.
- Don't stack other ingredients on top of your herbs, as crushing will accelerate wilting and decay.
- If you're using dried herbs, keep them in their original containers or airtight jars, and seal them immediately after each use to prevent moisture from compromising their flavor.
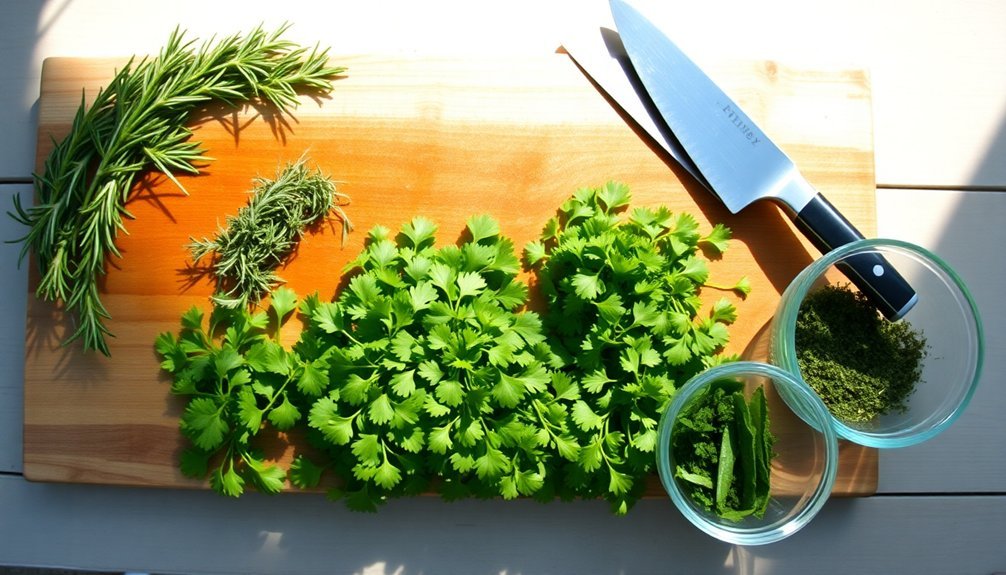
Herb Bundle Measurements
Creating perfectly sized herb bundles starts with understanding basic measurements. You'll want to select stems that are 5-8 inches long, gathering 5-7 stems per bundle.
While your herbs can vary in size, keep them similar in length to guarantee even drying and consistent cooking results.
When you're ready to tie your bundle, cut a piece of string that's four times the length of your herbs. This gives you plenty of material to wrap around the stems in a criss-cross pattern and secure with multiple knots.
Before bundling, remove any wilted or dead leaves to maintain quality. You can mix different herbs like rosemary, thyme, sage, and marjoram in your bundle, but always align the cut ends and position leaves in the same direction for best results.
Preventing Herb Flavor Loss
Maintaining ideal herb flavor begins with proper timing and technique during harvest. You'll want to pick your herbs just before their flowers open, during the bursting bud stage, and gather them early in the morning after the dew evaporates.
After a gentle rinse in cool water, remove any imperfect leaves to guarantee peak quality.
To preserve maximum flavor in your herbs:
- Dry them quickly in a dehydrator at 90-100°F rather than sun drying, which can diminish flavor.
- Store dried herbs in a cool, dark place away from heat that could degrade their taste.
- Replace your dried herbs annually since they naturally lose potency over time.
- Crush or sauté dried herbs before use to reactivate their essential oils and enhance their flavor profile.
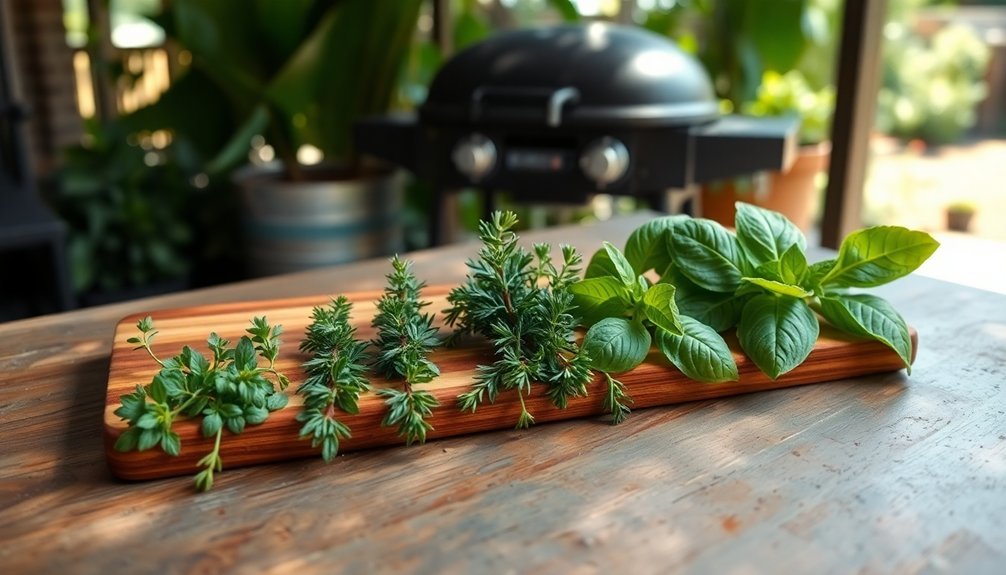
Herb Combinations For Solar Meals
Your solar meals can shine with the right combination of fresh herbs that stand up to heat, like rosemary, thyme, and oregano working together in dishes such as ratatouille.
When planning your sunny container garden, group drought-tolerant herbs like rosemary and thyme together, while keeping moisture-loving herbs like basil and parsley in separate planters.
You'll get the best results by positioning your herb containers where they'll receive 4-6 hours of direct sunlight, ensuring robust flavors for your solar cooking.
Fresh Herbs For Heat
While solar cooking presents unique challenges, pairing the right heat-tolerant herbs can transform your sun-powered meals into flavorful feasts. Mediterranean herbs like rosemary, oregano, and thyme aren't just sun-loving – they're perfect companions for outdoor cooking, offering both flavor and natural pest control benefits.
- Plant basil near your cooking area for quick access – it thrives in 6-8 hours of sunlight and adds fresh flavor to your solar-cooked soups and sauces.
- Combine sage and oregano for robust Mediterranean dishes – they'll flourish in full sun and enhance your grilled vegetables.
- Add lemon balm to your herb collection for citrusy notes in teas and salads.
- Include thyme and rosemary together – they're drought-tolerant, attract pollinators, and complement most solar-cooked proteins.
Sunny Container Herb Groups
Successful container herb gardens start with strategic groupings that share both growing requirements and culinary compatibility. You'll get the best results by grouping Mediterranean herbs like lavender, rosemary, and thyme together, as they're drought-tolerant and thrive in similar conditions. For Italian cuisine, combine basil, oregano, and parsley in one container, ensuring proper irrigation.
| Herb Group | Growing Needs | Culinary Use |
|---|---|---|
| Basil & Tarragon | High water, rich soil | Fresh sauces |
| Lavender & Rosemary | Low water, sandy soil | Mediterranean |
| Parsley & Chives | Medium water, partial shade | Garnishing |
| Sage & Thyme | Well-drained soil | Roasted dishes |
| Lemon Verbena & Dill | Full sun, regular water | Seafood dishes |
Remember to avoid mixing aggressive growers like mint with other herbs, and keep basil away from sage and thyme to prevent growth conflicts.
Clean Cutting Techniques
Sharp tools and proper technique form the foundation of herb preparation in any kitchen. You'll need a sharp chef's knife, clean scissors, and a stable cutting board to achieve precise cuts.
Before cutting, rinse your herbs in cold water and pat them dry with paper towels to remove excess moisture.
- Start by separating leaves from stems for soft herbs like basil and cilantro.
- Roll leafy herbs into tight cylinders for the chiffonade technique, creating thin ribbons.
- Use a gentle slicing motion for delicate herbs like chives.
- Rock your knife in a circular motion when you need finely chopped herbs.
Always cut just above leaf nodes to encourage branching in perennial herbs.
Store your freshly cut herbs in sealed containers or place them in water-filled jars covered with loose plastic bags for extended freshness.
Seasonal Herb Portioning
Once you've mastered proper cutting techniques, understanding seasonal herb portions will help you maximize flavor year-round.
During summer, you'll want to use generous amounts of fresh basil and dill, particularly for grilled dishes and salads.
As fall approaches, switch to heartier portions of sage and rosemary to complement roasted meats and autumn vegetables.
You'll need smaller quantities of dried herbs compared to fresh ones, as their flavors are more concentrated.
For winter cooking, bring your thyme and rosemary plants indoors, harvesting just 3-6 inches when needed.
In spring, you can divide and replant herbs like mint and chives, using them sparingly at first until they're established.
Remember to store unused portions properly – either freeze fresh herbs or keep them in the refrigerator to maintain their potency.
Frequently Asked Questions
How Do Insects and Pests Affect Herbs During Outdoor Food Preparation?
You'll need to inspect herbs for aphids, beetles, and caterpillars before using them outdoors. These pests can contaminate your food prep area and leave behind residue or damage on the leaves you're using.
Can Morning Dew Change the Potency of Freshly Harvested Herbs?
No, morning dew won't affect your herbs' potency. However, you should wait until leaves are completely dry before harvesting to prevent mold growth and guarantee the best quality for your herbs.
Does Ambient Humidity Affect How Herbs Should Be Measured?
Yes, you'll need to adjust your measurements in humid conditions as herbs can absorb moisture and become denser. Consider using weight instead of volume measurements for more consistent results in your recipes.
How Does Wind Exposure Impact Herb Flavor During Outdoor Prep?
You'll notice wind quickly dries out your herbs' essential oils, reducing their flavor intensity. It's best to chop herbs in a sheltered spot and use them immediately to preserve their aromatic compounds.
Should Herbs Be Rinsed Differently When Preparing Food Outdoors Versus Indoors?
You'll use the same rinsing methods outdoors as indoors. Whether you're using running water or submerging herbs in a bowl, just guarantee they're gently cleaned and properly dried to maintain their quality.
In Summary
You'll find that mastering herb portions for outdoor cooking makes all the difference in your solar-prepared meals. Remember to adjust quantities based on the season and sun intensity, keep your cutting tools clean, and store herbs properly in sealed containers. When you've got the right combinations and sizes down, you'll create flavorful dishes that harness both nature's herbs and solar power effectively.


Leave a Reply