
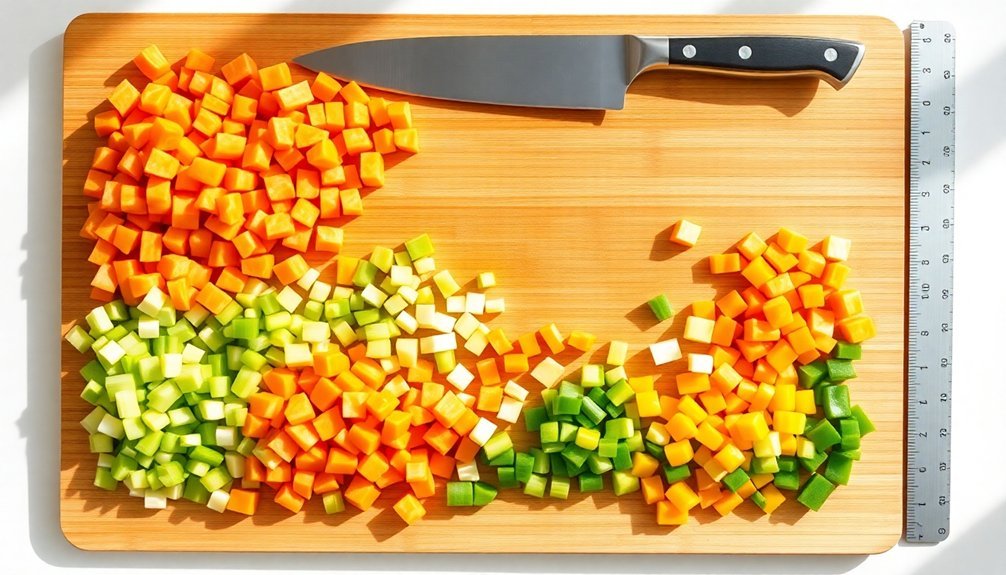
For ideal sun-baked meals, you'll want to cut your ingredients into uniform sizes to guarantee even cooking. Cut meat into 1-inch thick portions for consistent heat distribution, while root vegetables should be chunked into 1½-inch pieces. Break ground meat into small, even portions, and slice fruits uniformly to maintain cooking consistency. When prepping leafy greens, use sharp knives for clean cuts to preserve freshness. Keep your dark-colored cookware ready, and position your solar cooker to follow the sun's path. Master these sizing guidelines, and you'll access the full potential of your solar cooking adventures.
Understanding Solar Cooking Heat Distribution

While traditional cooking methods rely on direct heat sources, solar cooking harnesses the sun's UV rays through a fascinating process of energy conversion. When sunlight hits your solar cooker, it's transformed into infrared radiation, which makes the water, fat, and protein molecules in your food vibrate and generate heat.
To maximize this heat distribution, you'll want to use dark-colored cookware, as it absorbs solar energy more effectively than light-colored alternatives. The heat is then trapped inside your cooker through a transparent lid or covering, creating a greenhouse effect. Under optimal conditions with clear, sunny weather, your solar cooker can maintain steady cooking temperatures throughout the day.
For best results, you'll need to position your cooker to follow the sun's movement and guarantee your cooking vessel maintains direct sunlight exposure. This concentration of solar energy is essential for achieving consistent cooking temperatures.
Meat Cuts for Solar Ovens
When preparing meat for your solar oven, you'll want to cut pieces that are at least 1-inch thick to prevent overcooking and guarantee even heat distribution.
You should adjust your cutting technique based on the solar oven's temperature range, with thicker 2-inch cuts ideal for lower temperatures around 300°F and slightly thinner cuts for higher temperatures approaching 350°F.
Consider portioning larger cuts, like roasts and whole chickens, into uniform sections that will maintain consistent internal temperatures throughout the cooking process. For ground beef preparation, break the meat into small uniform chunks before placing it in the pot to ensure thorough and even cooking.
Optimal Thickness Guidelines
Successful solar oven cooking depends heavily on proper meat preparation and sizing. You'll want to maintain a consistent thickness of 1-1.5 inches across your cuts to guarantee even cooking and ideal heat distribution. Dark, heavy pots help maintain optimal cooking temperatures throughout the process.
When working with different cuts, it's essential to adjust your portions based on sun conditions and cooking times.
- Keep meat cuts uniform at 1-2 inch cubes for even cooking
- Remove bones and skin to reduce overall cooking duration
- Choose tender cuts like sirloin roast for better results
- Cut thinner portions during partly sunny conditions
- Position larger cuts during peak sun hours (10 am – 4 pm)
For best results, select lean meats and avoid large, whole cuts unless you're able to portion them appropriately.
Remember to realign your solar oven periodically when cooking thicker pieces to maintain consistent heat exposure.
Temperature-Based Portioning
Adapting your meat portions to solar oven temperatures guarantees ideal cooking results throughout the year.
When temperatures reach 300-350°F on sunny days, you'll want to work with smaller cuts that cook quickly and evenly. Choose ground meat or thin slices that respond well to these higher temperatures.
For cooler or cloudy days when your solar oven only reaches 250-300°F, you'll need to adjust both your portions and expectations.
Select cuts that excel at lower temperatures, and consider pre-searing thicker pieces on a conventional stove. If you're working with larger cuts like roasts, slice them into smaller portions before cooking.
Remember to monitor internal meat temperatures with a thermometer and keep repositioning your oven to maintain consistent heat throughout the cooking process.
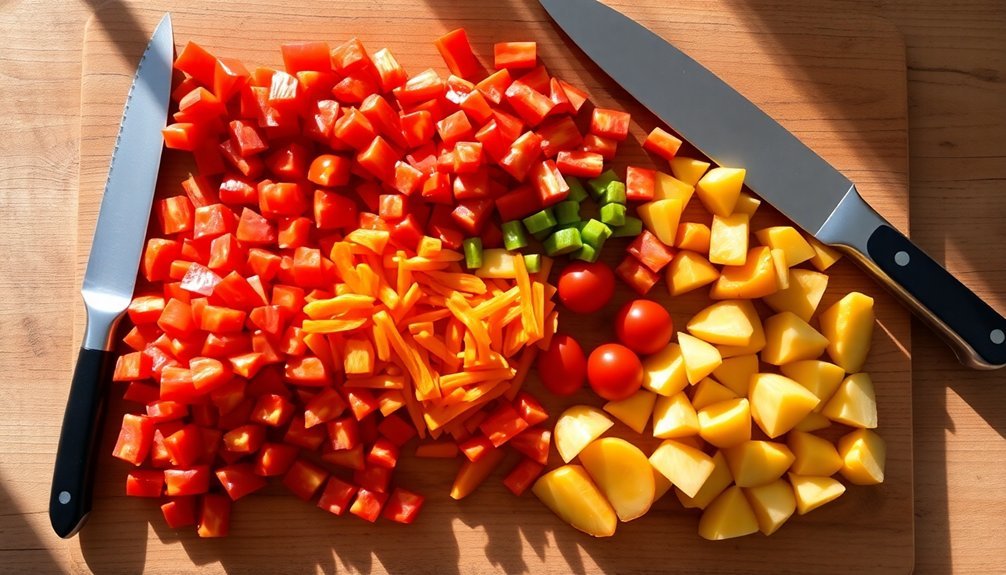
Root Vegetable Sizing Guide
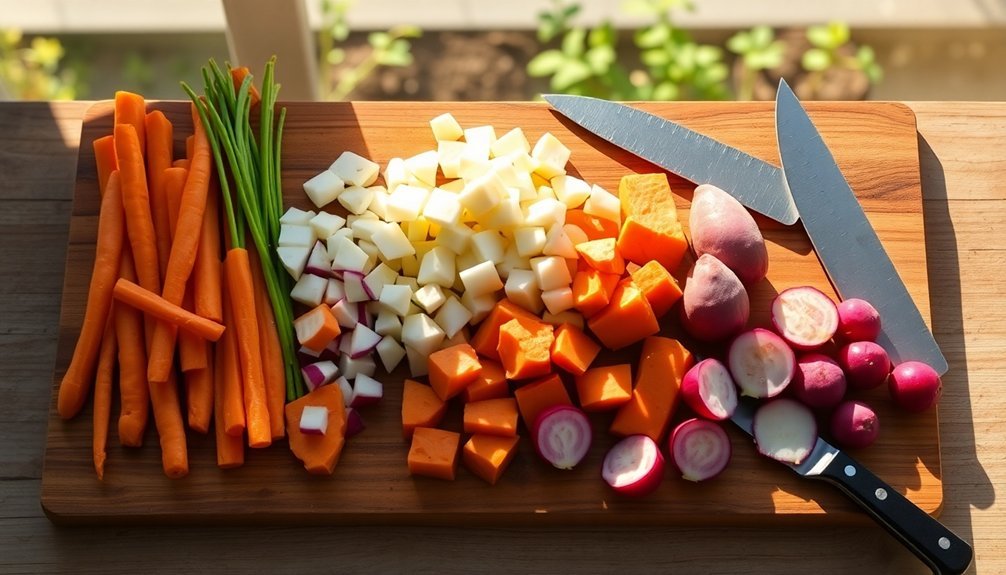
Proper sizing of root vegetables plays an essential role in achieving even cooking results. When you're preparing root vegetables for roasting, aim for uniform 1 1/2-inch chunks to guarantee they cook at the same rate. This consistency helps prevent some pieces from burning while others remain undercooked.
- Slice carrots into chunks, keeping their width consistent for even browning.
- Cut beets whole or in chunks, knowing they'll need extra time in the oven.
- Trim parsnips into similar-sized pieces as your carrots for synchronized cooking.
- Dice sweet potatoes uniformly, as they'll cook faster than most root vegetables.
- Quarter turnips to match the size of other vegetables, recognizing they'll cook quicker than beets.
Remember to spread your cut vegetables in a single layer, giving them space to roast properly without steaming.
Leafy Greens Preparation
You'll need to start by thoroughly washing your leafy greens in multiple changes of cold water to remove any dirt, sand, or debris.
For quick and efficient chopping, stack similar-sized leaves together, roll them tightly into a cylinder, and slice across to create uniform ribbons.
Store cleaned greens by wrapping them loosely in paper towels and placing them in a partially open plastic bag in the crisper drawer of your refrigerator.
Washing and Storage Methods
When preparing leafy greens, thorough washing and proper storage can greatly extend their freshness and guarantee food safety.
Fill a large basin with cool water and submerge your greens, swishing them to remove dirt. You'll want to spin them dry or use paper towels to remove excess moisture before storage.
For the best results, you can store clean greens in either bags or containers with paper towels to absorb moisture.
- Use a gallon-size bag or glass container with paper towels as a liner
- Wash greens in cool water until no dirt remains, avoiding chemical washes
- Dry thoroughly using a salad spinner or towel-rolling method
- Store with proper airflow, avoiding tight packing
- Keep in the refrigerator for up to 2 weeks, depending on storage method
Quick Chopping Techniques
Mastering a few quick chopping techniques can transform leafy greens preparation from a tedious task into an efficient process. You'll start by removing the tough stems – fold each leaf lengthwise and cut along the stem to separate it. Next, stack your leaves neatly and roll them tightly into a compact bundle.
| Step | Technique | Result |
|---|---|---|
| 1 | Stem Removal | Clean leaves |
| 2 | Stacking | Uniform layers |
| 3 | Rolling | Tight bundle |
| 4 | Slicing | Thin strips |
| 5 | Cooking | Wilted greens |
Using the chiffonade technique, slice across your roll with a sharp knife to create uniform strips. You're now ready to cook – add your greens to a lightly oiled pan with aromatics like garlic or ginger. Remember that delicate greens cook faster than sturdy ones, so adjust your timing accordingly.
Fruit Preparation Methods
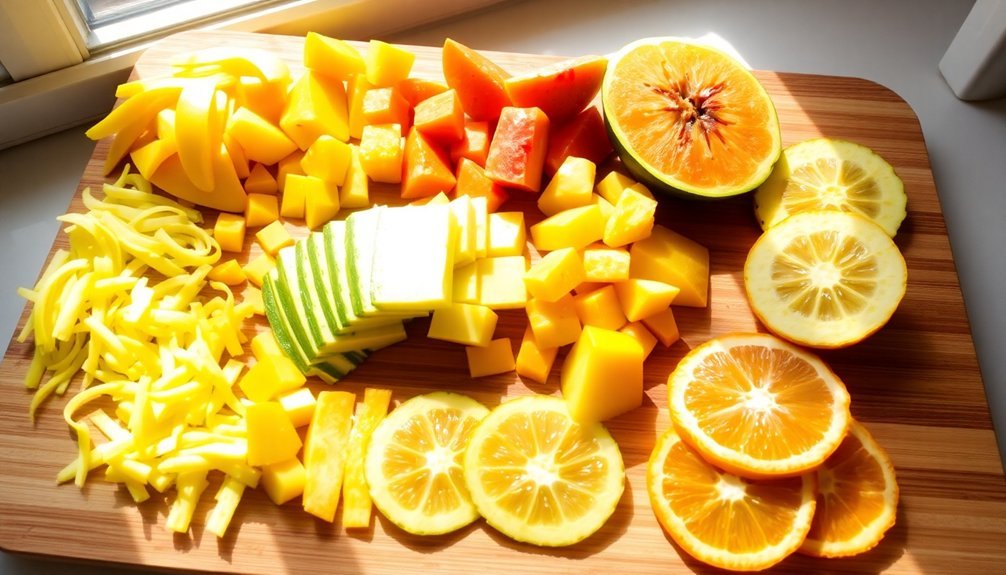
Three main steps define successful fruit preparation: selection, cleaning, and processing.
When preparing fruits for sun-baked recipes, you'll need to choose ripe, juicy varieties and confirm they're properly cleaned and peeled.
For best results, cook harder fruits like apples beforehand, and combine softer fruits with bananas or mangoes to achieve the right consistency.
- Remove all seeds and tough skin from fruits before processing
- Cut fruits into uniform pieces to confirm even cooking
- Blend fruits with 10% sugar ratio (10g per 100g fruit)
- Process until achieving a fine, smooth consistency
- Add lemon juice after cooking for enhanced flavor
Remember to spread your fruit mixture evenly at 1-2mm thickness on lined baking sheets.
You'll know it's ready when the texture is slightly sticky but not wet.
Grain and Bean Measurements
Accurate grain and bean measurements form the foundation of successful recipes, whether you're baking bread or preparing hearty salads. For whole wheat bread, you'll need 9 cups of flour, adding 5-6 more cups until the dough cleans the mixer's sides. When making grain and bean salads, combine equal parts of each ingredient.
| Ingredient Type | Amount | Container Size | Best Uses |
|---|---|---|---|
| Whole Wheat Flour | 9 cups | Large Bowl | Bread Dough |
| Cooked Grains | 2 cups | Medium Bowl | Grain Salads |
| Canned Beans | 2 cups | Colander | Bean Salads |
| Mixed Grains & Beans | 1:1 ratio | Large Bowl | Combined Salads |
For solar oven baking, place your dough in dark-colored pans and bake at 240-280°F for 1-2 hours. Remember to rinse canned beans before mixing them with your grains, and adjust portions based on your recipe's scale.
Herb and Spice Guidelines
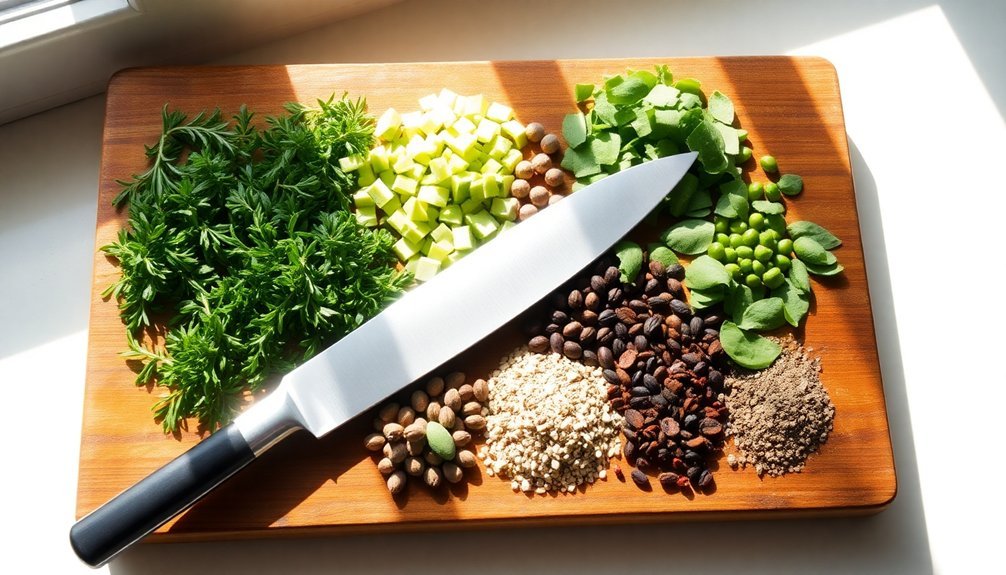
When working with fresh herbs, you'll need roughly 2-3 times more than dried herbs to achieve the same flavor intensity.
You should store your cut herbs wrapped in slightly damp paper towels inside an airtight container in the refrigerator to maintain freshness.
For the cleanest cuts, use sharp kitchen shears or a chef's knife to snip herbs just before cooking, and avoid crushing or bruising the leaves to preserve their oils and flavors.
Fresh Vs Dried Portions
Understanding the difference between fresh and dried herbs can transform your cooking results. When using dried herbs, you'll need considerably less than fresh ones since they're more concentrated. The standard conversion is 1 tablespoon of fresh herbs equals 1 teaspoon of dried flaky herbs, or 3/4 teaspoon of ground dried herbs.
For the best flavor, add dried herbs early in your cooking process and fresh herbs near the end.
- Fresh leafy herbs like basil, parsley, and cilantro shine in raw dishes and quick-cooking recipes.
- Dried woody herbs such as oregano, thyme, and rosemary work better in long-cooking dishes.
- Fresh herbs maintain their bright flavors when added in the final minutes.
- Dried herbs need time to rehydrate and release their flavors fully.
- Keep dried herbs for up to a year before replacing them to guarantee peak potency.
Storage After Cutting
Proper storage of your cut herbs and spices determines how long they'll maintain their vibrant flavors and aromatic qualities. Store them in airtight glass, stainless steel, or ceramic containers, avoiding clear containers unless you're keeping them in a dark place.
Keep your cut ingredients in a cool, dry area away from heat sources like stovetops and dishwashers. Don't expose them to humidity or store them in the refrigerator. When handling your cut herbs and spices, always use dry utensils to prevent moisture from entering the containers.
Remember that whole spices can last up to 4 years, while ground varieties typically stay fresh for 1-2 years. Cut leafy herbs have a shorter lifespan of 3 months to 2 years.
You'll know it's time to replace them when their aroma becomes faint or disappears entirely.
Optimal Cutting Techniques
Different herbs require specific cutting techniques to preserve their flavors and maximize their culinary potential. For leafy herbs like parsley and cilantro, strip the leaves from stems and gather them in a tight bunch before chopping with a sharp knife using a claw grip.
When working with broad-leaf herbs like basil or sage, employ the chiffonade technique by stacking and rolling leaves before making fine crosswise cuts.
- Use a blade grip for better control and precision
- Keep your knife sharp to prevent bruising delicate herbs
- Make initial cuts close together to avoid chasing scattered leaves
- Rock the knife in a circular motion for finer chopping
- Strip stems from parsley, but keep cilantro stems for added flavor
Remember to use smooth, horizontal slicing motions for efficiency, and avoid these techniques with woody herbs like rosemary or thyme.
Essential Kitchen Tools
Success in the kitchen begins with having the right cutting tools at your disposal.
You'll need a versatile chef's knife for general cutting tasks, a paring knife for detailed work, and a serrated bread knife for baked goods. A quality cutting board, like the OXO Good Grips, provides a stable work surface.
For specialized tasks, you'll find a mandoline slicer invaluable for uniform vegetable slices, while a spiralizer transforms vegetables into pasta-like strands.
Don't overlook the convenience of a hand-held chopper for quick prep work and a box grater for multiple grating options.
Kitchen shears are essential for snipping herbs and cutting meat, while a bench scraper helps transfer chopped ingredients efficiently.
Consider investing in a V-Power mandoline for professional-grade slicing and dicing capabilities.
Food Safety While Cutting
While having the right tools sets the foundation for food preparation, knowing how to use them safely prevents kitchen accidents. Keep your knives sharp and choose the right blade for each task – a dull knife can slip and cause injury. You'll need a stable cutting surface and proper lighting to see clearly what you're doing.
When cutting, curl your fingers under and use the Bridge Method for round foods to protect your hands from the blade.
- Keep knife tips pointed down when carrying them
- Create a flat base by cutting off rounded ends of ingredients
- Use a rimmed cutting board to prevent food from rolling away
- Position your non-dominant hand to hold food securely
- Maintain six to eight-inch blade length for ideal control
Remember to stay focused and avoid distractions while cutting – safety should always be your priority.
Time-Saving Cutting Techniques
Mastering eight essential cutting techniques can revolutionize your kitchen efficiency.
You'll find the rock chop perfect for herbs and garlic, while the cross chop helps you quickly cut ingredients without focusing on appearance. For uniform pieces, use a straightforward chop with an up-and-down motion.
When you need matchstick-sized ingredients, opt for the julienne cut. For aromatics, the mince technique creates a fine, paste-like consistency.
The slice method works across the grain for thin, uniform pieces of most ingredients. If you're making salsa or mirepoix, use the dice technique for even cubes.
Finally, create elegant ribbons from herbs and leafy greens with the chiffonade method by stacking, rolling, and cutting across the leaves.
Storage of Cut Ingredients
Proper storage of cut ingredients is just as essential as the cutting techniques themselves. You'll want to keep your prepared ingredients in airtight containers and store them in a cool, dry place away from direct sunlight and heat sources. For ideal freshness, clean and thoroughly dry your storage containers before adding cut ingredients.
- Store cut herbs in containers with tight-fitting lids to maintain their aromatic properties.
- Place cut ingredients in polypropylene bins with sliding lids for easy access.
- Use different container sizes based on your ingredient portions.
- Label containers with preparation dates and expected shelf life.
- Keep allergen-prone ingredients in separate, specially marked containers.
Remember to check your cut ingredients regularly for freshness by examining their aroma and appearance. If you're not using them immediately, consider freezing certain cut ingredients to extend their shelf life.
Frequently Asked Questions
How Do Different Knife Materials Affect Ingredient Preparation for Solar Cooking?
You'll find stainless steel knives best for solar cooking prep, as they're corrosion-resistant and maintain sharpness. While carbon steel offers superior cutting, it's prone to rust in humid outdoor conditions.
Can Pre-Cut Frozen Vegetables Be Used Effectively in Solar Ovens?
Yes, you can effectively use pre-cut frozen vegetables in your solar oven. You'll need to allow extra cooking time and add a small amount of water to create steam for even cooking.
Does Altitude Affect How Finely Ingredients Should Be Cut?
Yes, you'll need to cut ingredients smaller at higher altitudes since cooking takes longer. Finer cuts help guarantee even cooking despite the lower boiling point and pressure changes affecting cooking times.
How Does Ingredient Color Influence Cutting Size for Solar Cooking?
You'll want to cut dark-colored ingredients larger since they absorb heat better, while light-colored foods should be cut smaller to maximize their exposure to sunlight and guarantee even cooking throughout.
Should Marinaded Ingredients Be Cut Differently Than Non-Marinaded Ones?
When you're working with marinades, you'll want to cut ingredients slightly larger than non-marinaded ones since they'll break down more during cooking. This helps prevent mushiness while still allowing good flavor absorption.
In Summary
You've now got the knowledge to properly size and cut ingredients for ideal solar cooking results. By following these sizing guidelines for different food types and keeping safety in mind, you'll achieve even cooking and better flavors in your sun-baked dishes. Remember to keep your tools sharp, store cut ingredients properly, and maintain food safety standards. Your solar cooking journey will be more efficient with these cutting techniques at hand.


Leave a Reply