
To master seasonal sun cooking, you'll need to work with nature's rhythms. Position your solar oven in direct sunlight between 11 am and 3 pm, adjusting every 30-45 minutes to track the sun. You'll want to adapt recipes by season – winter dishes need longer cooking times at lower temperatures (140-160°C), while summer meals cook quickly at higher temps (180-200°C). Monitor weather patterns, use proper insulation, and select season-appropriate ingredients like hearty winter squash or quick-cooking summer vegetables. Track your oven's temperature every 20 minutes and maintain detailed logs of cooking conditions. These fundamentals just scratch the surface of solar cooking success.
Peak Sun Hours Matter
Four essential hours can make or break your success with solar cooking. You'll find peak sunlight between 11:00 am and 3:00 pm when the sun's directly overhead, providing ideal conditions for your solar cooker.
To maximize your results, start preheating and browning ingredients by 10:00 am. You'll need to track and adjust your cooker's position throughout these vital hours to maintain the right temperature. High UV rays during these peak hours ensure the most effective solar cooking performance.
During shorter days, you'll want to be especially mindful of starting early enough to complete your cooking. While you can extend your cooking window until 4:00 pm to keep food warm, remember that the most effective cooking happens during peak hours.
Don't wait too late to begin – early timing is key to ensuring you have enough sunlight for thorough cooking.
Seasonal Recipe Adaptations
Adapting your solar cooking recipes to the seasons guarantees consistent results throughout the year.
You'll need to select ingredients that are in season and adjust cooking times based on available sunlight. In winter months, plan for longer cooking periods and use dark pots to maximize heat absorption.
Choose slow-cooked dishes like stews and casseroles that don't rely on browning, especially during seasons with less intense sunlight. Using reflectors for heat retention will significantly improve your cooking results in cooler months.
Pre-soak legumes and prepare ingredients in advance to optimize cooking time. When fresh produce isn't available, don't hesitate to use preserved or stored alternatives.
Layer your ingredients carefully and enhance flavors with herbs and spices to compensate for the lack of browning.
Remember to be flexible with your recipes, substituting ingredients based on seasonal availability while maintaining the dish's essence.
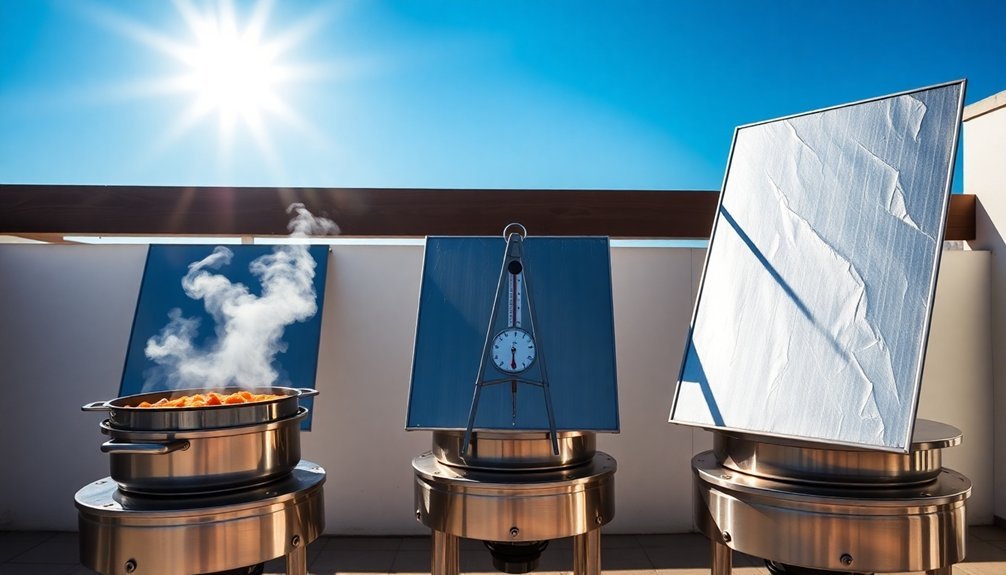
Positioning Your Solar Oven
Proper positioning of your solar oven can make the difference between a perfectly cooked meal and undercooked food. You'll want to place your oven in direct sunlight, facing the sun's rays with no shadows cast on it. The best cooking hours are between 11:00 am and 3:00 pm.
To maximize efficiency, mount your oven on a rotating base or Lazy Susan that allows for easy adjustment. Attach a reflector made of aluminum foil to direct more sunlight into the cooking chamber. A ruler to prop open the reflector flap helps achieve precise angle control for optimal sunlight capture.
You'll need to reposition the oven every 30-45 minutes to track the sun's movement. Choose a spot that's protected from strong winds, and make sure your oven is well-insulated with materials like crumpled newspaper or foam. Seal it tightly with clear plastic wrap or glass to trap heat inside.
Weather Pattern Tracking
When planning your solar cooking schedule, understanding weather patterns becomes essential for ideal results.
You'll need to track several weather conditions to maximize your solar cooking success. Modern weather tools and forecasting techniques can help you predict the best days for your sun-powered meals.
To effectively monitor weather patterns for solar cooking:
- Check barometric pressure readings – higher pressure typically indicates clearer skies.
- Monitor real-time satellite imagery to spot incoming cloud cover.
- Track humidity levels, as lower humidity usually means better solar intensity.
- Use weather apps that provide nowcasting data for 6-hour predictions.
Pay special attention to surface observations from your local weather stations, as they'll give you the most accurate picture of immediate conditions affecting your solar cooking setup.
Insulation Through The Seasons
The success of your solar cooking depends heavily on maintaining proper insulation throughout the changing seasons.
You'll need to adapt your insulation strategy as temperatures and sunlight patterns shift.
In winter, double up on insulation by using extra layers of crumpled newspapers and guaranteeing your dark-colored surfaces are maximizing heat absorption.
Position your oven in south-facing spots to capture limited sunlight.
During summer, you can maintain basic insulation while benefiting from intense sun exposure and longer cooking hours.
Your solar oven's performance relies on effective heat retention.
Use black construction paper to line the bottom, and verify that vacuum tubes or double glazing are functioning properly.
With proper insulation, you'll maintain cooking temperatures between 180°F and 300°F, even during less favorable conditions.
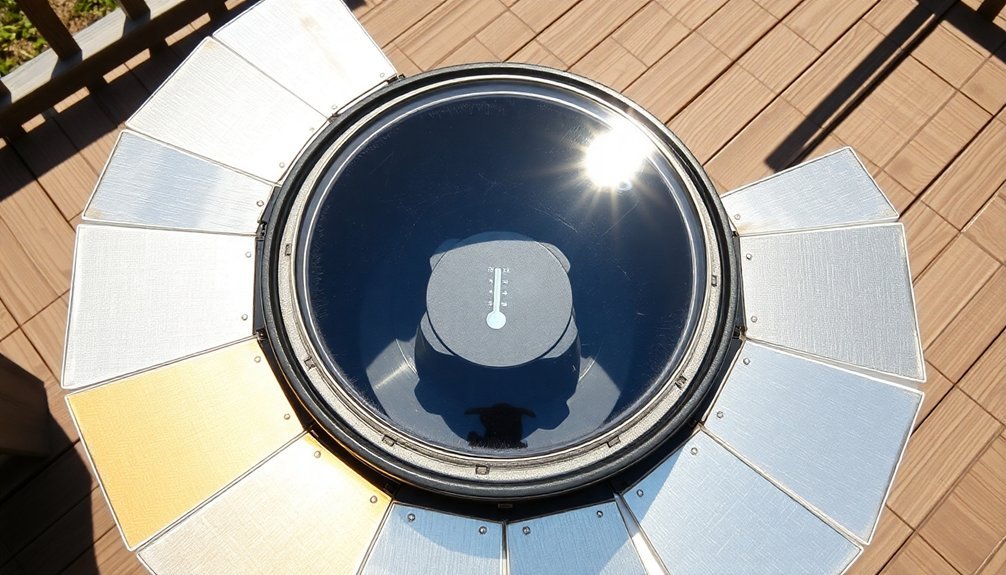
Reflector Angle Adjustments
Achieving ideal cooking temperatures in your solar oven depends heavily on mastering reflector angle adjustments.
You'll find two primary methods for positioning your reflectors: eyeballing from the sun's perspective or using specialized calculators to determine best angles.
For most standard box cookers, you'll want to set reflectors at a 60-degree angle to maximize efficiency. However, you can adjust between 30-60 degrees based on the sun's position.
Here's how to optimize your reflector setup:
- Position the top ray to hit the opposite side of your target.
- Adjust angles seasonally based on sun elevation.
- Use multiple reflector angles for low sun positions.
- Extend the rim where it faces the pot cover.
Temperature Monitoring Strategies
You'll want to track your solar oven's temperature patterns throughout the day using a calibrated thermometer, recording readings every 20 minutes to understand heating cycles.
For ideal cooking results, position your oven to catch maximum sunlight during peak heating hours, typically between 10 AM and 2 PM.
Keep detailed logs of both temperature data and environmental conditions like cloud cover or wind, as these factors directly impact your oven's performance.
Track Daily Heat Patterns
Successful solar cooking relies on understanding and tracking daily temperature patterns in your outdoor oven. By monitoring these patterns, you'll enhance cooking times and maintain food safety throughout the day.
To effectively track daily heat patterns:
- Record temperatures every 30 minutes using a reliable thermometer, noting how cloud cover affects your readings.
- Monitor your oven's position relative to the sun, adjusting as needed to maintain ideal heat absorption.
- Document how different surfaces and materials impact heat retention – darker surfaces will absorb more solar energy.
- Keep a log of temperature variations during peak sun hours (typically 10 AM to 2 PM).
Use this data to predict cooking times and make necessary adjustments to your oven's insulation or positioning.
When you understand these patterns, you'll achieve more consistent cooking results.
Position For Peak Temps
The right positioning of your solar oven makes all the difference in reaching peak cooking temperatures. You'll need to face your oven directly toward the sun and adjust it every 20 minutes to maintain ideal exposure. Place a thermometer inside to track your progress and make necessary adjustments.
| Time of Day | Target Temp (°F) | Positioning Tips |
|---|---|---|
| Morning | 150-175 | Tilt 45° east |
| Mid-morning | 175-185 | Tilt 30° east |
| Noon | 185-200 | Flat position |
| Mid-afternoon | 175-185 | Tilt 30° west |
| Late afternoon | 150-175 | Tilt 45° west |
Don't forget to line your oven with black construction paper and secure all reflective surfaces. Use clear plastic wrap to seal in heat, and you'll see temperatures climb steadily throughout your cooking session.
Cooking Time By Season
You'll notice cooking times vary markedly between winter and summer, with winter dishes generally requiring longer periods at lower temperatures.
Summer recipes like salmon fillets and chicken breasts cook quickly at higher temperatures (180-200°C), while winter comfort foods like beef brisket need extended cooking times at gentler heats (140-160°C).
Your seasonal cooking success depends on understanding these temperature variations and adjusting your timing accordingly, whether you're preparing a 20-minute summer salmon or a slow-cooked winter brisket that takes several hours.
Winter Vs Summer Temps
Understanding seasonal temperature variations plays an essential role in adapting your cooking times and methods throughout the year.
You'll notice that winter's cooler temps slow down chemical reactions and yeast growth, while summer's heat accelerates these processes.
- Winter cooking requires longer rising times for dough, as temperatures often fall below the ideal 75-78°F range.
- Summer's increased humidity and warmth can make dough rise too quickly, requiring adjustments to prevent over-proofing.
- Winter temperatures have risen about 3°F since 1896, while summer temps have increased by 1.6°F.
- You'll need to monitor food safety closely in summer, as the danger zone (50-130°F) becomes more critical.
Remember to adjust your cooking times accordingly – slower and longer in winter, quicker and more controlled in summer's heat.
Optimal Seasonal Cook Times
Mastering seasonal cook times helps you achieve consistently perfect results throughout the year.
You'll notice that spring vegetables like broccoli and Brussels sprouts maintain consistent cooking times into autumn, while summer produce requires longer durations. For example, you'll roast broccoli for 12-15 minutes year-round, but summer turnips need 30-35 minutes.
Your meat cooking times vary greatly by season too.
Spring chicken breasts bake quickly at 200°C for 20-25 minutes, while autumn's heartier cuts like beef brisket need 40 minutes per 450g plus 20 minutes at 160°C.
Remember to let meats rest after cooking.
To guarantee success across seasons, you'll want to preheat your oven properly and turn food halfway through cooking for even results.
Solar Heat Storage Methods
While the sun provides abundant energy for cooking during daylight hours, effective heat storage methods are essential for extending cooking capabilities into the evening.
You'll find several innovative ways to capture and store solar heat for later use.
Here are the most effective solar heat storage methods you can utilize:
- Fluid-based systems using molten salt and water in dual-tank setups, perfect for larger installations.
- Phase change materials like stearic acid and paraffin wax, which store energy through state changes.
- Sensible heat storage using rock beds and air, offering a cost-effective and scalable solution.
- Integrated PCM configurations that can be built into your cooker's base or outer cover.
You'll get the best results by choosing a storage method that matches your cooking needs and local conditions, ensuring reliable heat availability even after sunset.
Seasonal Food Selection
Your seasonal menu planning starts with light spring ingredients like fresh greens and asparagus, shifting perfectly into summer's bounty of tomatoes and zucchini for sun-cooked meals.
Fall's harvest brings hearty options like winter squash and root vegetables that'll hold up well to solar cooking temperatures.
When winter arrives, you'll want to focus on Brussels sprouts and sturdy greens that can withstand longer cooking times while maximizing the available sunlight.
Spring and Summer Picks
Spring and summer present an abundant variety of fresh produce perfect for sun cooking. You'll find tender vegetables like asparagus and artichokes in spring, while summer brings sun-ripened tomatoes and sweet corn. To maximize your solar cooking success, select produce at its peak seasonal freshness.
- Spring greens like spinach, kale, and Swiss chard cook quickly and retain their nutrients when prepared in a solar cooker.
- Early summer vegetables such as green beans and zucchini offer versatile options for main dishes and sides.
- Mid-summer fruits including peaches, plums, and berries make excellent solar-cooked desserts.
- Late summer produce like eggplant, peppers, and garlic create flavorful Mediterranean-style dishes perfect for solar preparation.
Consider combining seasonal ingredients to create well-balanced meals that harness the sun's natural energy.
Fall Harvest Cooking Options
As temperatures cool and leaves begin to change, fall's bounty brings an exciting array of produce perfect for solar cooking. You'll find robust root vegetables, hearty gourds, and crisp fruits ready for your solar oven. Brussels sprouts and broccoli develop a naturally sweeter flavor after frost, making them ideal for roasting in your sun-powered setup.
| Produce Type | Solar Cooking Tips |
|---|---|
| Root Veggies | Slice carrots and beets thinly for faster cooking |
| Gourds | Add herbs to butternut squash for enhanced flavor |
| Fruits | Layer pears and apples for sweet desserts |
| Cruciferous | Steam broccoli and sprouts in parchment paper |
Transform seasonal ingredients into warming dishes like pumpkin soup or roasted acorn squash. Don't forget to pair your solar-cooked vegetables with fresh fall fruits for balanced, nutritious meals.
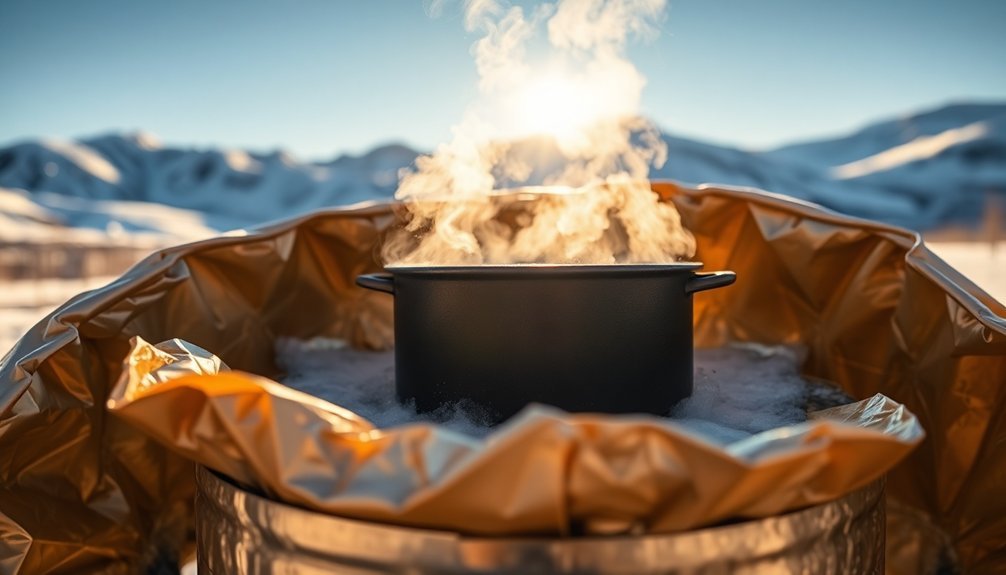
Winter Warming Dishes
Winter's coldest days call for soul-warming dishes that can be easily prepared in your solar oven.
You'll find that hearty meat dishes like beef stew and short ribs become incredibly tender when slow-cooked, while seasonal vegetables add both nutrition and flavor to your winter meals.
Your solar oven can perfectly execute these warming winter favorites:
- Rich beef stroganoff with buttery egg noodles and mushroom gravy
- Potato, leek, and chorizo soup featuring seasonal root vegetables
- Spicy harissa white bean soup for international flair
- Tender oxtail with herbs and winter greens
Don't forget to incorporate winter squash, cruciferous vegetables, and citrus fruits into your dishes.
They'll add essential nutrients while brightening up heavier meals during the coldest months of the year.
Frequently Asked Questions
Can Solar Ovens Work Effectively at High Altitudes?
Yes, you'll find solar ovens work effectively at high altitudes, often with better results due to intense direct sunlight. With proper insulation and adjustments, your oven can reach up to 350°F even in thin mountain air.
How Do Different Colored Cooking Vessels Affect Solar Cooking Performance?
You'll get the best results using dark-colored cooking vessels since they absorb more sunlight and convert it to heat efficiently. Light-colored pots reflect sunlight away, considerably reducing your solar cooking performance and cooking times.
Is It Safe to Leave Solar-Cooked Food Outside Overnight?
No, you shouldn't leave solar-cooked food outside overnight. It'll likely stay in the dangerous temperature zone (50-125°F), promoting bacterial growth. Either cool it below 50°F quickly or consume it before nightfall to guarantee safety.
What Happens if Animals Are Attracted to the Cooking Smells?
If animals are attracted to your cooking smells, you'll need to secure your food immediately, move to a safe location, and don't leave any trace of food behind. They might become aggressive when seeking food.
Can Solar Ovens Be Used to Sterilize Water in Emergency Situations?
Yes, you can use solar ovens to sterilize water in emergencies. They'll heat water to 149°F (65°C) in about an hour, killing harmful pathogens. Just make sure you're using clean containers to avoid recontamination.
In Summary
You've got all the tools needed to make solar cooking work year-round. By tracking sun patterns, adapting recipes, and using proper insulation, you'll master this eco-friendly cooking method in any season. Remember to monitor temperatures closely and choose foods that match the available solar energy. With these sun cooking secrets, you're ready to harness nature's power for sustainable, delicious meals every season.


Leave a Reply